• Enumerating Raspberry Pis

    After installing a freshly-copied microSD card in a headless Raspberry Pi, there is sometimes an awkward moment. The Raspberry Pi boots in its default configuration and obtains an address from DHCP, then you need to SSH into it. However, even if in general the Raspberry Pi can be found with its domain name (raspberrypi by default) using a local DNS server or mDNS, it can also become a pain sometimes, for instance when you configure multiple Raspberry Pis at the same time.

    In situations where ssh pi@raspberrypi.local does not work, you need to scan the local network to find the Raspberry Pis, which can be achieved with nmap. Raspberry Pi devices can be recognized because their MAC addresses are issued by the organization "Raspberry Pi Trading".

    This allows to automate the discovery process by enumerating interfaces with ip then enumerating the Raspberry Pis on each interface with nmap:

    #!/bin/bash
    
    echo "Looking for Raspberry Pis..."
    IFACES=$(ip -4 -o addr show | awk '/docker0/ {found=1; next} /scope global/ {print $4}')
    RPI_ADDRS=()
    for IFACE in $IFACES; do
        echo "Scanning on interface $IFACE..."
        ADDRS=$(sudo nmap -n -sP "$IFACE" | grep …

  • A USB-controlled Furby

    The original Furby from Tiger Electronics was a huge phenomenon at the end of the 1990s. In this article, we are going to replace a Furby's electronics to transform it into a USB-controlled puppet.

    The blue-eyed brown-bellied cute horror

    The blue-eyed brown-bellied cute horror

    The little beaked Mogwais looked quite alive and faked learning processes pretty well. As electronic talking toys were still a novelty back then, its capacities were grossly over-estimated, especially among children. For instance, the microphone is limited to sensing the noise level to talk back when you talk to it, it is actually unable to differentiate noises, let alone interpret speech.

    In reality, the technology was already old. As the patent indicates, Furbys were built around a 8-bit SunPlus SPC81A microcontroller, basically a crippled 6502 processor with 128 bytes of RAM (yes, bytes). The original MOS Technology 6502 processor was introduced in 1975 and became pretty popular because it was extremely cheap. For instance, the Atari 2600 and Apple II were both built around modified 6502 processors. It was a strong influence in the design of RISC architectures, in particular ARM processors. The voice synthesis is handled by a Texas Instruments …


  • Converting a unipolar stepper to bipolar

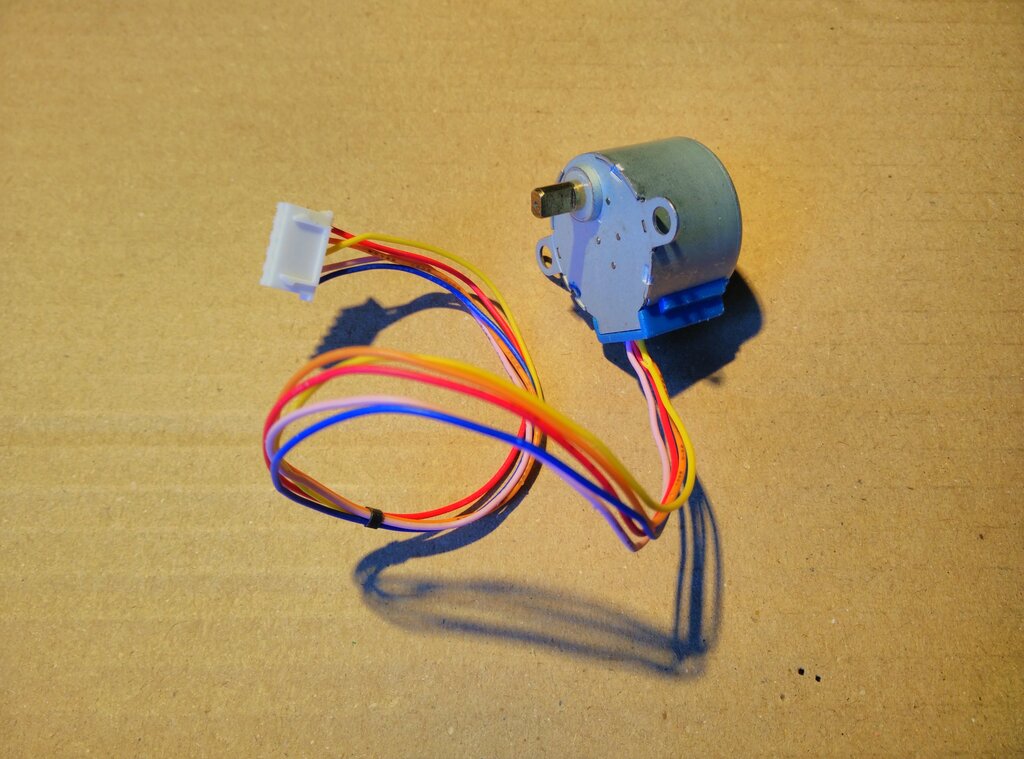
    Here is the situation: I have a 28BYJ-48 motor, a cheap unipolar stepper motor. However, I would like to drive it as a bipolar stepper motor.

    A 28BYJ-48 stepper motor

    A 28BYJ-48 stepper motor

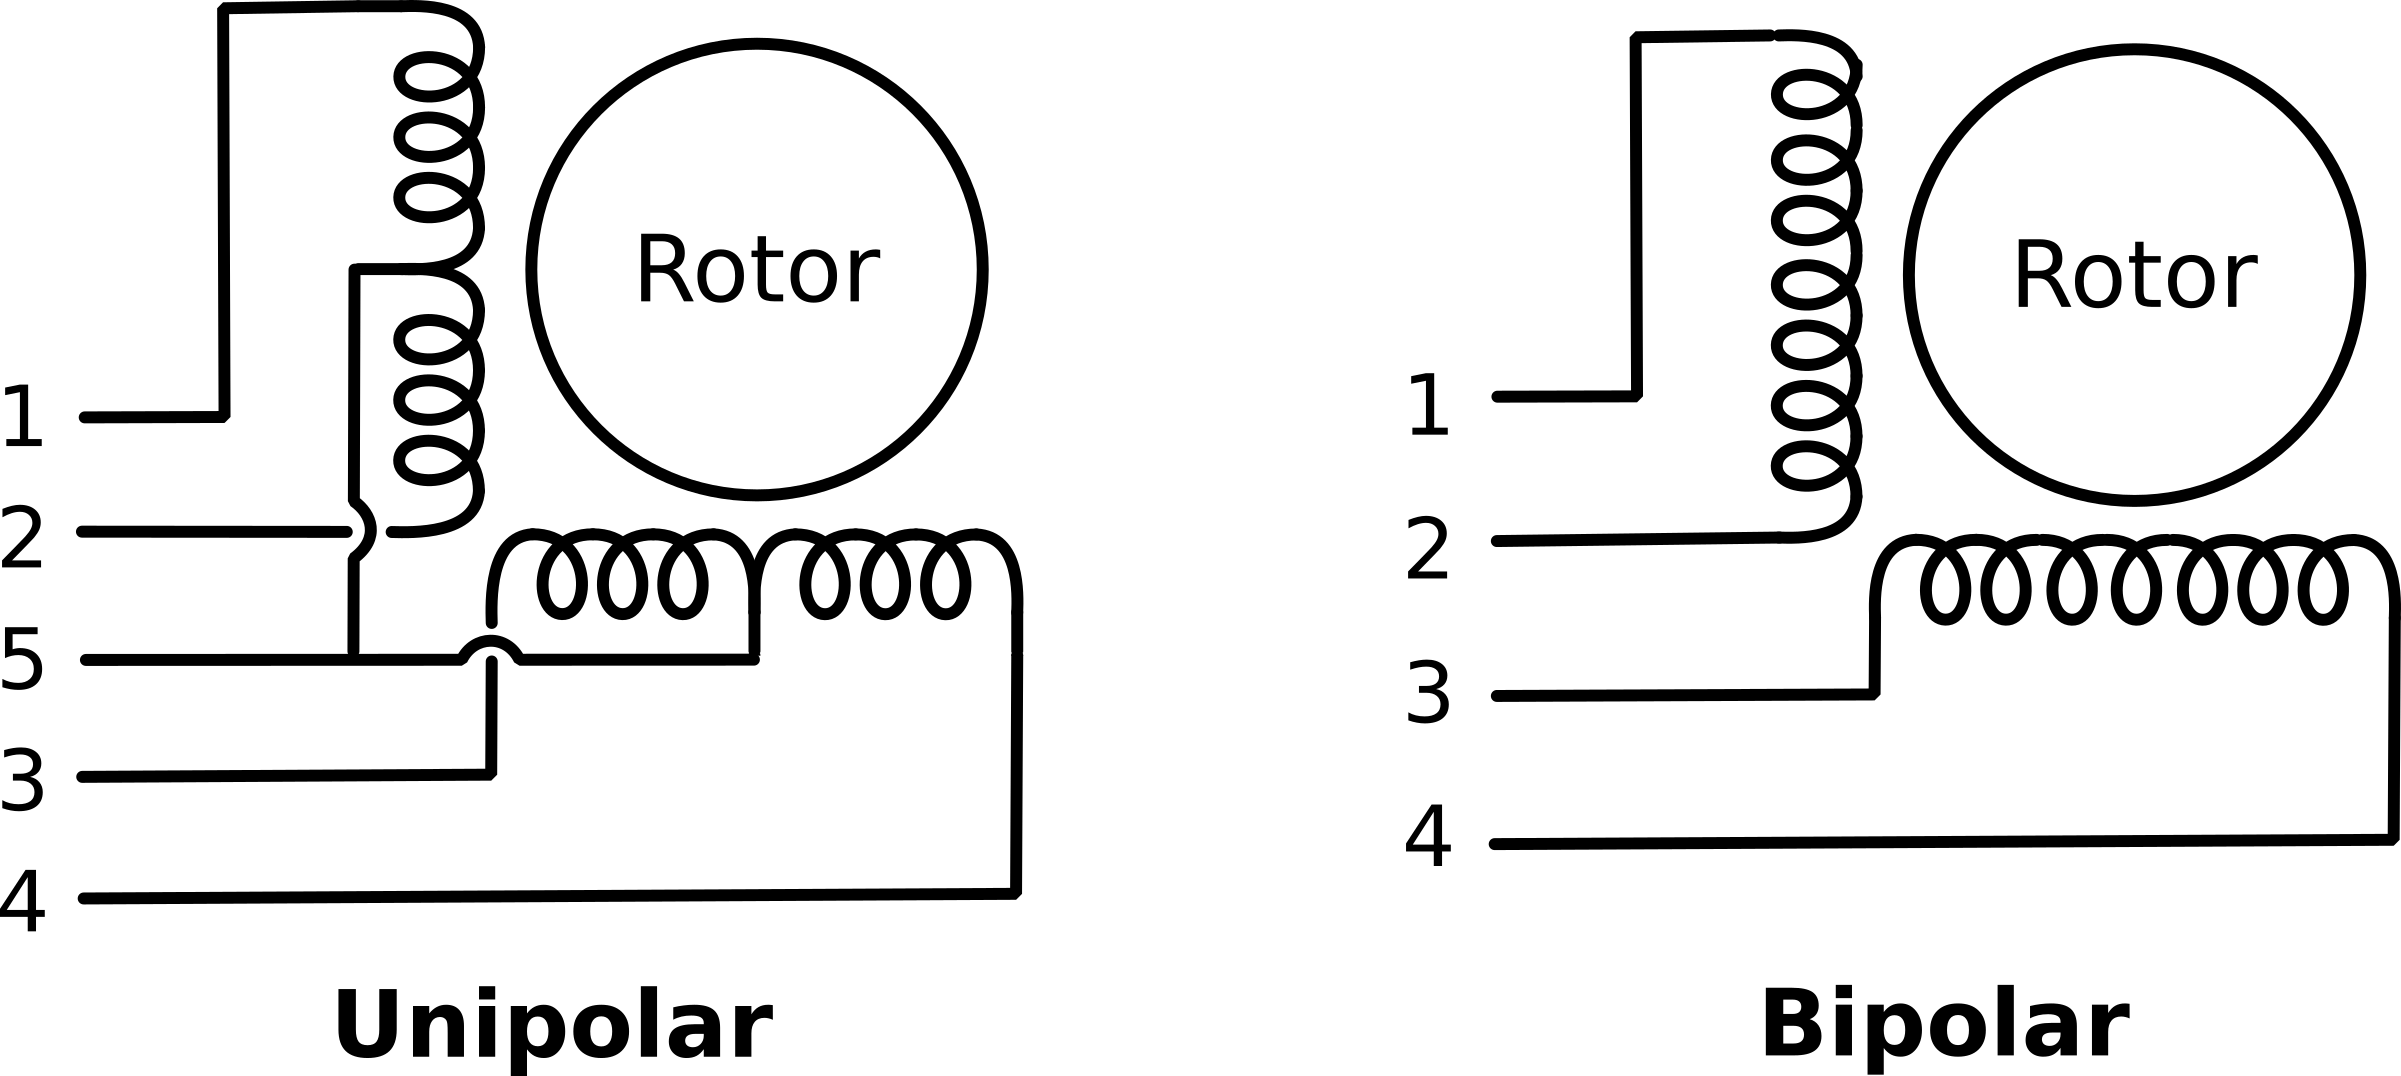
    Unipolar stepper motors have 5 wires, whereas bipolar ones have only 4 wires. The 5th wire is a common wire joining the coils, creating 4 half-coils that can be enabled independently.

    Schema of a unipolar stepper motor

    Schema of unipolar and bipolar stepper motors

    Both types of stepper motors are not driven the same way. Unipolar steppers are simpler to drive since you don't need to reverse the current: the driver only applies the tension to the common wire and sequencially grounds the other wires to power the half-coils. The drawback of course is that they are less powerful because only half of each coil is powered at a given time, so you get half the torque for the same coil length.

    Luckily, you can use a unipolar stepper as a bipolar one with twice the torque, provided you have a circuit able to drive it. The modification is indeed rather simple: you need to remove the common wire and cut the link between the coils …


  • An enhanced 3D-printed NAS

    I got numerous comments about my 3D printed NAS. An issue encountered by multiple people is that it is now virtually impossible to come around a similar USB hub. Indeed, I used a store brand one and the product has been discontinued for some time...

    Let's build an enhanced version solving that issue!

    The finished NAS

    The finished NAS

    The first version of the case was designed with OpenSCAD and 3D-printed. I modified it to accomodate a new wider 4-port USB hub and a more efficient 40mm fan at the rear instead of the small one on the lid. You can download the new SCAD source files and STL files here (licensed under GPLv3).

    3D models of the enhanced case

    3D models of the enhanced case

    In addition, we'll use the following elements:


  • A High-Tech Minitel

    This article is the continuation of my Minitel series: a Minitel as a Linux terminal, and a Minitel 2.0.

    It's rather easy to remove legacy electronics and unmount the cathodic tube from the Minitel to replace them with a Raspberry Pi and a flat screen. However, the difficult part would be adapting the Minitel's proprietary keyboard.

    Therefore, in this article, we will first make a generic USB keyboard controller for the Minitel 1B out of an Arduino board. We'll use an Arduino Pro Micro. It is roughly equivalent to the Pro Mini, except it has an on-board USB transceiver, which will allow us to configure it as a USB Keyboard. Then, we'll fit a 8-inch LCD panel to replace the old CRT. I chose an Innolux HE080IA-01D panel with driver board. Its dimensions and 1024x768 resolution make it a perfect candidate for our use case here.

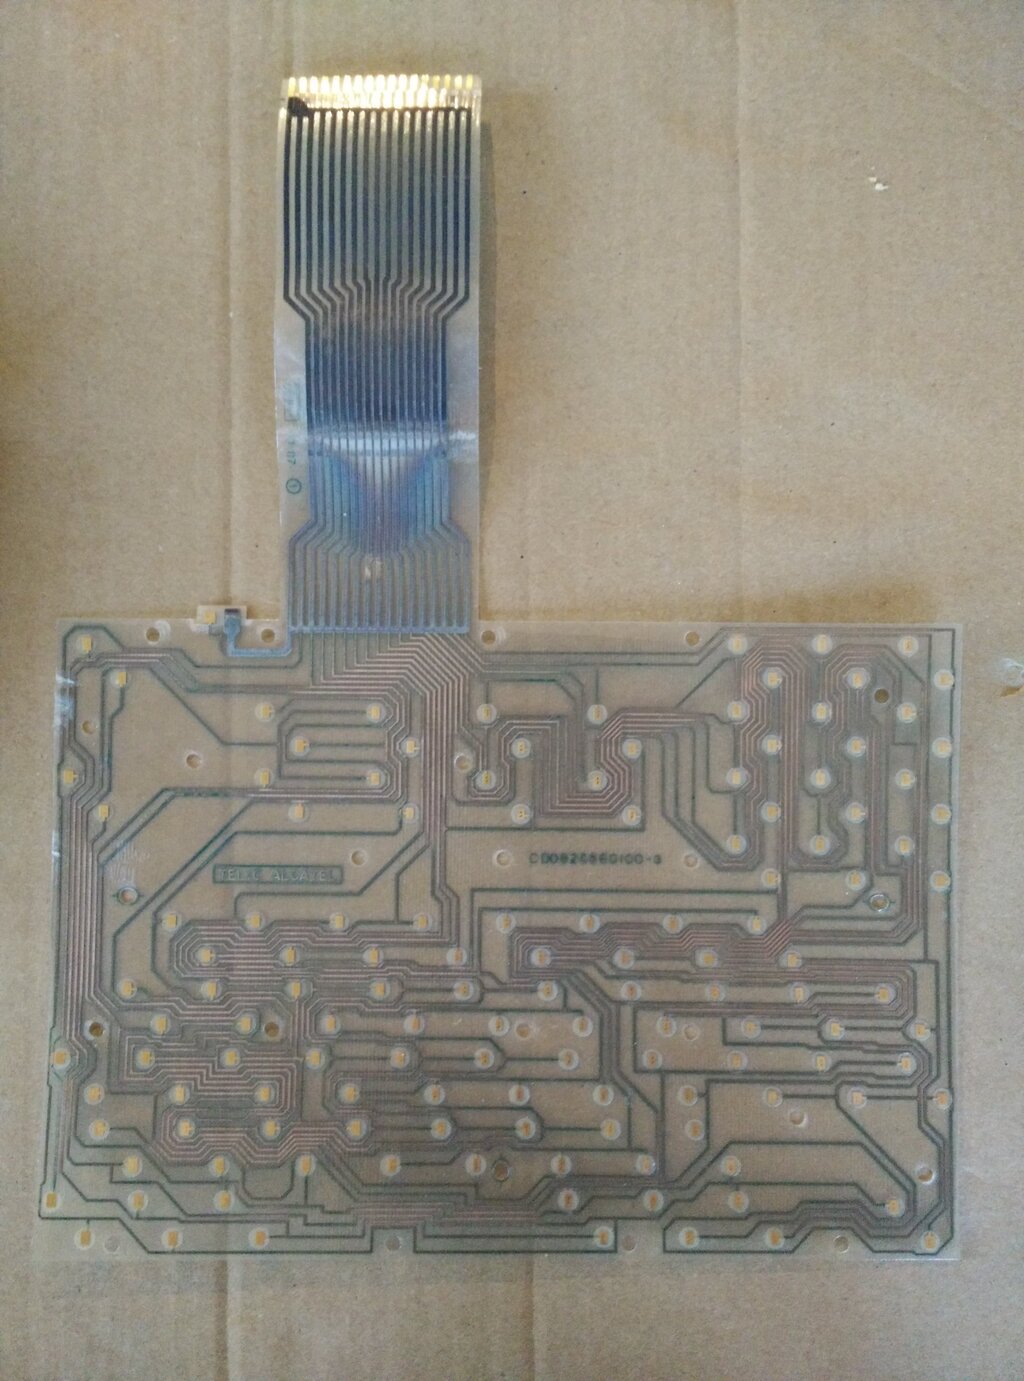
    The Minitel's keyboard is a simple matrix one. Key presses close circuits, and by continuously scanning the matrix, the controller can deduce which keys are pressed. Sadly, the matrix is non-standard, so we have to retro-engineer it...

    The keyboard contact board extracted from a Minitel

    The keyboard contact board extracted from …


  • A Minitel 2.0

    This article is the continuation of my previous article on the Minitel.

    These are dark times we live in. Far from the original design of the Internet whose cornerstone was decentralisation, the Web has created a split between servers and clients, between service providers and service consumers, between the ones who harvest data and the ones who are harvested. To use the expression forged by Benjamin Bayart (in French), the Internet is bascially converging back to a Minitel 2.0.

    Let's take the statement literally and build an actual Minitel 2.0!

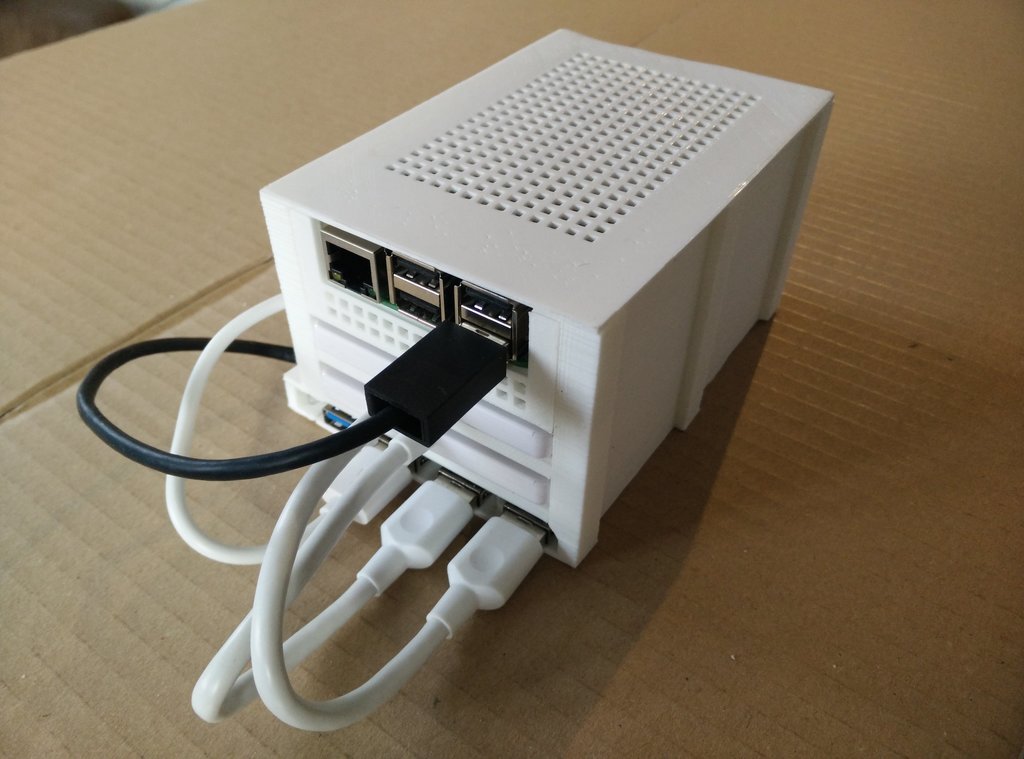
    My idea is simple: there is an unused extension bay at the rear of the Minitel 1B where we can lodge a Rasberry Pi connected to the Minitel as its terminal. This will effectively add modern Ethernet, Wifi, and USB connectivity to a 35-year-old Minitel.

    To hold the Pi, I designed and 3D-printed a replacement for the rear panel. The OpenSCAD source and the STL models are available here (under GPLv3).

    Replacement for the rear panel holding the Raspberry Pi

    Replacement for the rear panel holding the Raspberry Pi

    The support piece is printed separately, then clipped and glued to the panel before the Pi is secured …


  • Eyepot - Programming

    Let's program the robot I built in the previous article!

    The Eyepot works by using in conjunction a Raspberry Pi Zero W and an Arduino Pro Mini connected by a serial link. Therefore, we'll write the Arduino code first, then a Python program for the Raspberry Pi. Then, we'll setup remote control from a web browser.

    You can find the entire source code for the project licensed under GPLv3 on my repository on GitHub.

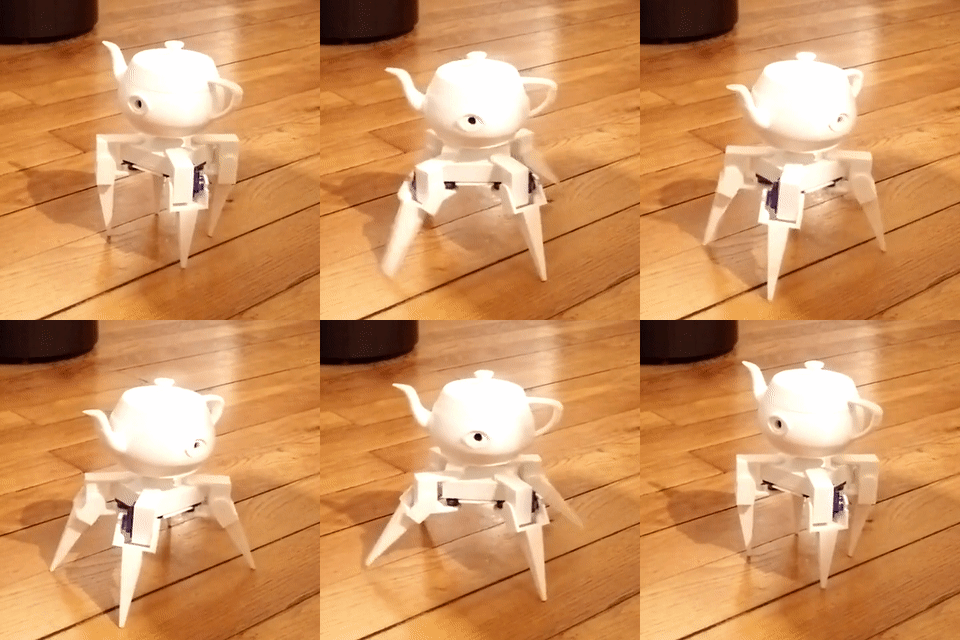
    The finished Eyepot moving

    The finished Eyepot moving

    Arduino program

    The Arduino Pro Mini is responsible for driving the eight servos of the legs. Commands to specify target angles are sent from the Raspberry Pi through a serial link.

    The custom serial protocol is text-based and quite simple. It can easily be typed manually when debugging, but it is still compact enough to allow short transmission times even at low bitrates. Each line contains a one-character command, an optional space, and an optional parameter as a base-10 integer. Implemeted commands are as follows:

    • 0 to 7: store target angle for corresponding servo (0 to 7)
    • R: reset stored target angle to default for each servo
    • C: commit stored target angles …

  • Eyepot: a creepy teapot

    What has four legs but only one eye? A teapot of course!

    My new robot is based on a Raspberry Pi Zero W with a camera. It is connected via a serial link to an Arduino Pro Mini board, which drives servos. Since each one of the four legs will have two articulations, each with one servo, we need eight servos in total.

    Here is a list of the material we will use:

    Let's start by designing and printing the parts. I use OpenSCAD, and print with white PLA, as usual.

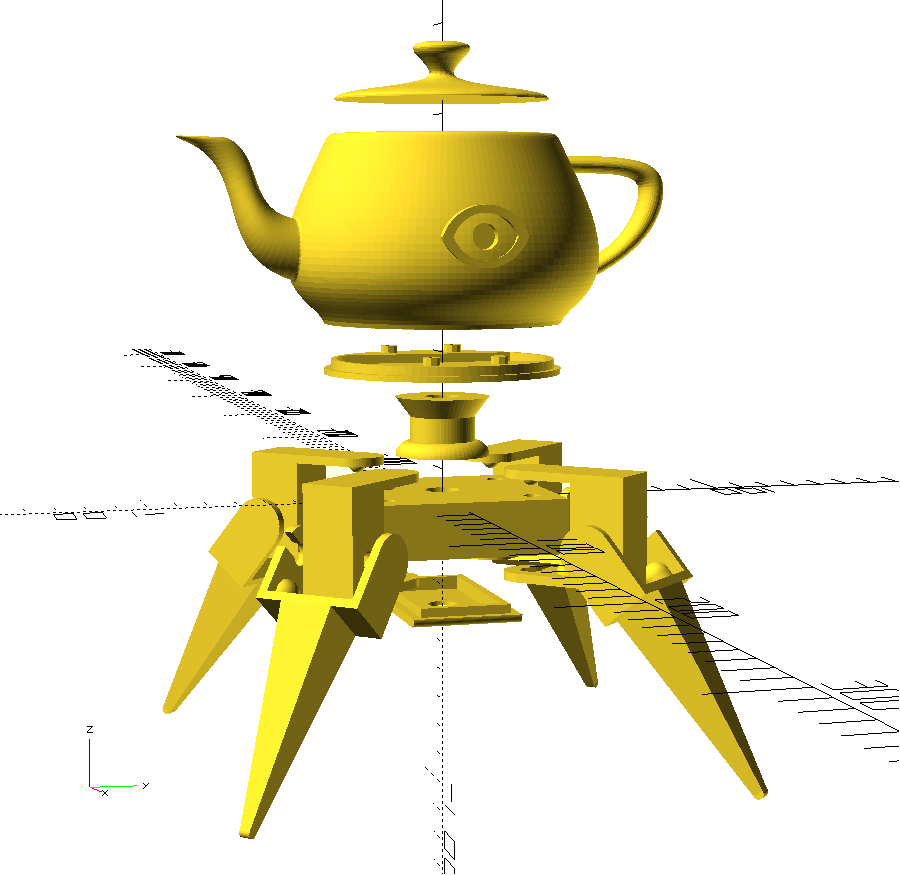
    View of the 3D models set

    View of the 3D models set

    You can download the SCAD source files (licensed under GPLv3) and …


  • Plasteac - Enhancements

    You must remember my cute robotic dancing teapot. It works great, but it has a little drawback: you need to open it to physically connect and disconnect the battery. Therefore, let's fix that issue by integrating a switch directly in the teapot lid!

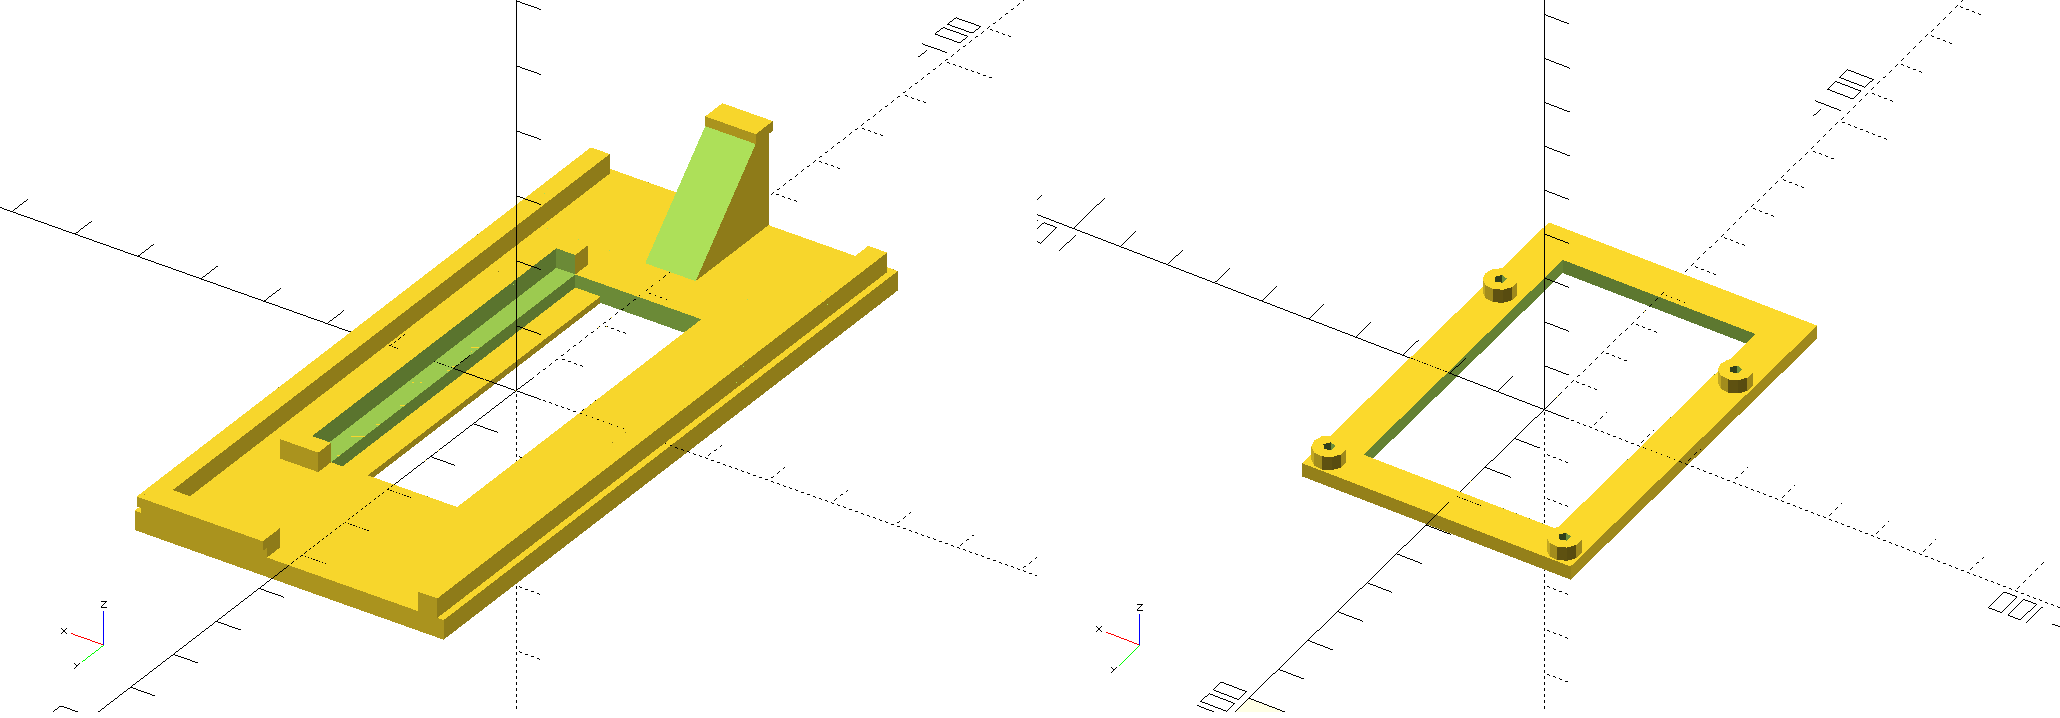
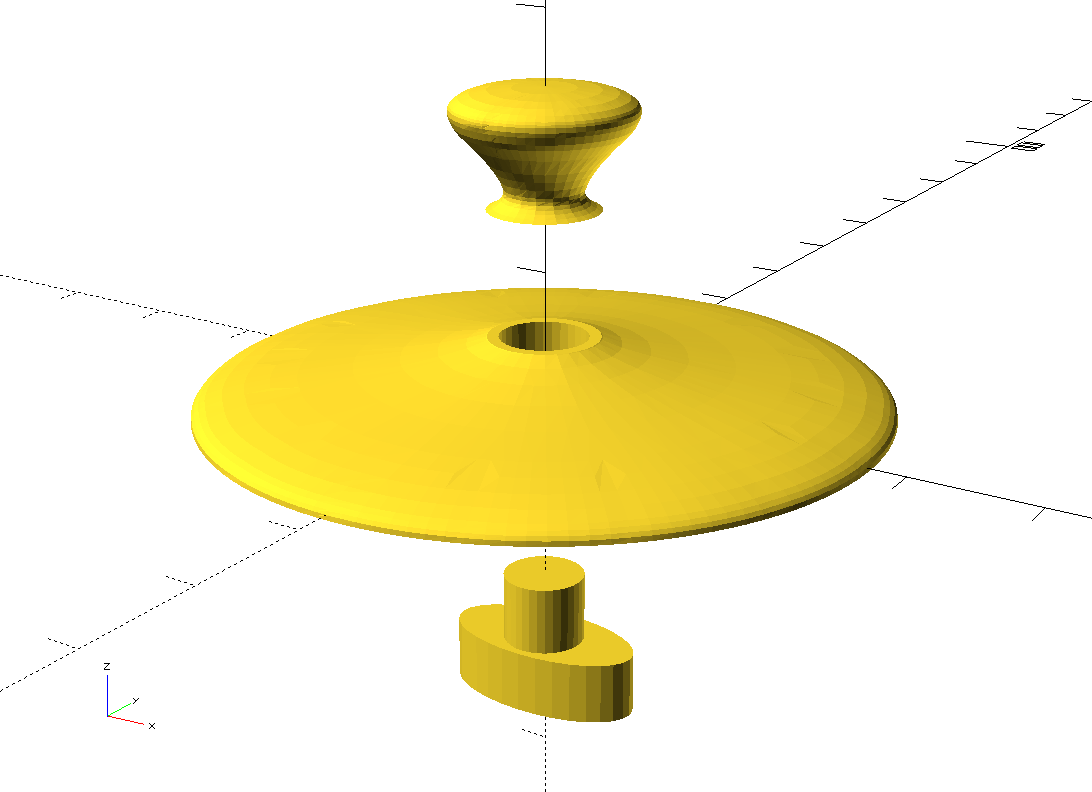
    I designed three new plastic parts for the second version of the lid. The new lid features a hole instead of the handle, and the actual handle is to be glued to an axis going through the lid, with an elliptic lever at the bottom. The lever shall push a micro switch attached on the inside of the lid, just like you would press a button.

    The three new parts

    The three new parts: the lid with a hole, the handle, and the button switch

    You can download the new SCAD source files (licensed under GPLv3) and the corresponding STL files on my GitHub repository. Apart from a micro switch, I'll also use prototype board, pins, and a Dupont wire.

    One the parts are printed, the handle is glued to the axis that goes through the lid. Then, the micro switch is soldered to a piece of prototype board. Two pins …


  • Playing music on Arduino

    Provided you connect a piezo speaker to your Arduino board, the tone Arduino function allows to play tones given their frequencies. Let's use it to play entire melodies!

    The Arduino board of my robotic teapot with a piezo sounder

    The Arduino board of my robotic teapot with a piezo sounder

    The melody encoding format I'll use is compact and pretty straightforward, but I admit it isn't the easiest one to read. The melody is represented as a null-terminated string of chars, in which each note is described by 3 consecutive characters:

    1. The note duration in sixteenth notes as an hexadecimal digit between 0 and F (0 has a special meaning and is interpreted as a whole note)
    2. The note name in English notation as an uppercase letter, or lowercase if sharp (R has a special meaning and indicates a rest)
    3. The octave number as a decimal digit, between 0 and 8 (for a rest, the value is ignored)

    So for instance, a quarter-note C from the 5th octave is 4C5, and a eighth-note D sharp from the 4th octave is 2d4.

    With this notation, the Tetris theme is:

    4E52B42C54D52C52B44A42A42C54E52D52C56B42C54D54E54C54A42A42A42B42C56D52F54A52G52F56E52C54E52D52C54B42B42C54D54E54C54A44A44R0
    

    In this example, a piezo passive sounder is connected on pin 3 …


  • Plasteac: a dancing teapot

    The Bob robot, itself remixed from the Arduped robot, inspired an impressive number of clones with its really good design.

    The most famous ones might be Zowi, and more recently Otto. They are both simple, cheap, open-source and 3D-printed little robots which have refined Bob two-legged design.

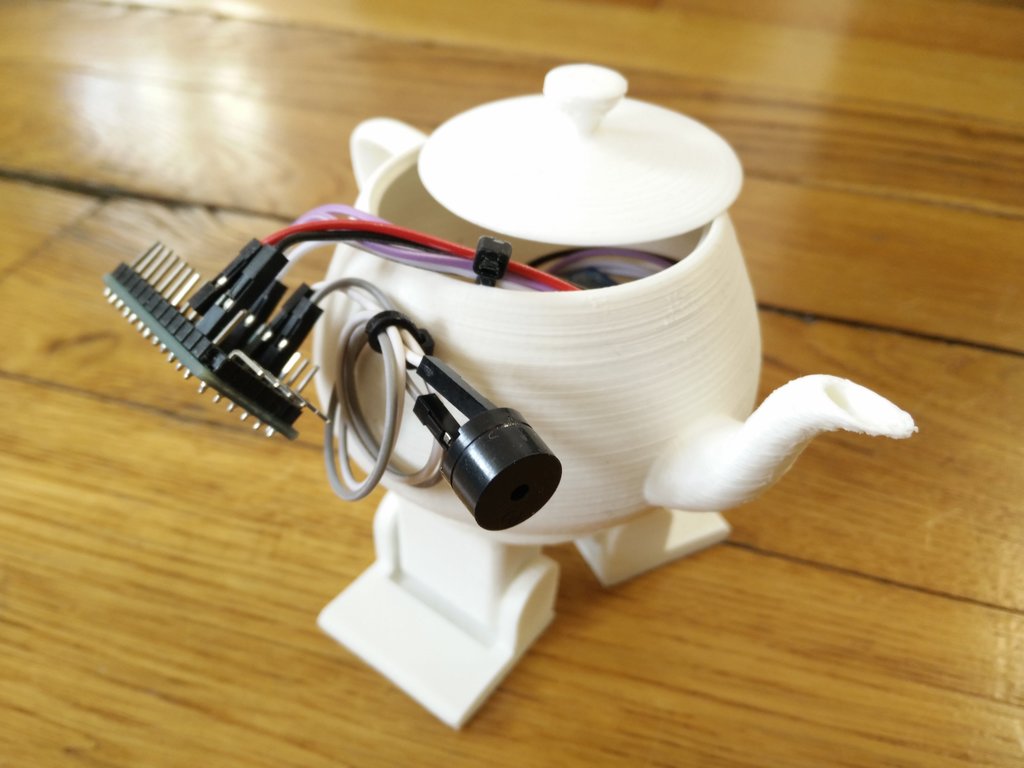
    Yet, I am not a fan of their strange square heads. What I would like is a teapot. A dancing teapot.

    I chose to design 3D-printed parts from scratch, not only because I prefer to use OpenSCAD over FreeCAD, but also because the design of the top part will be entierly different anyway. Also, for once, it will be powered by a 9-volt alkaline battery rather than a lipo battery.

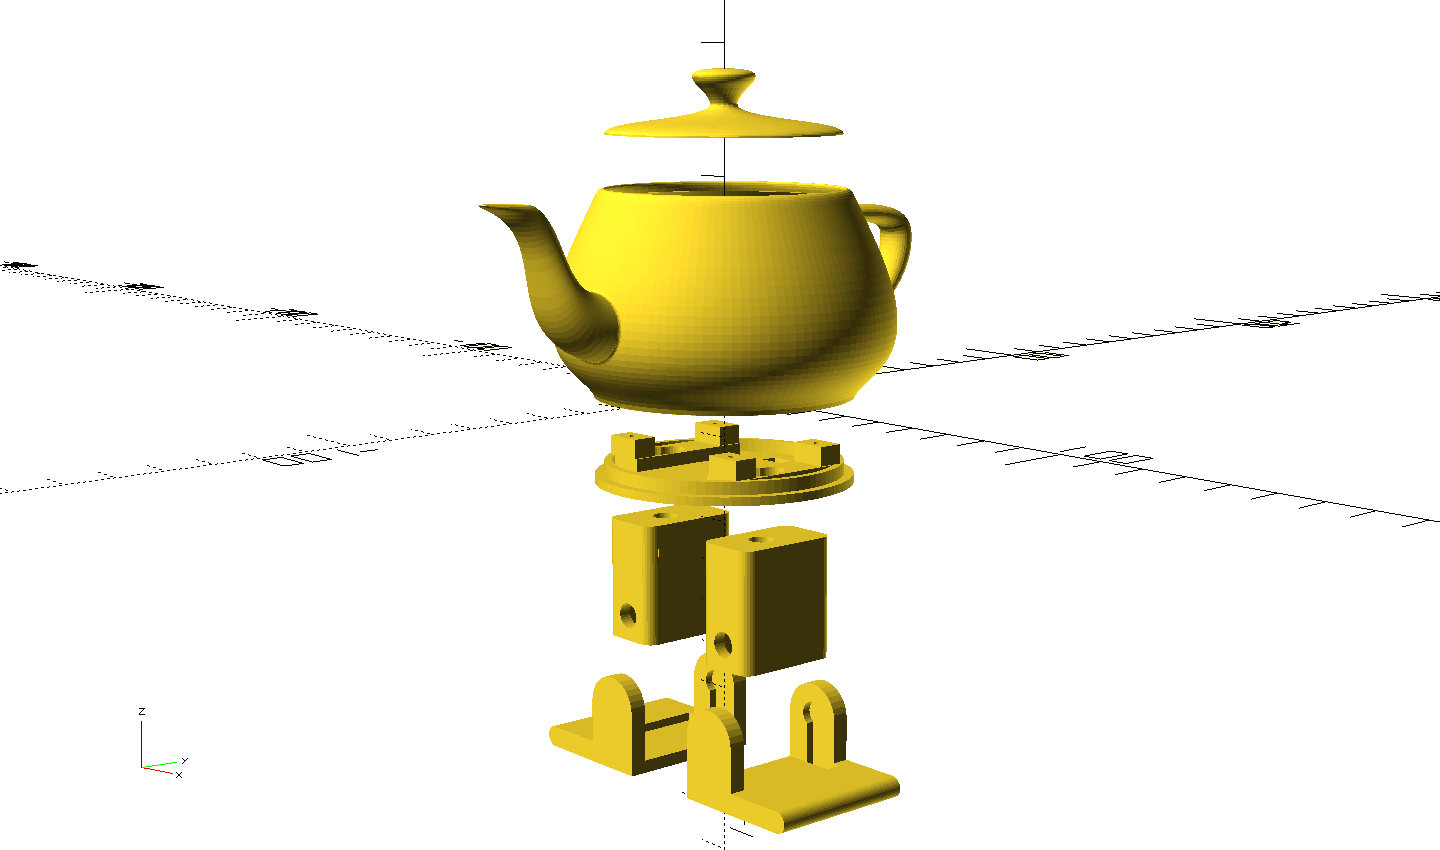
    3D models forming the robotic teapot

    3D models forming the robotic teapot

    You can download the SCAD source files (licensed under GPLv3) and the corresponding STL files here or on my GitHub repository. I printed them with white PLA, not the fanciest color but the perfect one for a teapot.

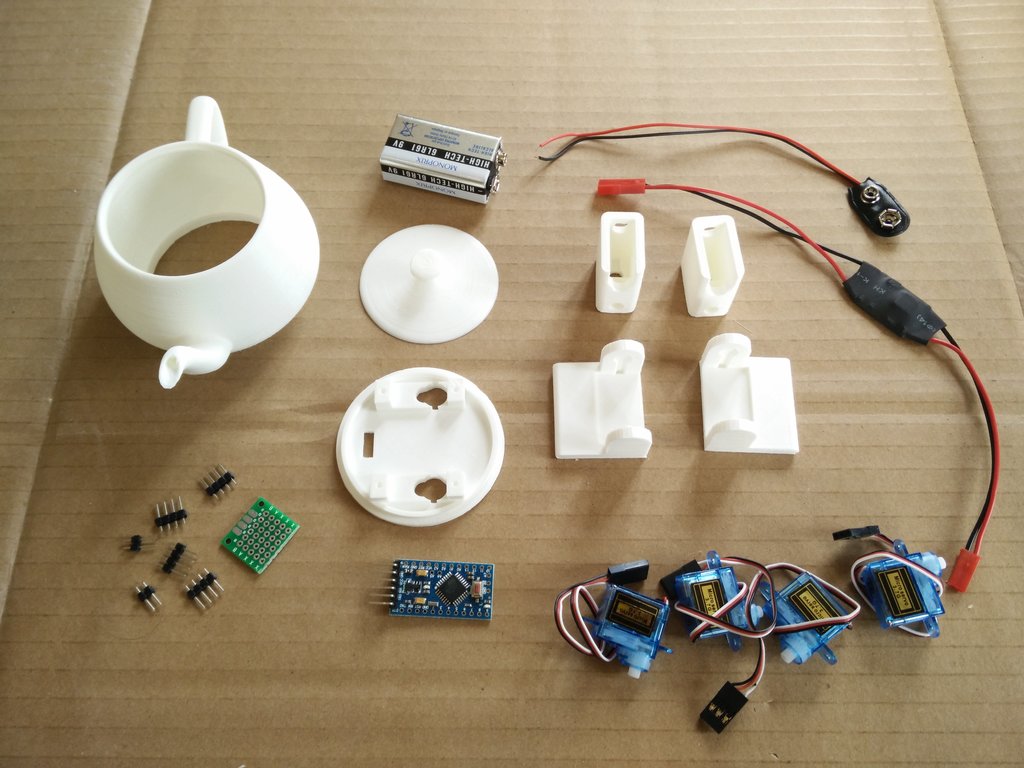
    The components ready to assemble

    The components are ready to assemble

    You might have recognized the shape of the famous Utah teapot! However, this is a subdivided and smoother model since the original is …


  • A telepresence robot - Enhancements

    In this article, I'm going to describe architecture enhancements for the control system of the WebRTC-controlled telepresence robot I built a few months ago, presented in a previous article.

    The four-wheel base of the telepresence robot

    The four-wheel base of the telepresence robot

    Since I did not manage to have a satisfying WebRTC support directly in a native Android app, I previously settled for a hack where the smartphone of the Telebot uses two different connections to the signaling channel: one to receive user control in the Android app, and one to handle the WebRTC session in the browser.

    This was bad for two reasons:

    • The robot can enter an incoherent state if one connection is closed and not the other.
    • User control commands do not benefit from WebRTC, instead they travel through the server, adding latency and jitter.

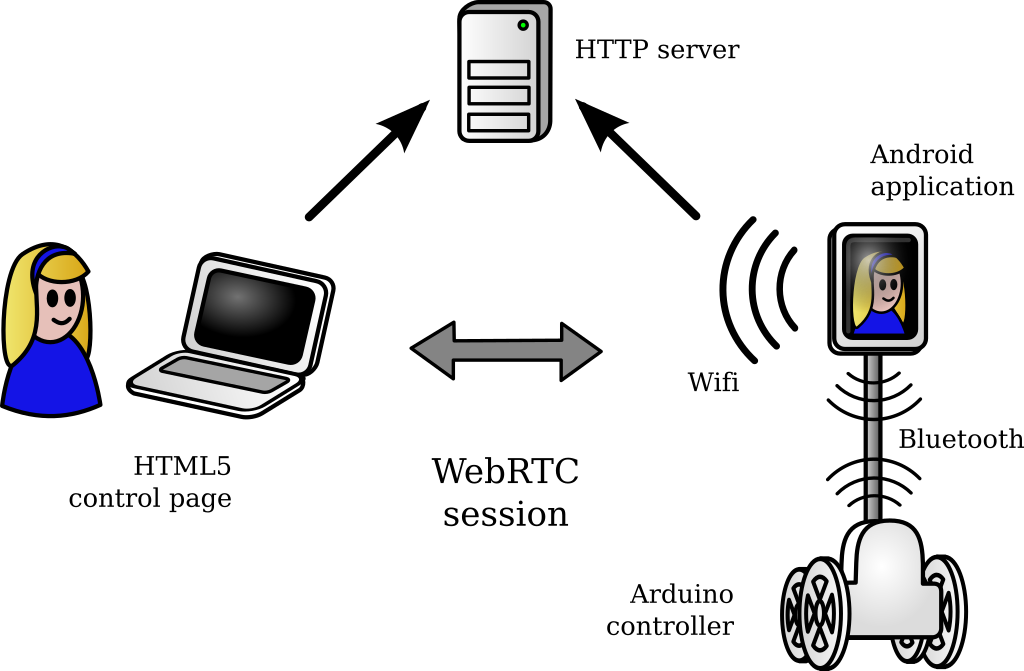
    The idea for the new architecture is to have the Android app run a small HTTP server in background that can accept motor control commands and send them to the Bluetooth device. We will send users commands on an RTCDataChannel and forward them to this small HTTP server with JavaScript in the browser.

    General schematic of the enhanced architecture

    General schematic of the enhanced …


  • Streaming from Linux to a Chromecast

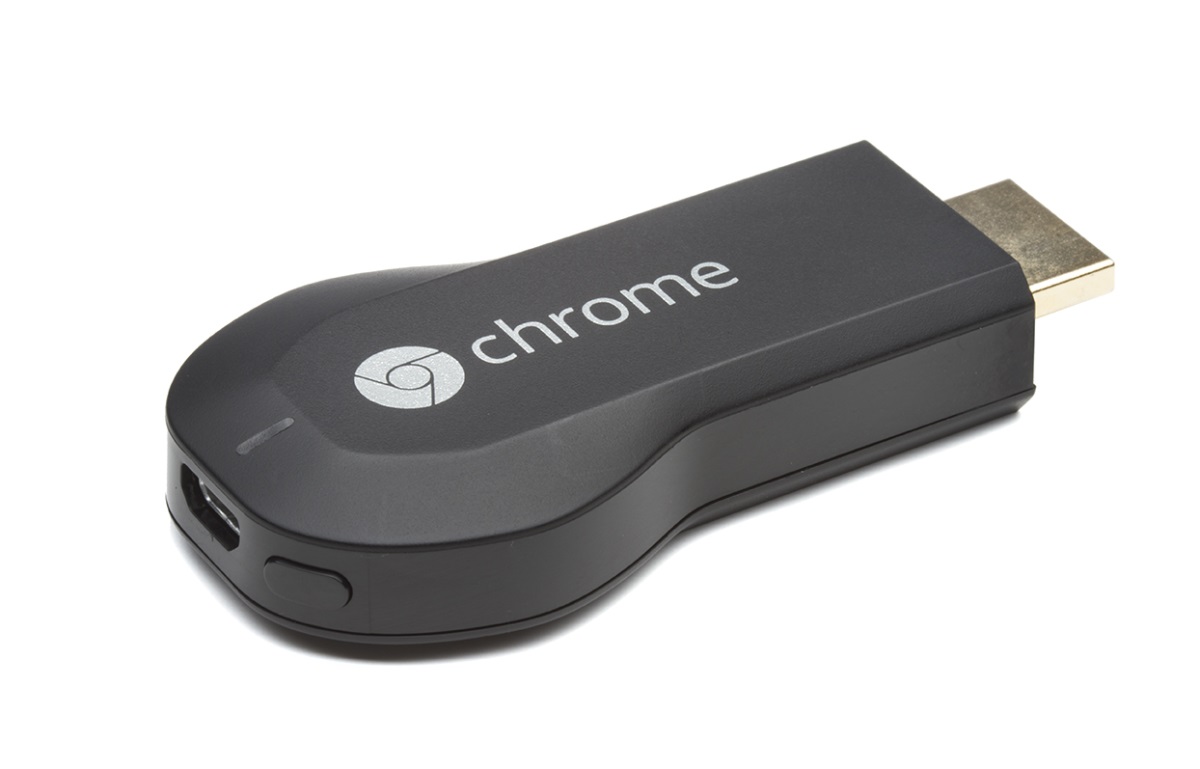
    The Google Chromecast is an impressive little device. If you haven't encountered one already, it's a small HDMI dongle which, when connected to a TV screen, allows to play audio, video, or visual content of a compatible webapp from a computer or mobile device.

    Google Chromecast

    However, it is primarily designed to only stream content from the Web, and not from your computer itself, which follows the current trend that everything should be "in the cloud" and is infuriatingly limiting. As you can guess, that dubious ideology is not my cup of tea.

    Luckily, the excellent library PyChromecast allows to control the device from a Python program. Yet the issue is that it only works for codecs the Chromecast is able to decode natively, i.e., H.264 and VP8. Besides, the Chromecast is only able to handle a few containers like MP4 and WebM. What if you want to stream other video formats ? Besides, what if you want to stream dynamically-generated content, for instance your screen or a live video from a camera ?

    Introducing ffmpeg!

    ffmpeg -i test.avi -c:v libvpx -c:a libvorbis -f webm out.webm
    

    In this …


  • A telepresence robot - Programming

    In this article we are going to program the Telebot we have built in the previous article.

    We will use WebRTC, which is the new standard for real-time communication in Web browsers, and take advantage of the necessary signaling channel to also transmit commands to move the robot.

    General schematic of the whole control system

    General schematic of the whole control system

    Programming the robot actually consists of three different steps:

    • Writing Arduino-flavored C++ code for the Arduino-like controller to properly move and balance the robot
    • Building a specific Android application to handle a WebRTC session on the smartphone and relay commands to the controller via Bluetooth
    • Setting up a node.js server to serve an HTML5 control page over HTTPS allowing visioconference and remote control
    The Telebot ready to be programmed

    The Telebot ready to be programmed

    Therefore, the project will be a mix of Arduino, Android Java, and Javascript (client-side and server-side). The source code is free software, licensed under BSD 2-clause license and GPLv3 (Arduino code). The complete source for the project is available on my repository on GitHub.

    Arduino programming

    First, motor control is achieved through an extremely simple text protocol over the Bluetooth serial, with one single-letter command …


  • A telepresence robot - Building

    Telepresence robots are pretty cool, so let's build my own Telebot!

    Schema of a telepresence robot

    The telepresence robot allows visioconferencing while moving around

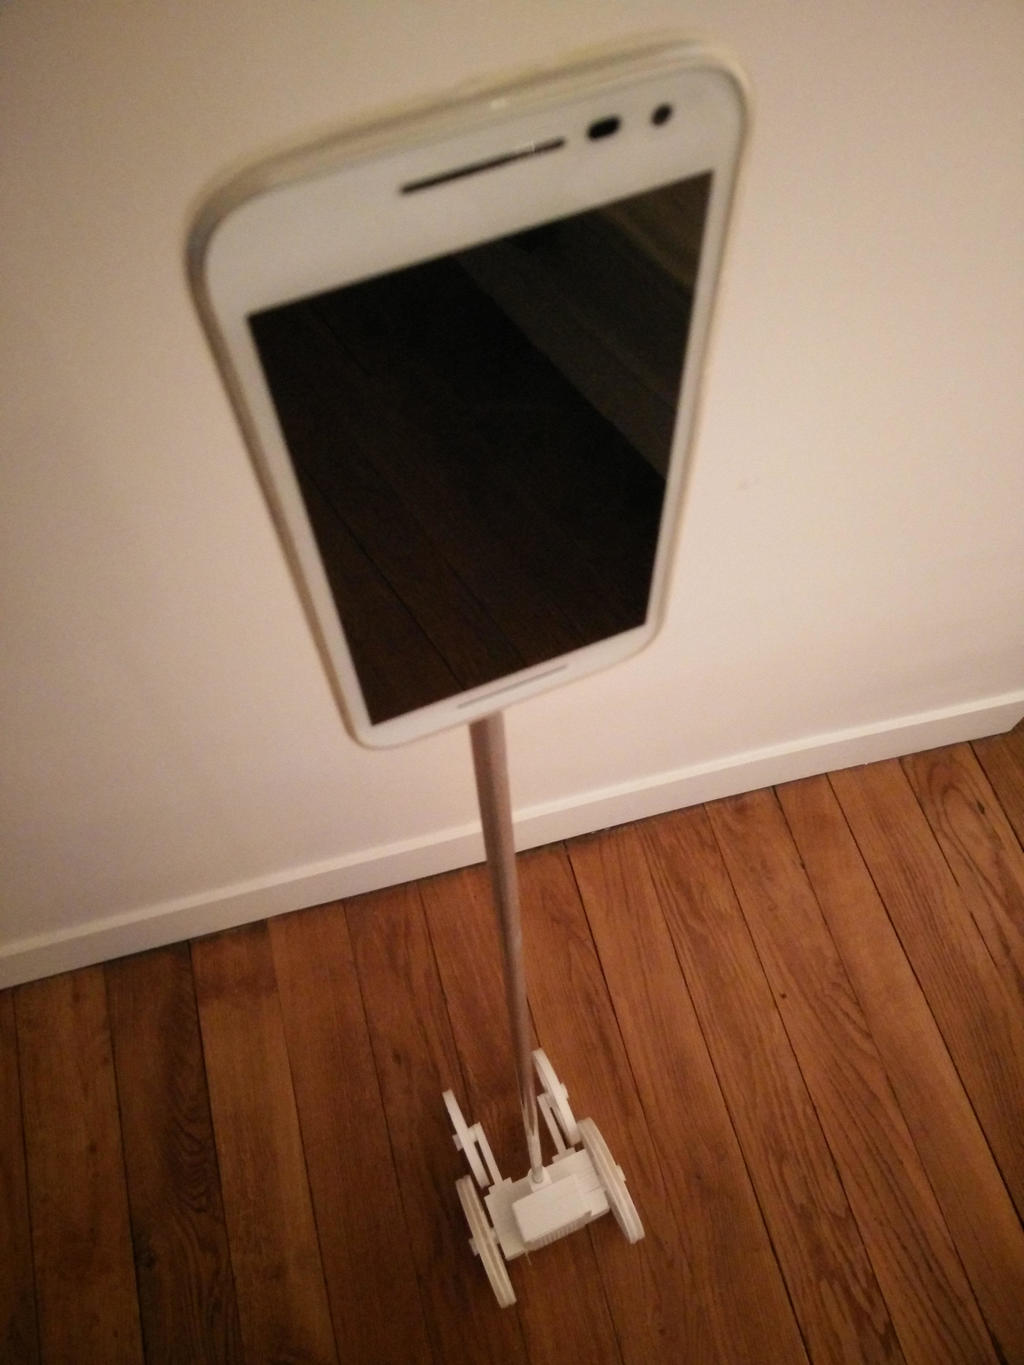
    The robot will be built as a base with 4 wheels, on top of which a vertical pole allows to stick a smartphone. The smartphone, connected to the base via Bluetooth, will permit visioconference via WebRTC and remote control at the same time, allowing to move around. Even if the center of gravity is quite high, a gyroscope will prevent the robot from falling over. The base will be powered by lithium-polymer batteries and rechargeable via a USB connector.

    Telebot moving around

    This article covers building the robot, while the next article focuses on programming it.

    We will use the following components:


  • A Minitel as a Linux terminal

    The Minitel (from the French Médium Interactif par Numérisation d'Information Téléphonique) was an interactive videotex online service accessible through phone lines, operated in France from 1982 by the state-owned PTT (Postes, Télégraphes et Téléphones), the ancestor of France Télécom. The service was retired in 2012, after more than 30 years of existence. It might have been the world's most successful early online service, before the World Wide Web era. It offered services like telephone directory, purchases, reservations, mail, and chat just like the Web offers today.

    The Minitel, starting from model 1B, can be used as a VT100-compatible Linux terminal with the proper wiring. So let's try...

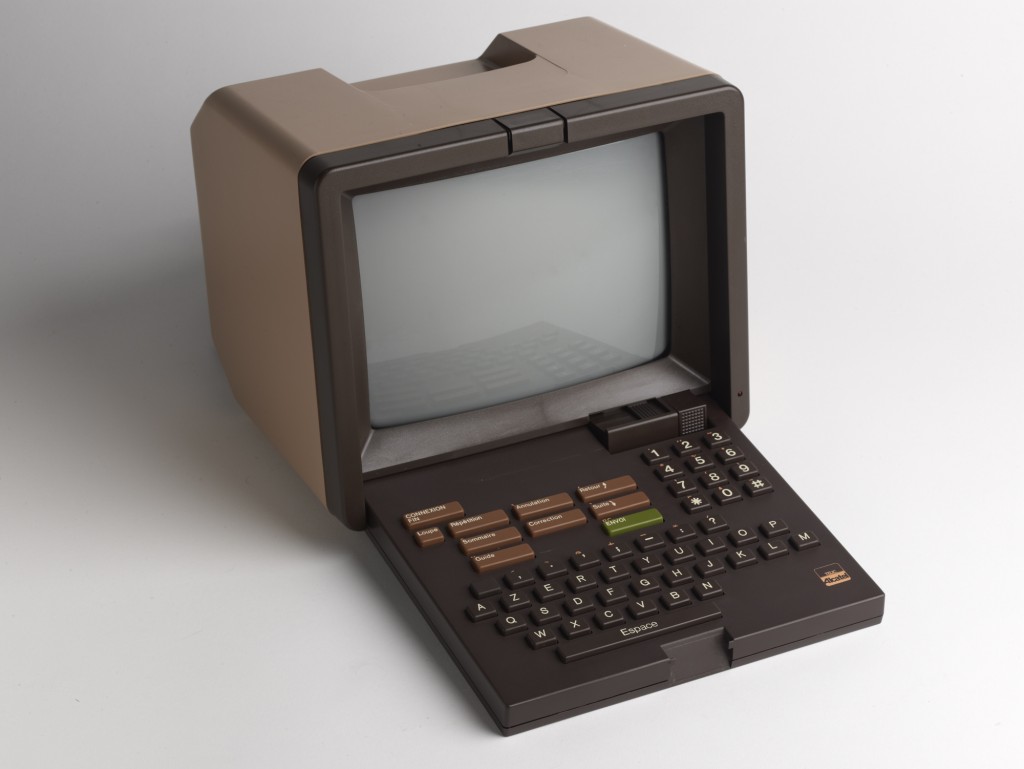
    Minitel 1

    The first version of the Minitel, made by Telic Alcatel. So 80s.

    Before starting to tinker, it's interesting to recall that the story behind the Minitel is actually pretty tragic despite its success. In the 70s, France was leading research on packet-switched networks. The CYCLADES project, directed by Louis Pouzin, inventor of the datagram, designed an early datagram-based packet communications network. In parallel, the French PTT was developing Transpac, a packet network based on virtual circuit switching with the emerging X.25 standard …


  • An Ethernet Tor box

    You are without doubt already familiar with the Tor project. The Tor browser is already a very handy tool to surf anonymously, but what if we had an entire network's traffic forwarded through Tor via a special gateway? Let's transform a tiny router in a transparent Tor proxy, a portable Wifi access point redirecting all traffic to the Tor network!

    Tor logo

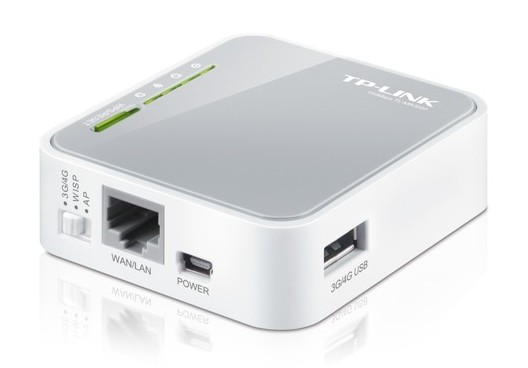
    Let's begin with a short presentation of one of my favorite hackable network devices: the TL-MR3020.

    TP-link TL-MR3020

    The portable 3G/4G wireless N router TL-MR3020 from TP-Link

    Despite being marketed as a portable 3G/4G wireless N router, it does not possess any kind of mobile telecommunication interface. Instead, it's a very small and cheap router featuring a 802.11n 150Mbps Wifi interface, a 100Mbps ethernet port, and a USB port. It is powered over a mini-B USB port and it has an extremely low power consumption with an average current draw around 120mA at 5V, i.e. 600mW. Its hardware is pretty limited: an Atheros AR9331 SoC with a 400MHz MIPS processor, 32MB of RAM, and 4MB of flash memory.

    The preliminary step for our Tor box is to install …


  • A small 3D-printed NAS

    EDIT: I published an updated version of the NAS in a more recent article.

    Network-Attached Storages (NAS) are very handy devices on a home network. They offer a simple way to share or synchronize files, and can host various useful services at the same time provided they are generic enough. A NAS being nothing more than a specialized file server, we will actually build a small home server than will be able to do anything.

    The functions can be the following:

    • File server (FTP, NFS, SMB/CIFS...)
    • Streaming server (audio or video on the local network)
    • Personal web server (to host a website, synchonize contacts or send files to people)
    • Local seedbox (to download torrent files)
    • Domotic hub (for instance by adding a Zigbee USB dongle)

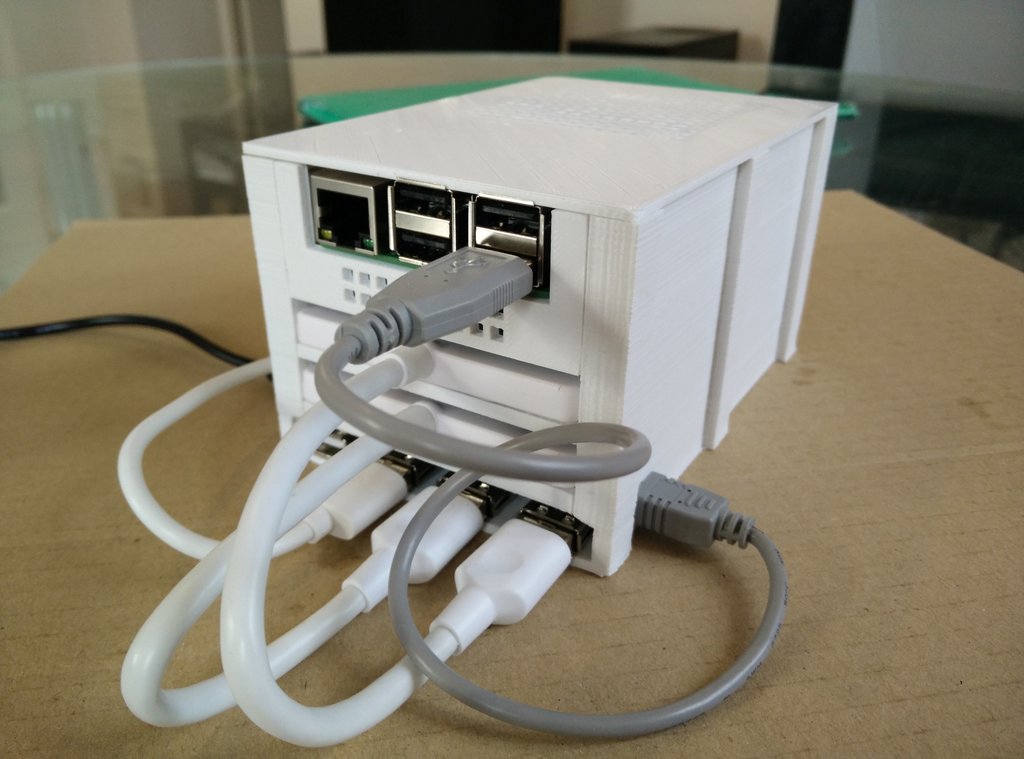
    The server will be pretty simple in its technical design: a Raspberry Pi 2 model B with two hard disks connected with USB adapters.

    The finished NAS featuring a Raspberry Pi 2

    The finished NAS featuring a Raspberry Pi 2

    The Raspberry Pi is actually not able to power the two drives over USB, since we would need 500mA per drive, so 1000mA overall, and the Pi can only supply 600mA over …


  • A smart VPN gateway

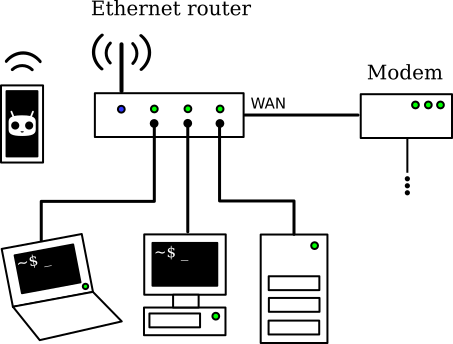
    My network setup at home is surprisingly pretty common: a DSL modem (VDSL2 actually) followed by a router featuring an ethernet switch and an 802.11n Wifi access point, configured as a NAT gateway.

    My home network setup before modifications

    My home network setup before modifications

    Let's imagine I'm in a country that doesn't care about the right to private life of its citizens and performs automated mass surveillance, on the pretext of fighting against terrorism or copyright infringement. A gloomy perspective for sure, but let's keep that as our work hypothesis, for what the future holds in store.

    Of course, I could just set up on every computer a VPN whose gateway happens to be in a foreign and more respectful country. However, multiple VPNs on multiple computers are a highly impractical setup for various reasons:

    • VPN configuration has to be done multiple times, and I'm allergic to repetitive tasks
    • The maximum number of concurrent connections is restricted by VPN service providers
    • Access to resources on a local network at the same time is a hassle and need specific configuration, like DNS settings

    So, why not install the VPN once and for all in a …


Categories
Tags
Feeds