This article is the continuation of my previous article on the Minitel.
These are dark times we live in. Far from the original design of the Internet whose cornerstone was decentralisation, the Web has created a split between servers and clients, between service providers and service consumers, between the ones who harvest data and the ones who are harvested. To use the expression forged by Benjamin Bayart (in French), the Internet is bascially converging back to a Minitel 2.0.
Let's take the statement literally and build an actual Minitel 2.0!
My idea is simple: there is an unused extension bay at the rear of the Minitel 1B where we can lodge a Rasberry Pi connected to the Minitel as its terminal. This will effectively add modern Ethernet, Wifi, and USB connectivity to a 35-year-old Minitel.
To hold the Pi, I designed and 3D-printed a replacement for the rear panel. The OpenSCAD source and the STL models are available here (under GPLv3).
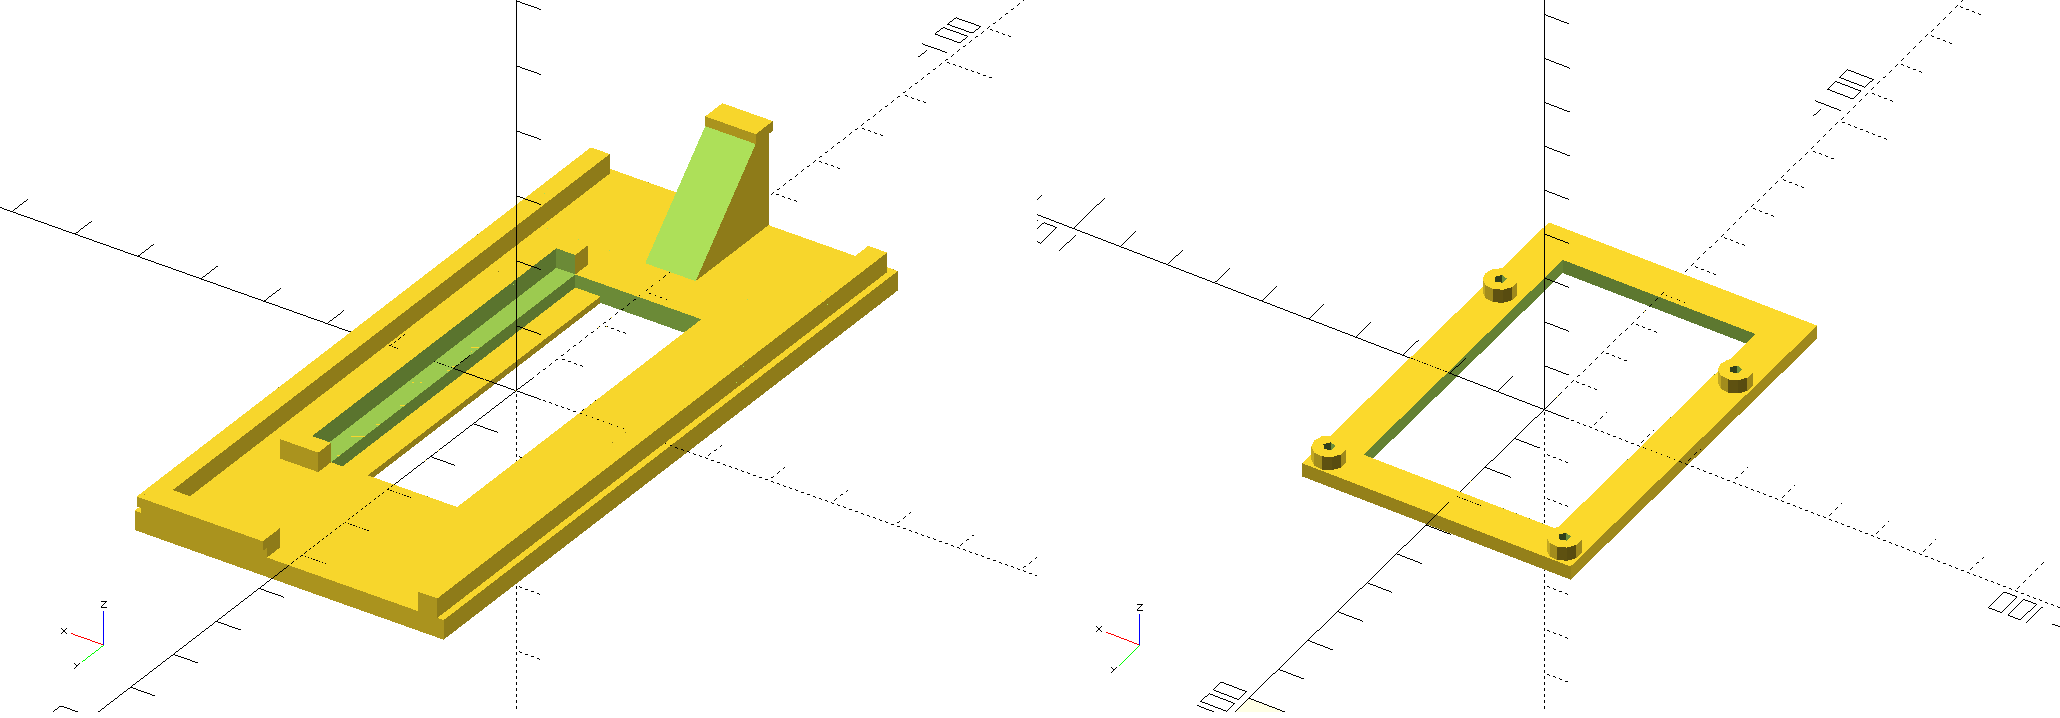
Replacement for the rear panel holding the Raspberry Pi
The support piece is printed separately, then clipped and glued to the panel before the Pi is secured on it with four screws. A hole on the panel will expose the ports on the back of the Minitel.
Now the fun part starts. First, we need to open the Minitel by unclipping the back cover.
Warning, as a CRT display, it is dangerous! Very high tensions are applied to the tube, notably by the flyback transformer at the anode cap (up to a few tenth of kV), and the capacitors can keep the charge even after the device is turned off and disconnected. Also, the tube is fragile (especially the neck part) and might violently implode if damaged, which could in addition release potentially toxic materials. Therefore, it is crucial that you take the necessary precautions!
The DIN connector will be hidden by the new panel, so power, ground, TX, and RX are taken directly under the connector by soldering four wires on the motherboard.
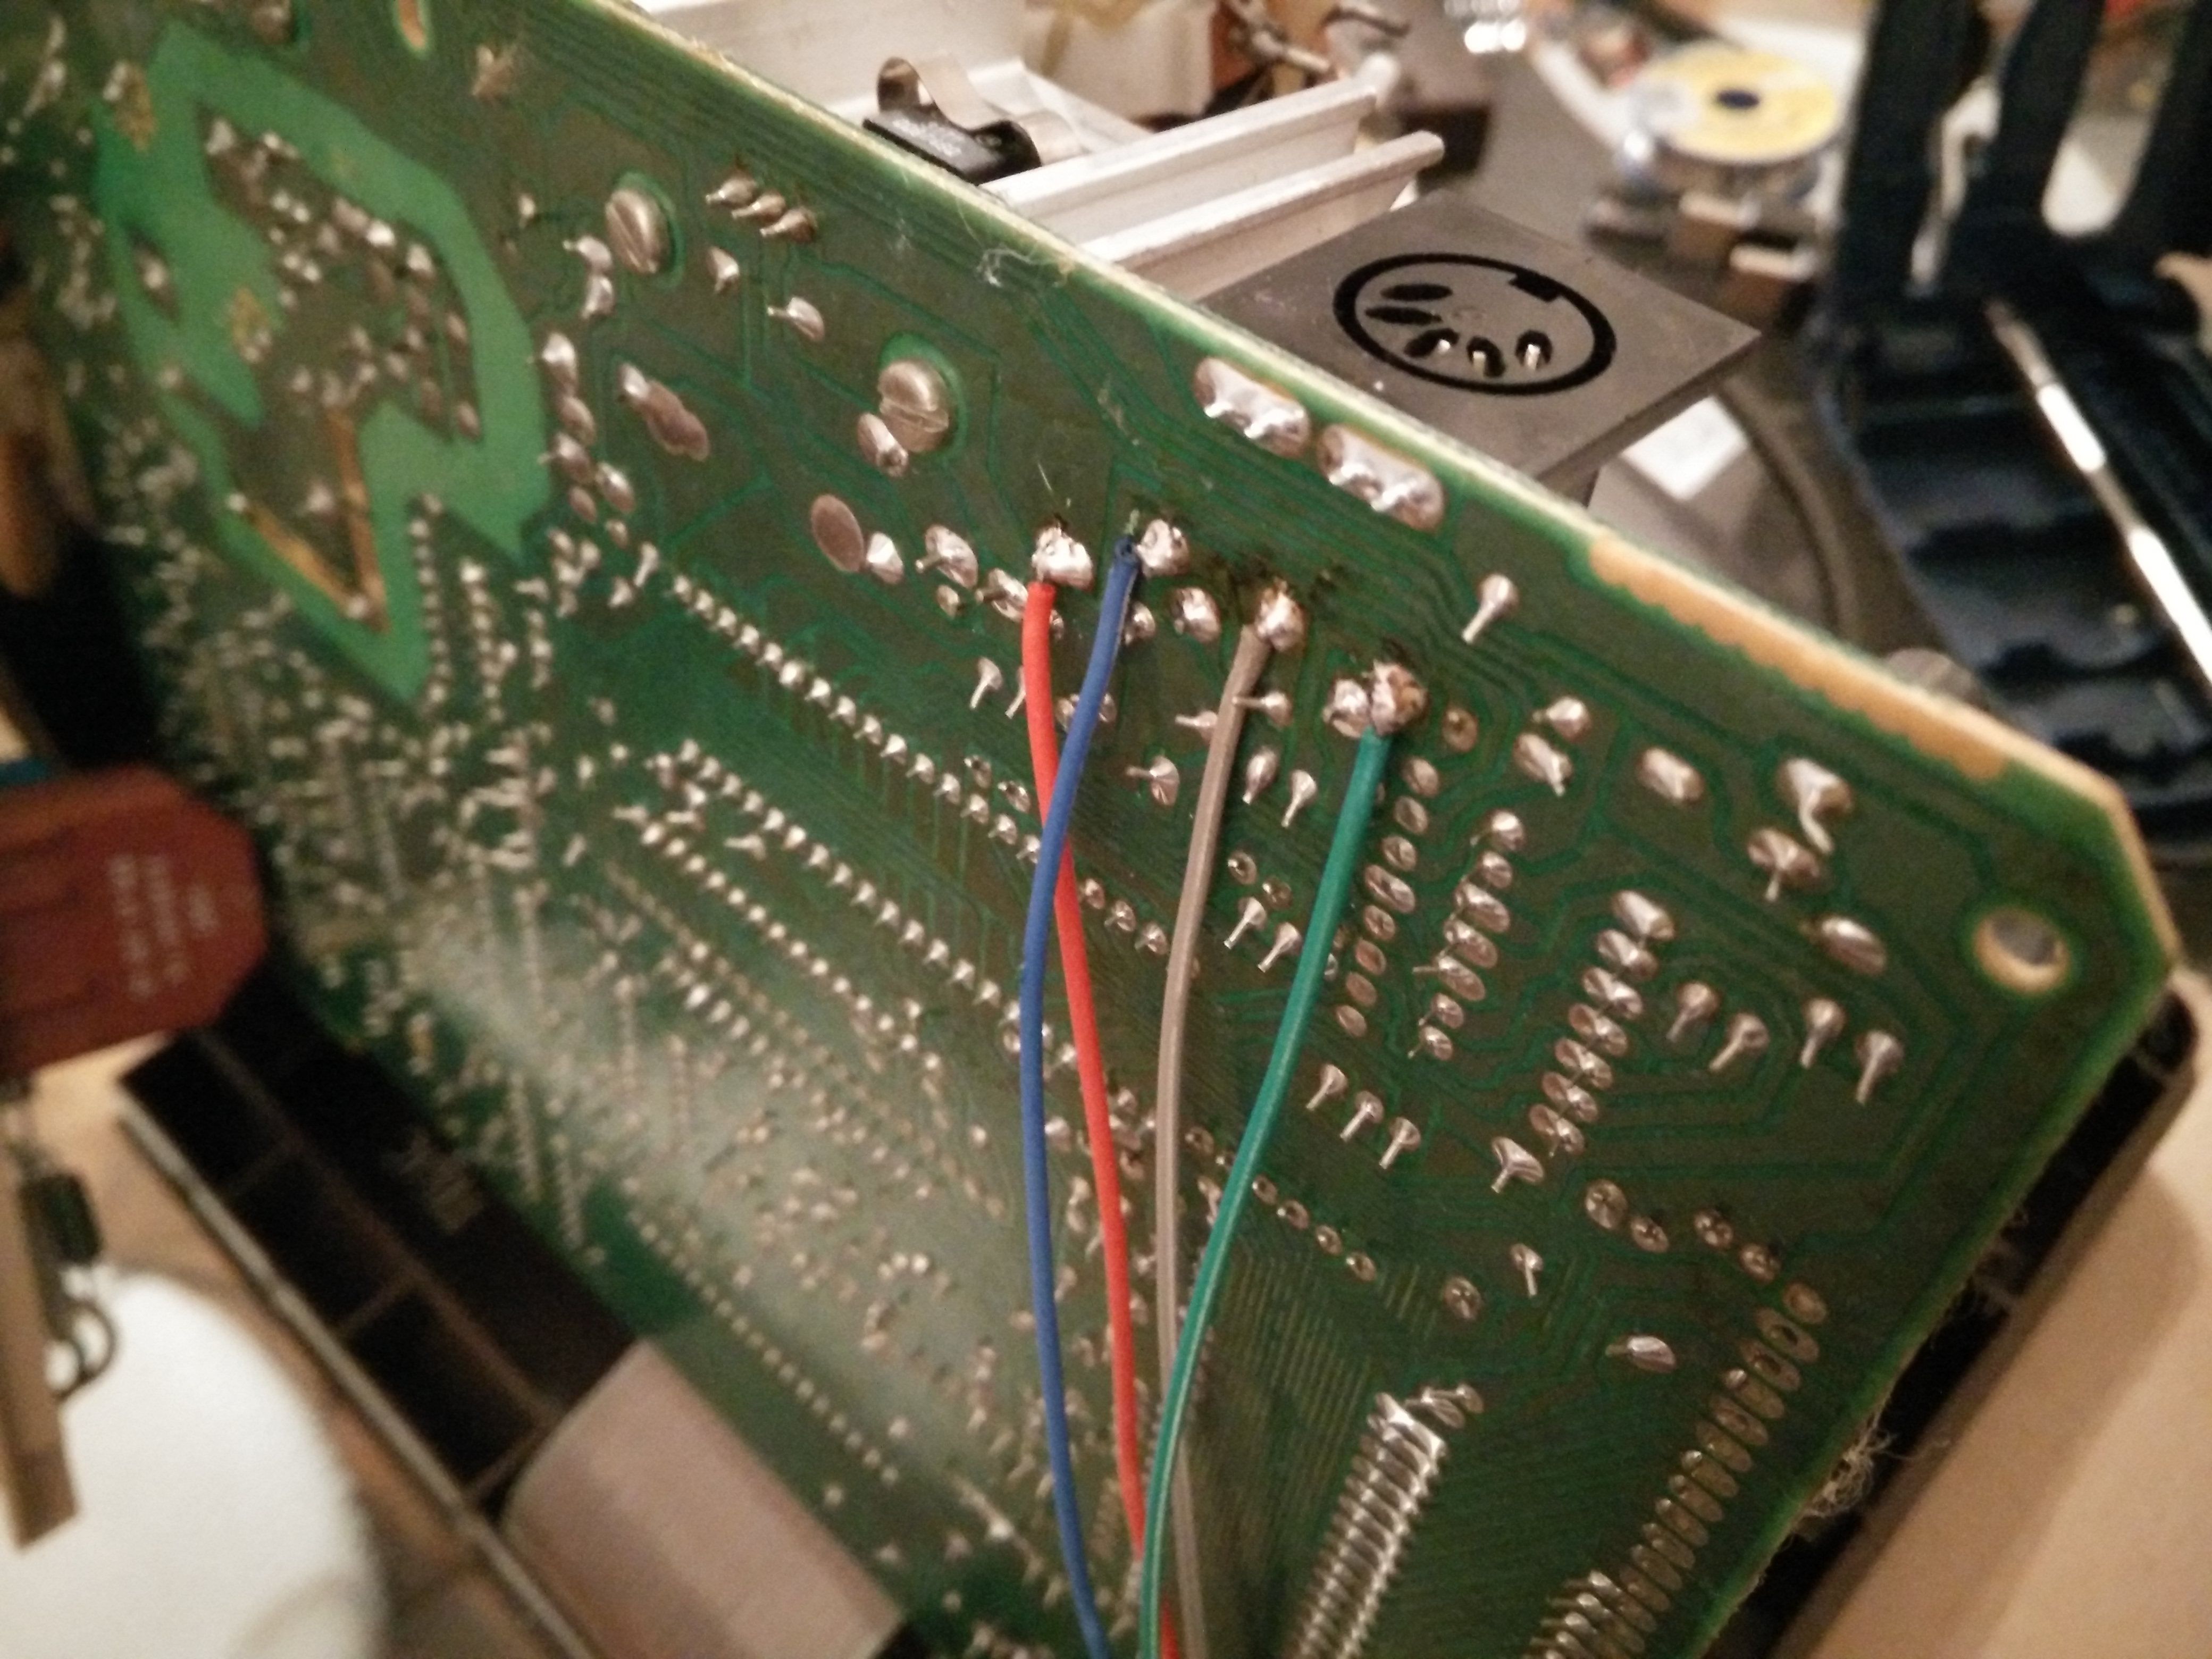
Power, ground, TX, and RX wires soldered to the Minitel motherboard
The serial levels need to be adapted to 3.3V as required by the Pi. The adaptation circuit is similar to what I did to set up the Minitel as a terminal, except it will be connected directly to the Pi's UART pins.

Schematic for the adaptation circuit between the Minitel and the Raspberry Pi
To power the Raspberry Pi, the 12V tension has to be reduced to 5V. Any 5V switching regulator will do the job, here I use a car electronics regulator but a 5V UBEC (Universal Battery Eliminator Circuit) from an RC hobby shop would be perfect.
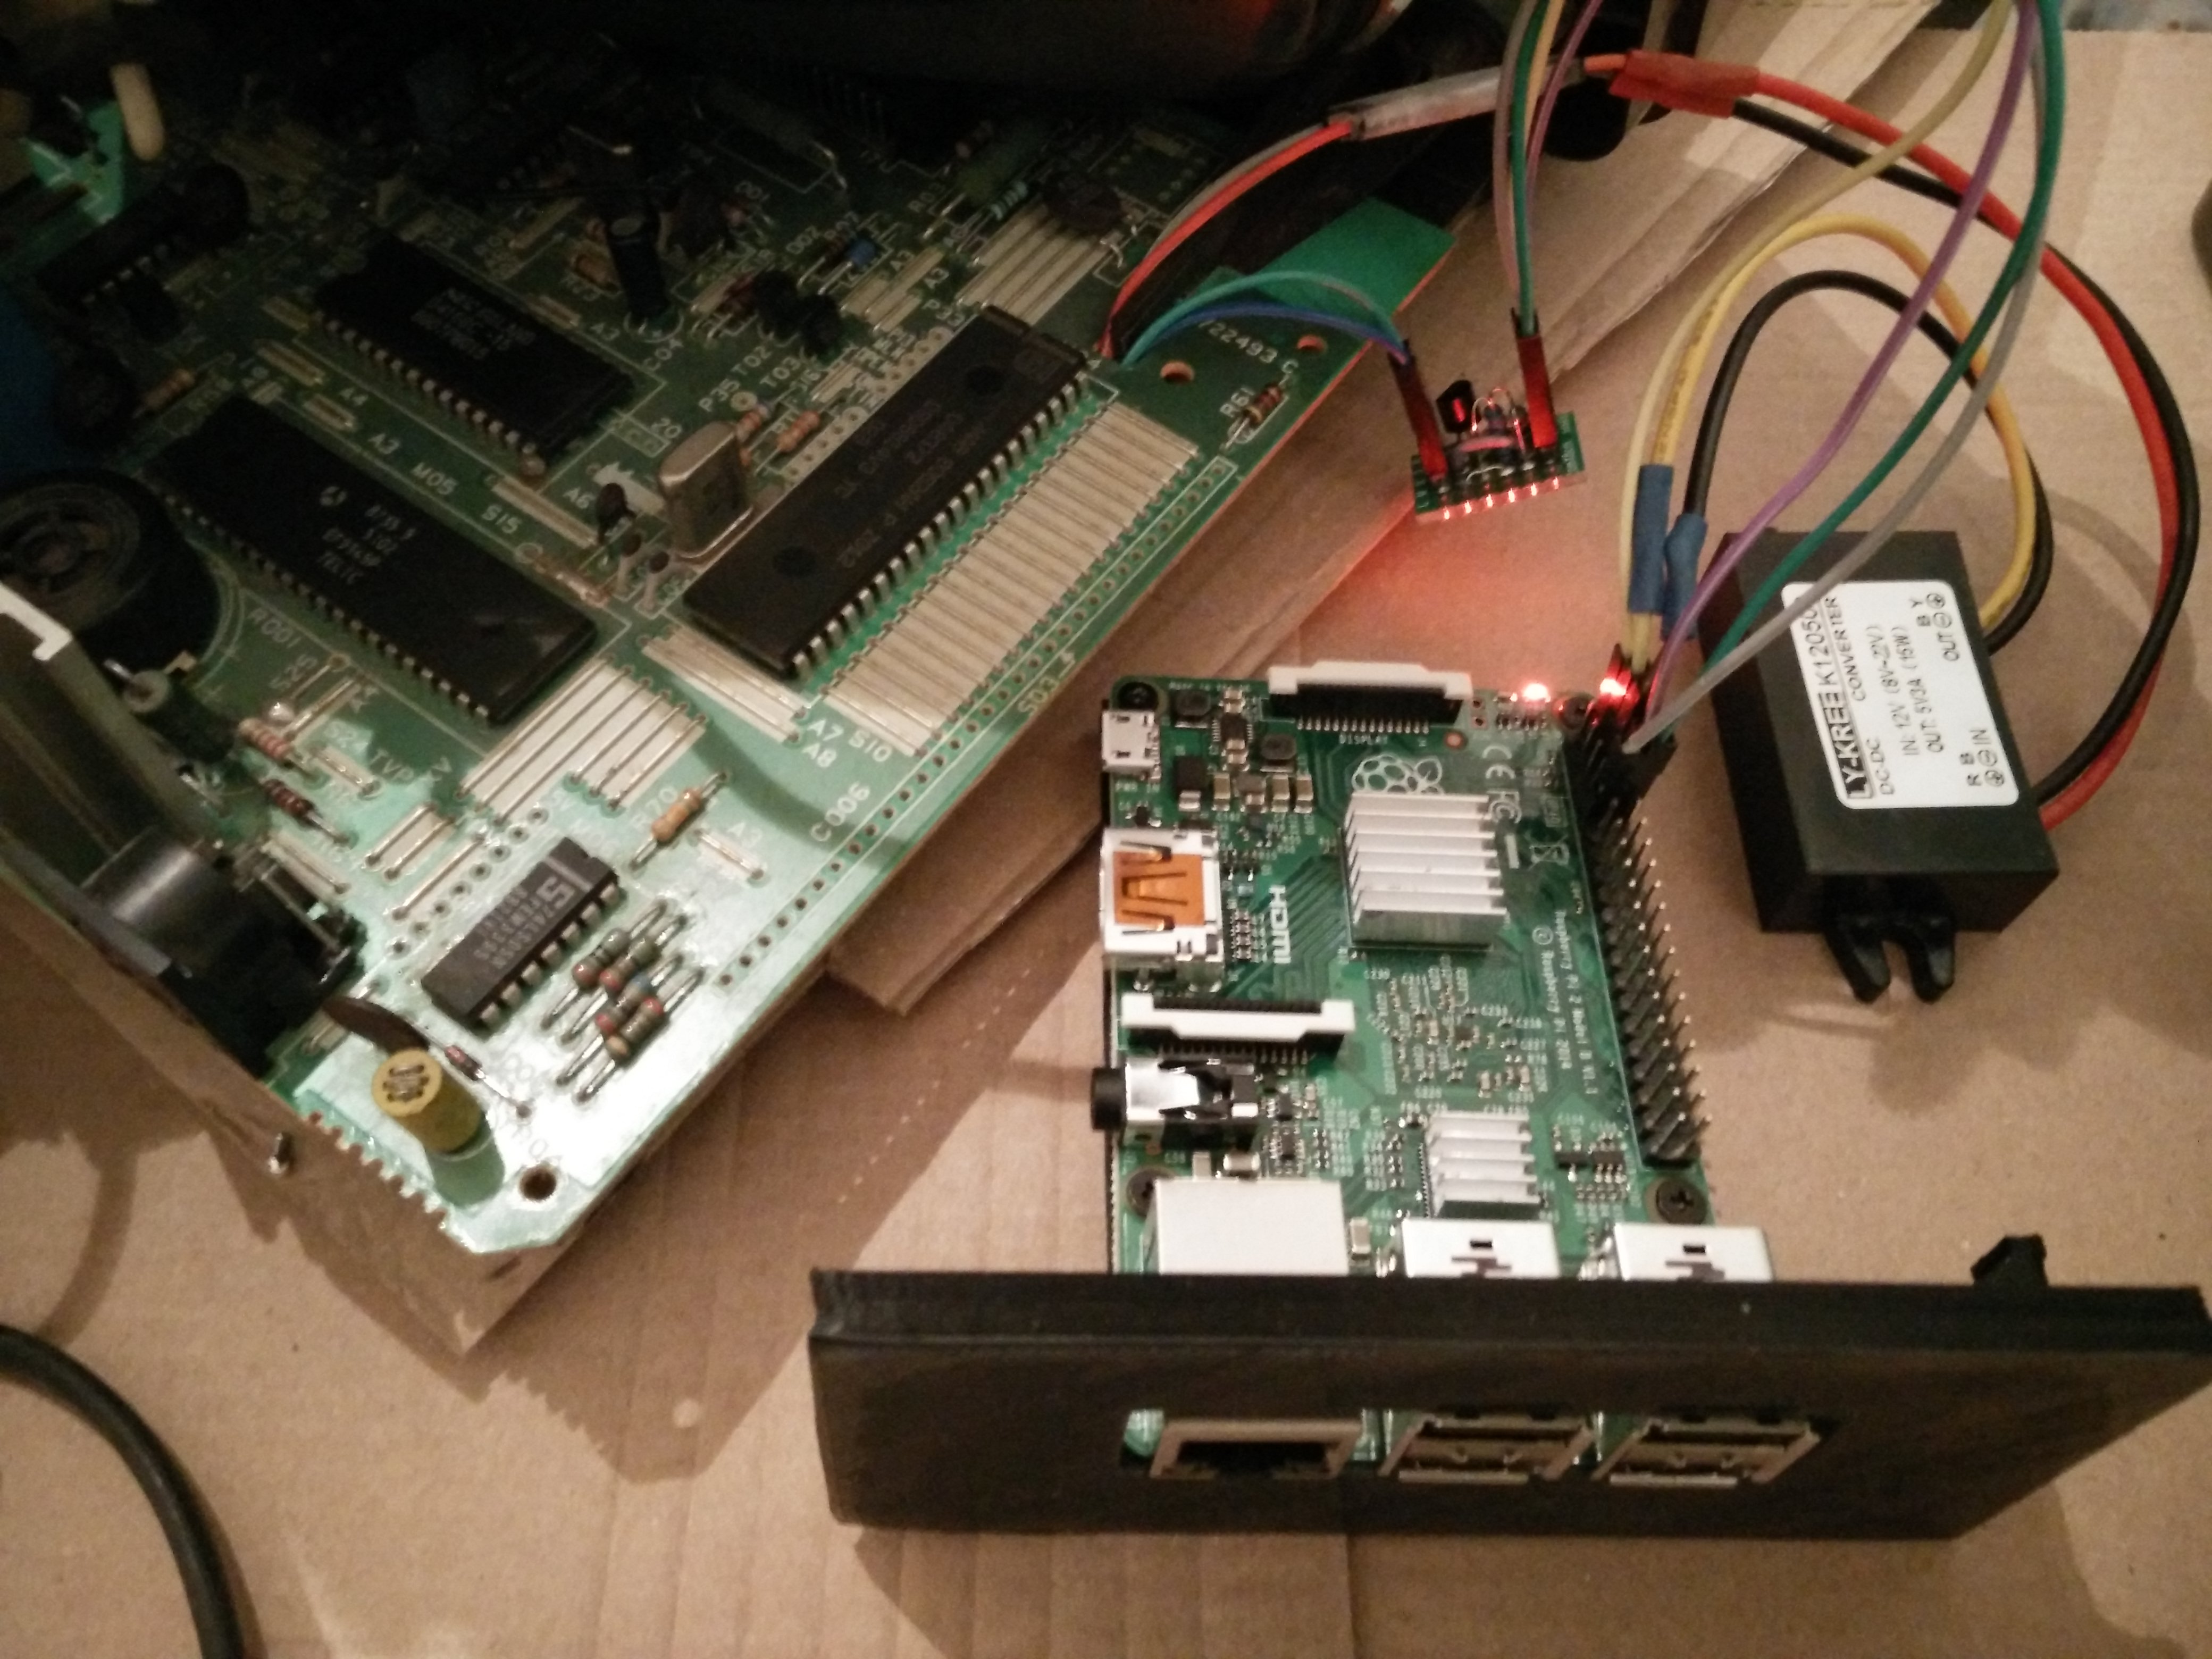
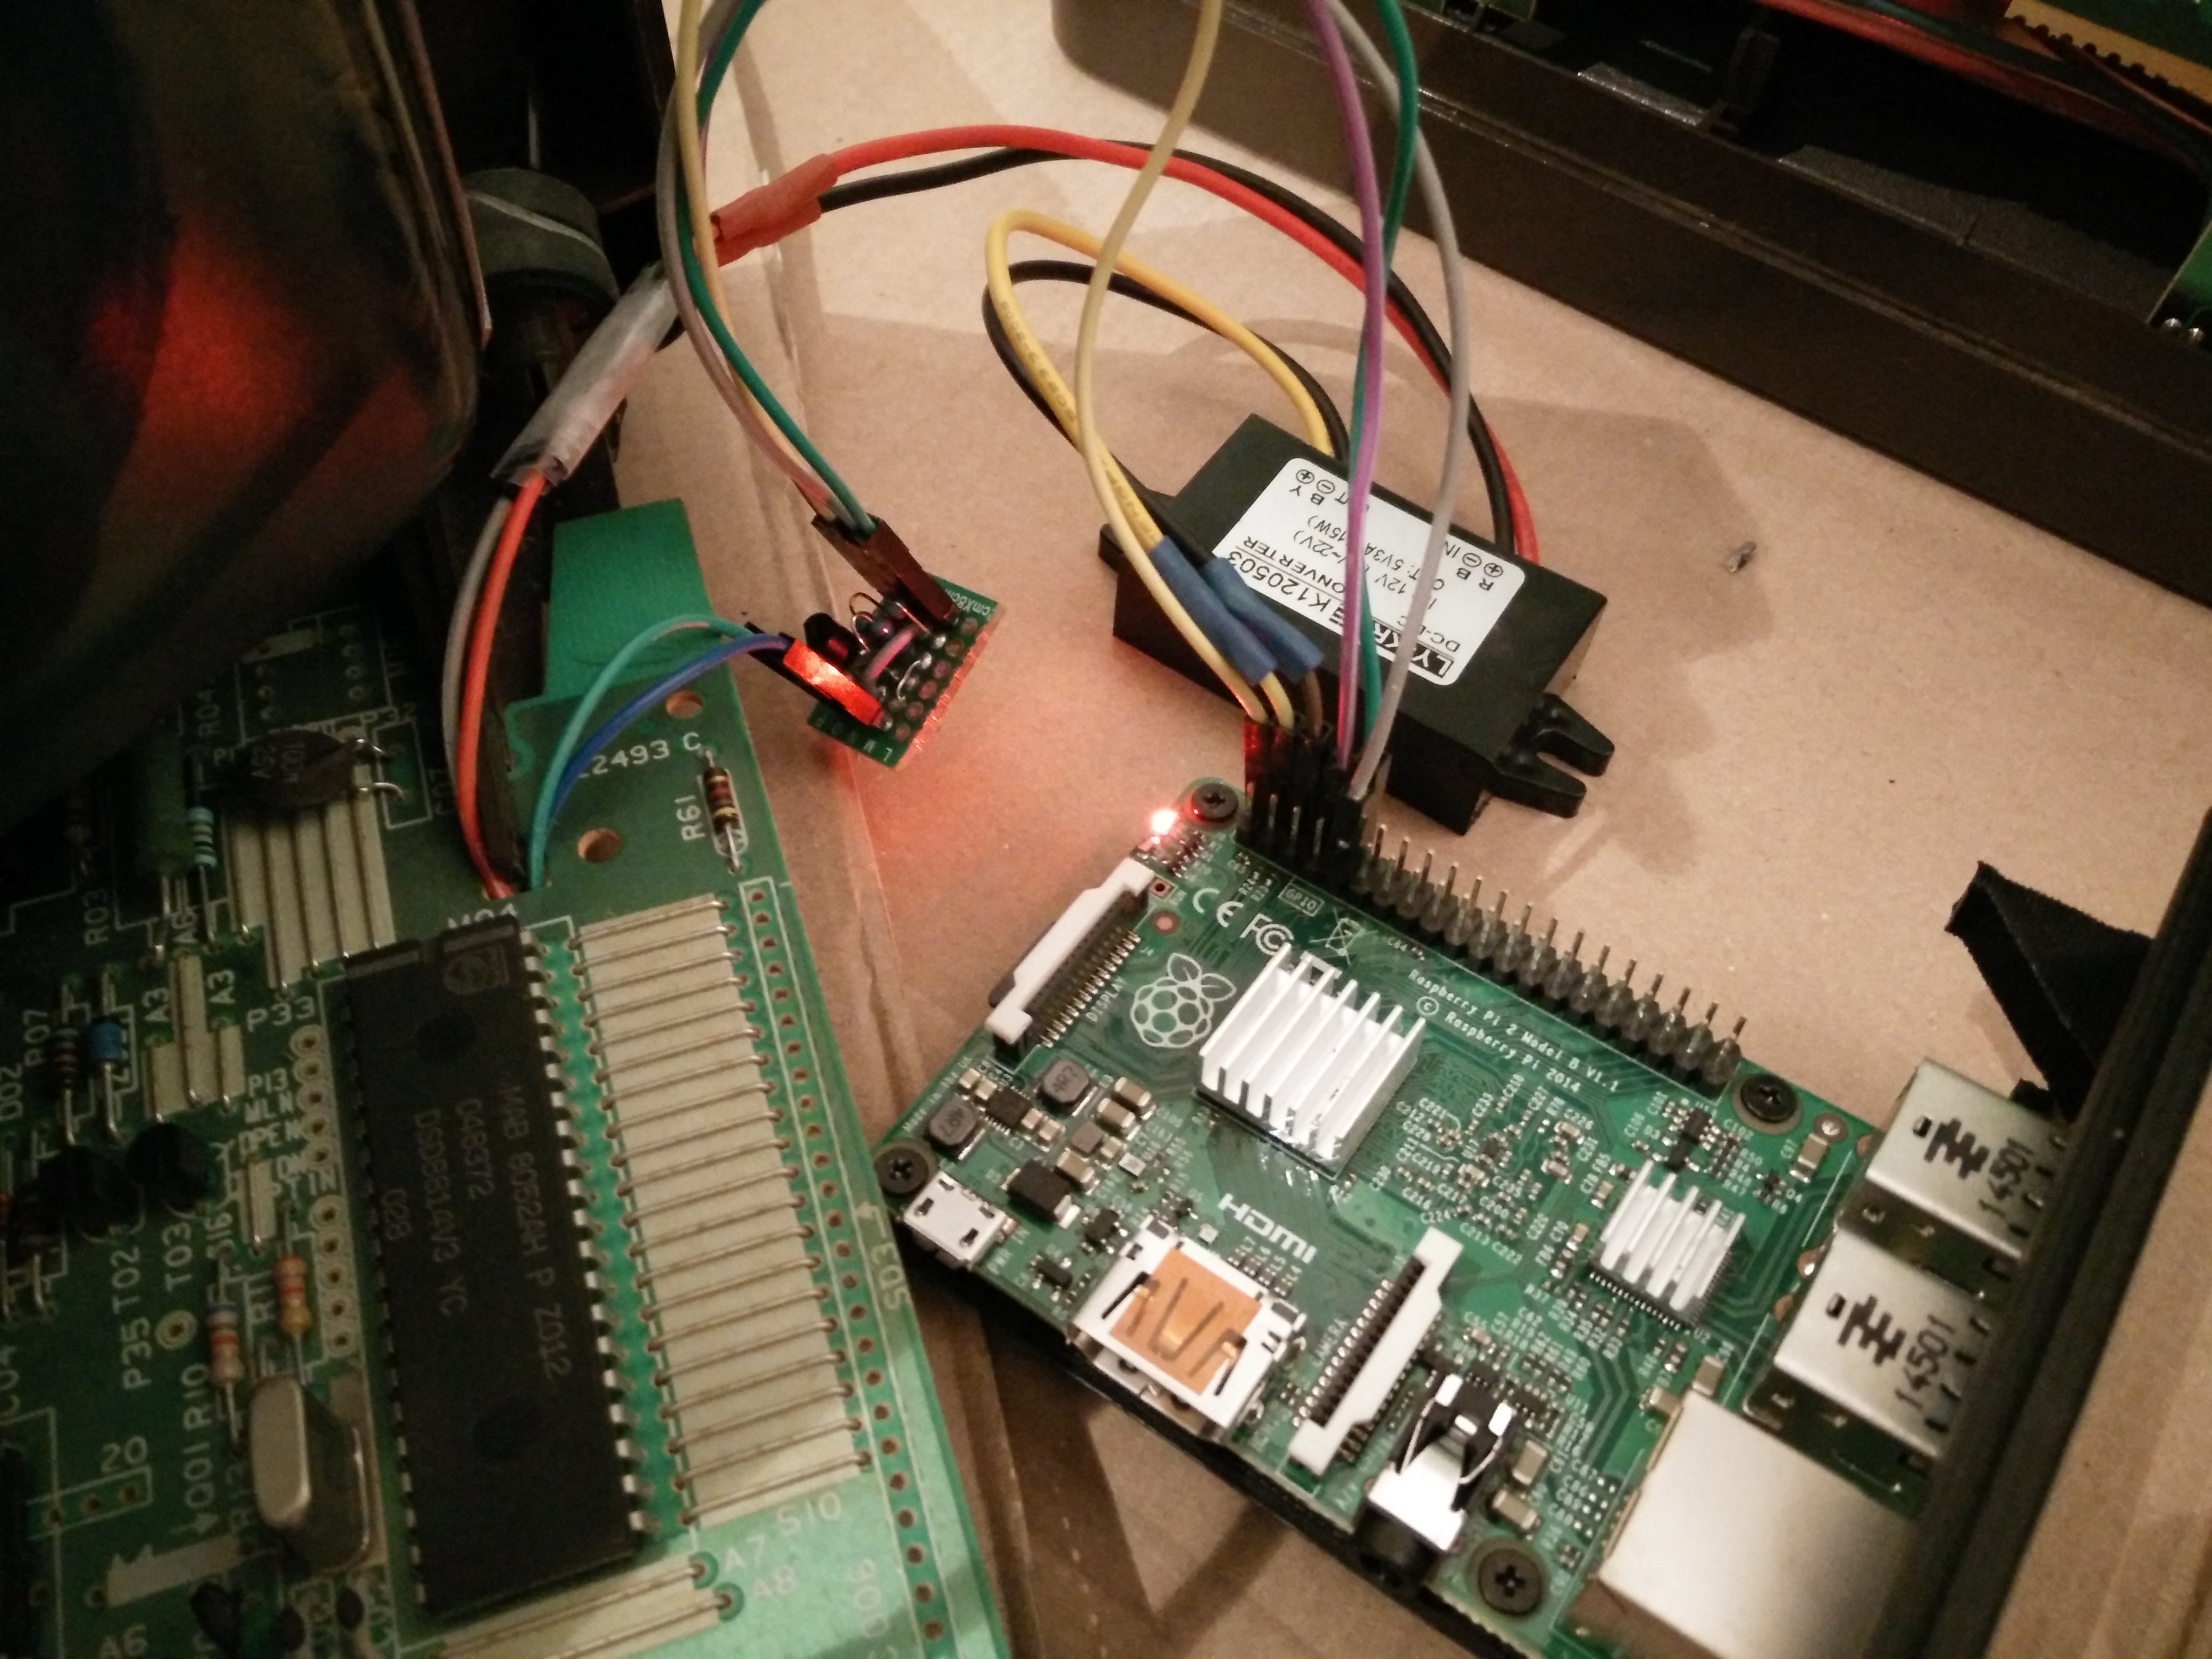
The Raspberry Pi connected to the Minitel
The Pi is powered by the 5V output of the regulator from a 5V pin, and the TX and RX levels are adapted with the homemade circuit shown above.
I installed Raspbian lite on the Pi, since we won't need fancy graphical stuff.
The serial works out of the box with a Raspberry Pi 2, but requires proper device tree overlay definitions for a Raspberry Pi 3 or more recent. In a nutshell, the Raspberry Pi features two UARTs, the internal mini UART (on /dev/ttyS0) and the more performant PL011 UART (on /dev/ttyAMA0). Starting from the Raspberry Pi 3, the PL011 UART is dedicated to Bluetooth instead of the serial console by default. The problem is, we need it because the mini UART does not support parity bits. Moreover, the mini UART baudrate is linked to the core frequency, so you have to disable the frequency governor in order to use it.
In that case, you have two configuration choices in /boot/config.txt:
- Swap UARTs with dtoverlay=pi3-miniuart-bt, lock the core frequency to 250MHz with core_freq=250, and modify /lib/systemd/system/hciuart.service to use the mini UART on ttyS0. This sacrifices performance but keeps Bluetooth usable.
- Disable Bluetooth entirely with dtoverlay=pi3-disable-bt and systemctl disable hciuart. This has the advantage of not degrading performance.
More info about this pitfall can be found in the official Raspberry Pi documentation.
When everything is put back together, the rear panel looks well integrated. It almost looks like a Minitel with Ethernet and USB ports!
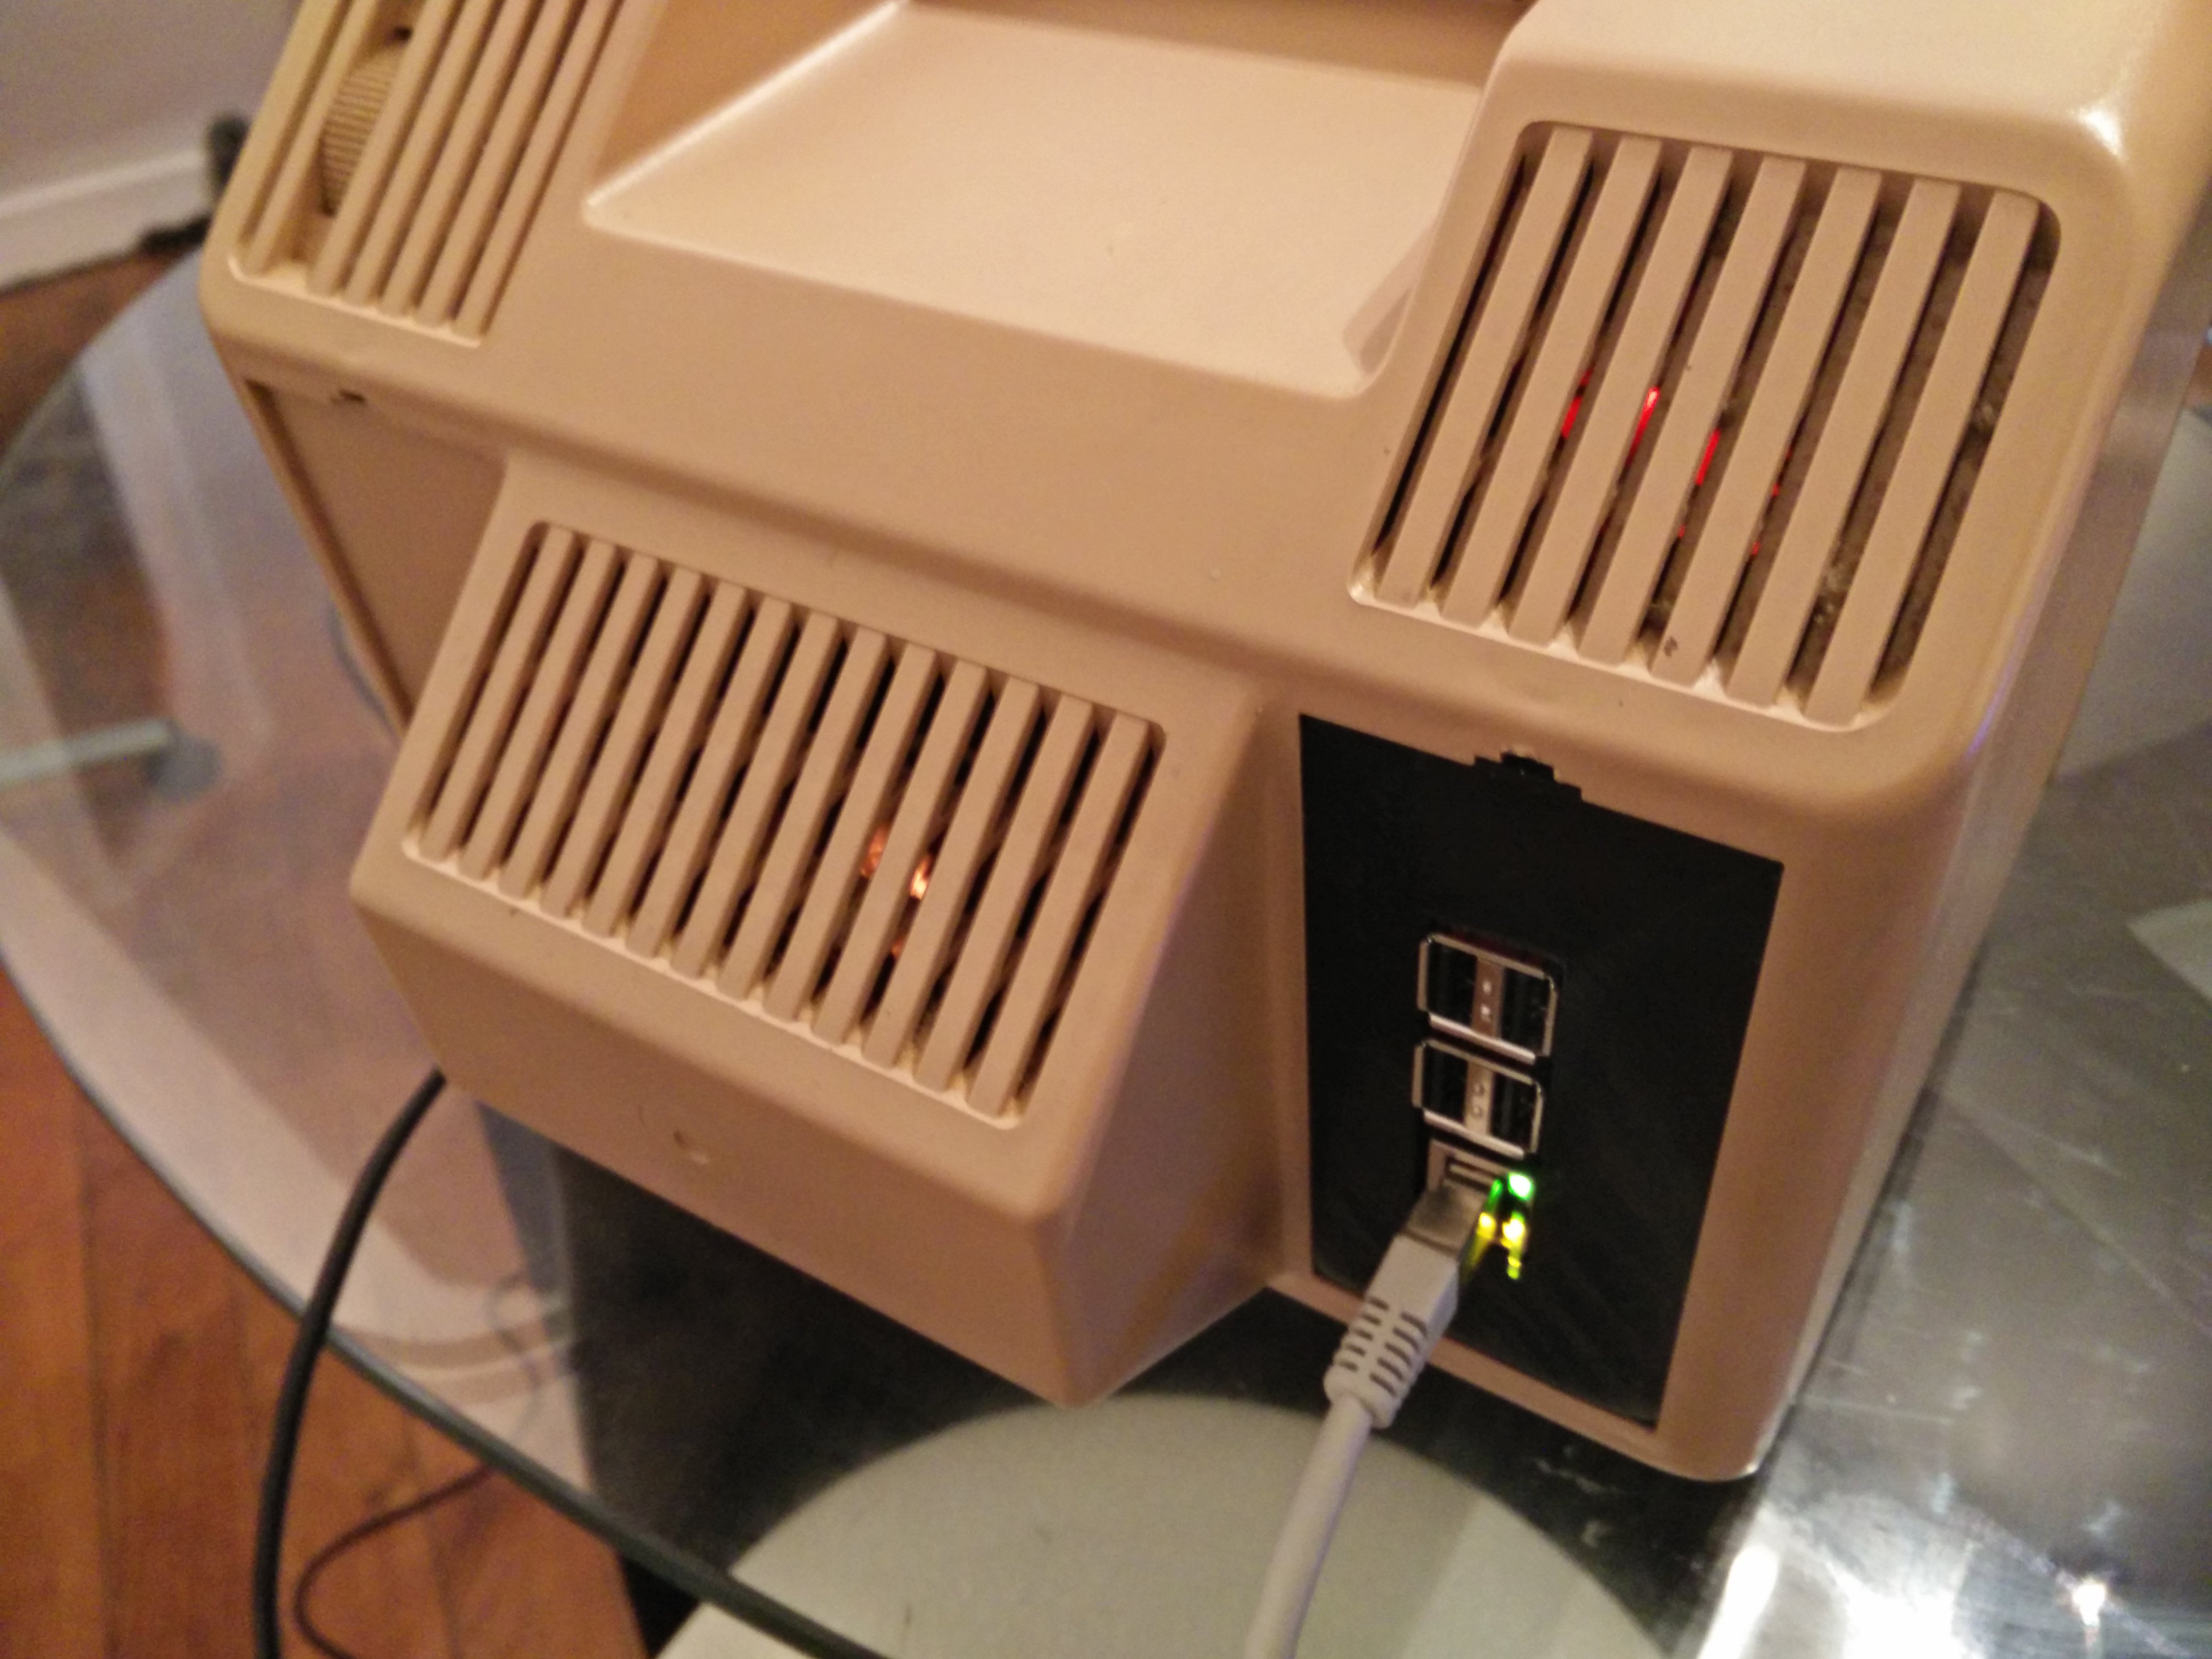
The rear panel when the Minitel is closed
For the Minitel to be operational immediately when turned on, we'll use the PyMinitel Python library by Frédéric Bisson (under GPLv3), which implements the proper protocol, to initialize the Minitel as needed:
- Set the baudrate to 4800bps (the maximum supported rate)
- Set the mode to mixed, aka "mixte", so the Minitel behaves as a VT100 terminal while still accepting commands (we need to disable echo)
- Set local echo off
- Set cursor visible
- Clear the screen, just to be sure
#!/usr/bin/env python3
# -*- coding: iso-8859-1 -*-

import sys
from minitel.Minitel import Minitel

port = sys.argv[1] if len(sys.argv) >= 2 else 'ttyAMA0'
baudrate = 4800

minitel = Minitel(peripherique = '/dev/'+port)
minitel.identifier()
minitel.definir_vitesse(baudrate)
minitel.definir_mode('MIXTE')
minitel.echo(False)
minitel.curseur(True)
minitel.efface()
The setup I previously used to configure the Minitel as a terminal was quite approximate, for instance it did not support displaying correctly some special characters like accents. Here, I chose a different approach here by writing an ad-hoc Python script to convert input and output, because the Minitel in mixed mode relies on a 7-bit ASCII table with escape sequences for some additional special characters.
Basically, the principle is to fork into a converter for input and a converter for output to implement a bidirectional terminal converter between the Minitel TTY and another TTY where a user shell is launched.
Just like my previous setup, the dedicated terminfo file mntl.ti written by Alexandre Montaron is required. It allows setting the TERM environment variable to m1b-x80 for model 1B in 80-column mode. It can be installed with tic:
$ wget http://canal.chez.com/mntl.ti
$ tic mntl.ti
Of course a lot of characters are not available on the Minitel, therefore I had to rely on placeholders, in particular for the majority of accentuated characters.
The script expects the output from the shell to use the ISO-8859-1 charset, but also supports ISO-8859-15 , and features some tweaks for Windows-1252 (especially the euro sign). The last one is necessary if you want to properly display websites with a text-mode browser like Lynx, because some websites made on Windows wrongly declare the encoding as ISO-8859-1 when it is actually the legacy Windows-1252 from Microsoft. Don't try to display UTF-8 with the script as it won't work!
#!/usr/bin/env python3
# -*- coding: iso-8859-1 -*-

"""
Minitel 1B terminal converter
Copyright (C) 2016 Paul-Louis Ageneau

This program is free software: you can redistribute it and/or modify it under
the terms of the GNU General Public License as published by the Free Software
Foundation, either version 3 of the License, or (at your option) any later
version.

This program is distributed in the hope that it will be useful, but WITHOUT
ANY WARRANTY; without even the implied warranty of MERCHANTABILITY or FITNESS
FOR A PARTICULAR PURPOSE. See the GNU General Public License for more details.

You should have received a copy of the GNU General Public License along with
this program. If not, see <http://www.gnu.org/licenses/>.
"""

import sys, os, subprocess, ctypes

port = sys.argv[1] if len(sys.argv) >= 2 else 'ttyAMA0'
user = sys.argv[2] if len(sys.argv) >= 3 else 'pi'
minitel = '/dev/'+port
term = 'm1b-x80'
lang = 'fr_FR.ISO-8859-1'
baudrate = 4800

# Character output conversion table
conv = {}

for i in range(0xC0, 0xC6):
    conv[i] = b'A'
for i in range(0xC8, 0xCC):
    conv[i] = b'E'
for i in range(0xCC, 0xD0):
    conv[i] = b'I'
for i in range(0xD2, 0xD7):
    conv[i] = b'O'
for i in range(0xD9, 0xDD):
    conv[i] = b'U'
for i in range(0xE0, 0xE6):
    conv[i] = b'a'
for i in range(0xE8, 0xEC):
    conv[i] = b'e'
for i in range(0xEC, 0xF0):
    conv[i] = b'i'
for i in range(0xF2, 0xF7):
    conv[i] = b'o'
for i in range(0xF9, 0xFD):
    conv[i] = b'u'

conv[0xC6] = b'AE'
conv[0xC7] = b'C'
conv[0xD0] = b'D'
conv[0xD1] = b'N'
conv[0xD7] = b'*'
conv[0xD8] = b'O'
conv[0xDD] = b'Y'
conv[0xDE] = b'TH'
conv[0xDF] = b'ss'
conv[0xE6] = b'ae'
conv[0xE7] = b'c'
conv[0xF0] = b'd'
conv[0xF1] = b'n'
conv[0xF7] = b'/'
conv[0xF8] = b'o'
conv[0xFD] = b'y'
conv[0xFE] = b'th'
conv[0xFF] = b'y'

conv[0xA0] = b' '  # non-breakable space
conv[0xA2] = b'c'  # cent sign
conv[0xA3] = b'L'  # pound sterling sign
conv[0xA5] = b'Y'  # yen sign
conv[0xAB] = b'"'  # opening guillemet
conv[0xBB] = b'"'  # closing guillemet
conv[0xAC] = b'-'  # negation sign
conv[0xB2] = b'^2' # square sign
conv[0xB3] = b'^3' # cube sign
conv[0xB9] = b'^1'

# Windows-1252 specific
conv[0x80] = b'E'  # euro sign
conv[0x8C] = b'OE'
conv[0x9C] = b'oe'

# ISO-8859-15 specific
conv[0xA4] = b'E'  # euro sign
conv[0xA6] = b'S'
conv[0xA8] = b's'
conv[0xB4] = b'Z'
conv[0xB8] = b'z'
conv[0xBC] = b'OE'
conv[0xBD] = b'oe'
conv[0xBE] = b'Y'

# Special characters
conv[0xE0] = b'\x0E\x40\x0F' # small a grave
conv[0xE8] = b'\x0E\x7D\x0F' # small e grave
conv[0xE9] = b'\x0E\x7B\x0F' # small e acute
conv[0xF9] = b'\x0E\x7C\x0F' # small u grave
conv[0xE7] = b'\x0E\x5C\x0F' # small c cedilla
conv[0xB0] = b'\x0E\x5B\x0F' # degree sign
conv[0xBA] = b'\x0E\x5B\x0F' # ordinal indicator
conv[0xA3] = b'\x0E\x23\x0F' # pound sterling sign
conv[0xA7] = b'\x0E\x5D\x0F' # section sign

# Special keys (0x13) conversion table
buttons = {}
buttons[0x41] = b'\x1BOM' # ENVOI
buttons[0x42] = b'\x1BOR' # RETOUR
buttons[0x43] = b'\x1BOS' # REPETITION
buttons[0x44] = b'\x1BOm' # GUIDE
buttons[0x45] = b'\x1BOQ' # ANNULATION
buttons[0x46] = b'\x1BOP' # SOMMAIRE
buttons[0x47] = b'\x1BOl' # CORRECTION
buttons[0x48] = b'\x1BOn' # SUITE

# Open a TTY for the user shell
master, slave = os.openpty()
ttyname = os.ttyname(slave)
os.chmod(ttyname, 0o666)
print(ttyname)

# Configure the TTY to the Minitel
os.system('stty -F "{}" {} istrip cs7 parenb -parodd brkint \
ignpar icrnl -ixon ixany -opost cread hupcl isig cbreak min 1 \
-echo echoe echok'.format(minitel, baudrate))

# Run a shell for the specified user
libc = ctypes.CDLL('libc.so.6')
p = subprocess.Popen(['bash', '-c', 'export TERM="{}"; export LANG="{}"; while true; do clear; cd "{}"; runuser -l "{}"; sleep 1; done'.format(term, lang, '/home/'+user, user)], stdin=slave, stdout=slave, stderr=slave, bufsize=0, preexec_fn=libc.setsid)

pid = os.fork()
if pid:
    w = os.fdopen(master, 'wb', 0)
    r = open(minitel, 'rb', 0)
    while 1:
        c = r.read(1)
        if len(c) == 0:
            break
        if ord(c) == 0x03 or ord(c) == 0x18: # divert ctrl-C and ctrl-X and send SIGINT
            try:
                fgid = int(subprocess.check_output(['ps', 'h', '-t', ttyname, '-o', 'tpgid']).decode(sys.stdout.encoding).split('\n')[0])
                subprocess.call(['kill', '-INT', '-'+str(fgid)])
            except Exception as e:
                print(e)
            continue
        elif ord(c) == 0x13: # Special buttons in mixed mode
            c = r.read(1)
            if not ord(c) in buttons:
                continue
            c = buttons[ord(c)]
        w.write(c)
        w.flush()
else:
    r = os.fdopen(master,  'rb', 0)
    w = open(minitel, 'wb', 0)
    while 1:
        c = r.read(1)
        if len(c) == 0:
            break
        if ord(c) in conv:
            c = conv[ord(c)]
        elif ord(c) >= 0xA0:
            c = b' ' # placeholder
        elif ord(c) >= 0x80:
            continue
        w.write(c)
        w.flush()
Finally, we need to run both scripts as root sequentially at startup, for instance from /etc/rc.local:
/root/init.py ttyAMA0       # Minitel initialization
/root/tty.py ttyAMA0 pi &   # Minitel terminal converter
exit 0
Then when we turn on the Minitel, after a few seconds... we get a prompt!
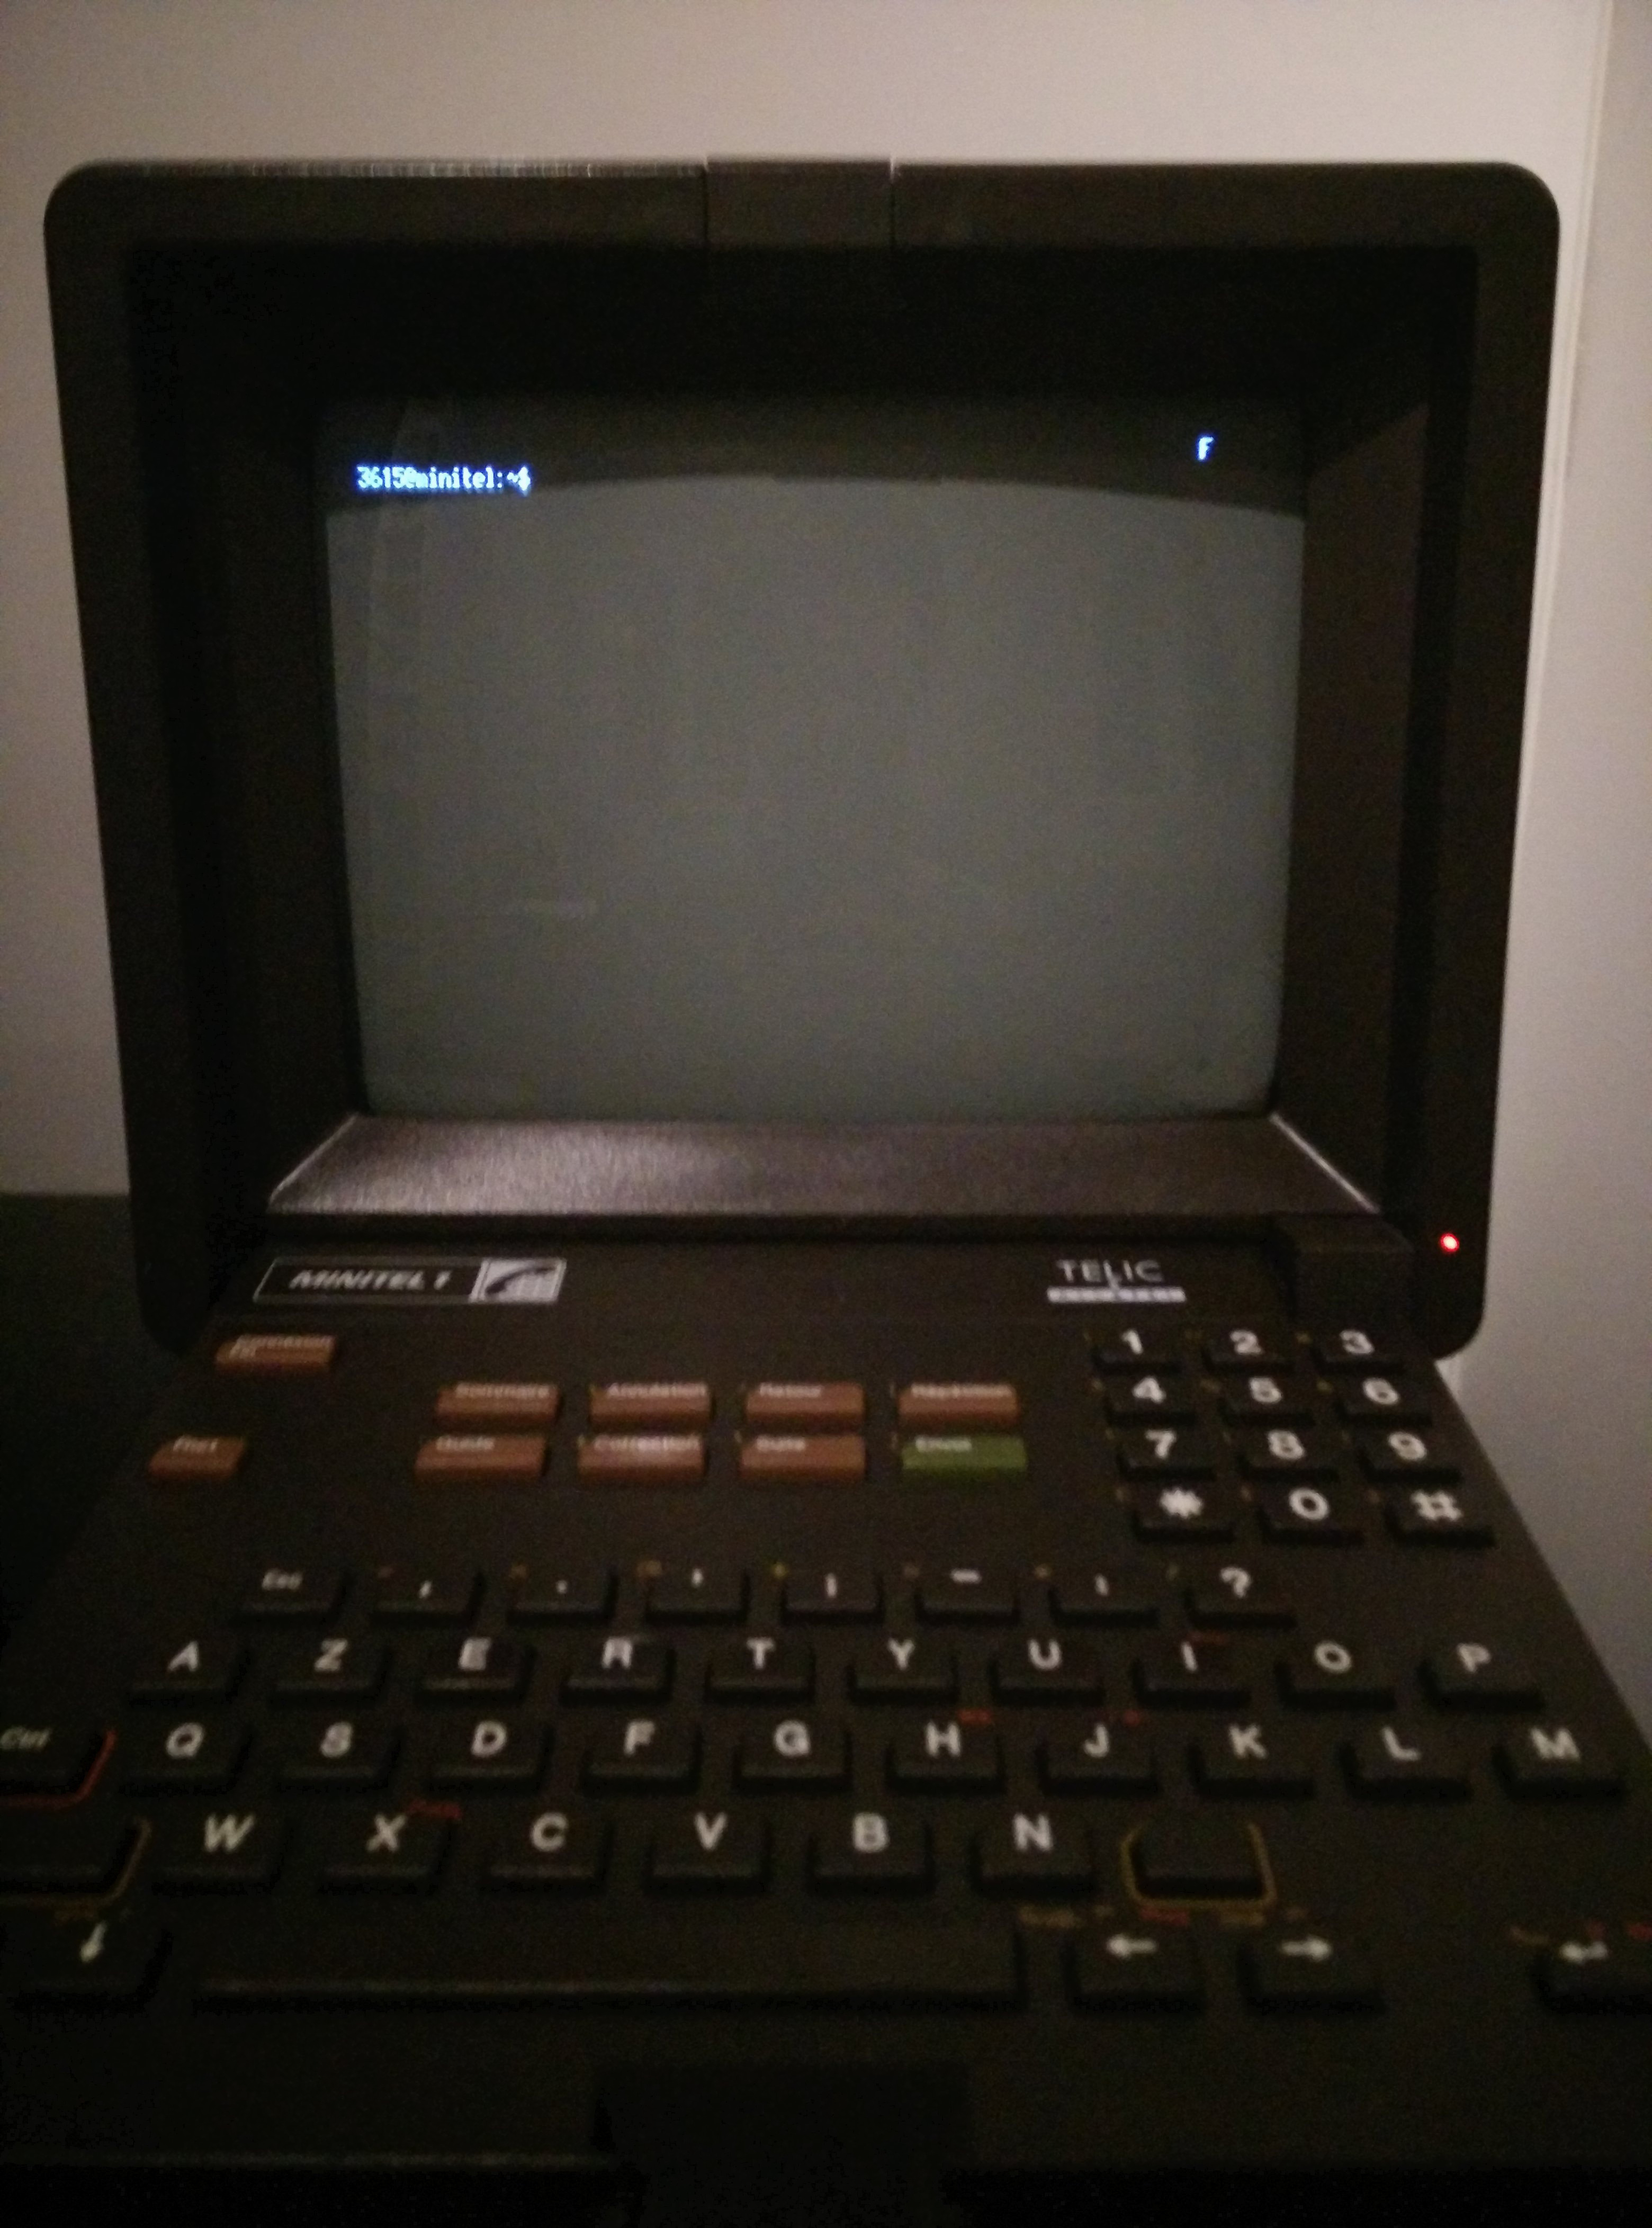
A wild prompt appears! It's even funnier if the user is 3615 ;)
Let's surf the Web with Lynx. Guaranteed without ads or JavaScript bloat.
Hurray for the Minitel 2.0!
Now, what about going deeper down the rabbit hole and replacing the screen with a modern LCD one? See my High-Tech Minitel article!

