The Bob robot, itself remixed from the Arduped robot, inspired an impressive number of clones with its really good design.
The most famous ones might be Zowi, and more recently Otto. They are both simple, cheap, open-source and 3D-printed little robots which have refined Bob two-legged design.
Yet, I am not a fan of their strange square heads. What I would like is a teapot. A dancing teapot.
I chose to design 3D-printed parts from scratch, not only because I prefer to use OpenSCAD over FreeCAD, but also because the design of the top part will be entierly different anyway. Also, for once, it will be powered by a 9-volt alkaline battery rather than a lipo battery.
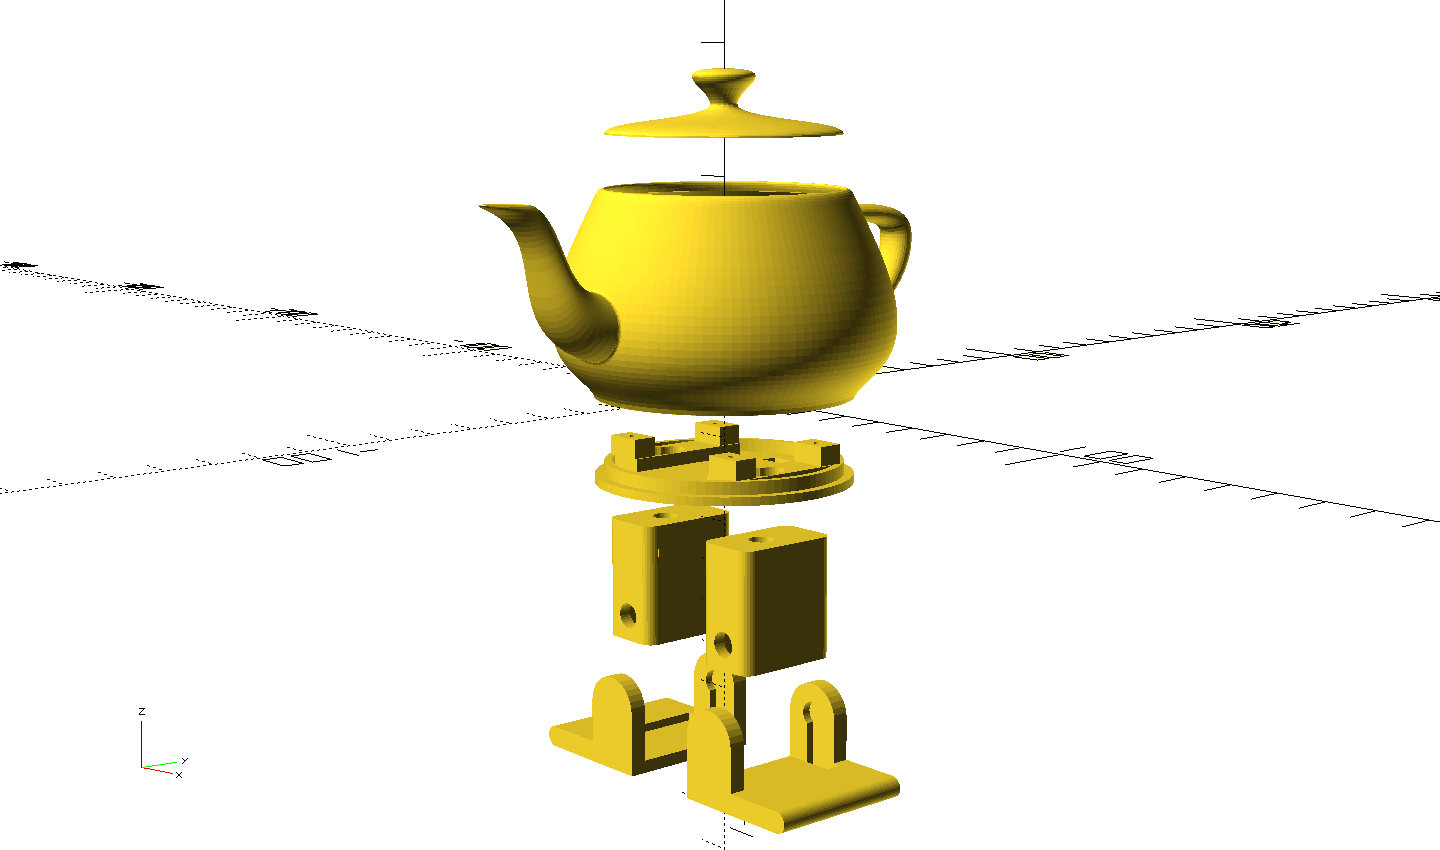
3D models forming the robotic teapot
You can download the SCAD source files (licensed under GPLv3) and the corresponding STL files here or on my GitHub repository. I printed them with white PLA, not the fanciest color but the perfect one for a teapot.
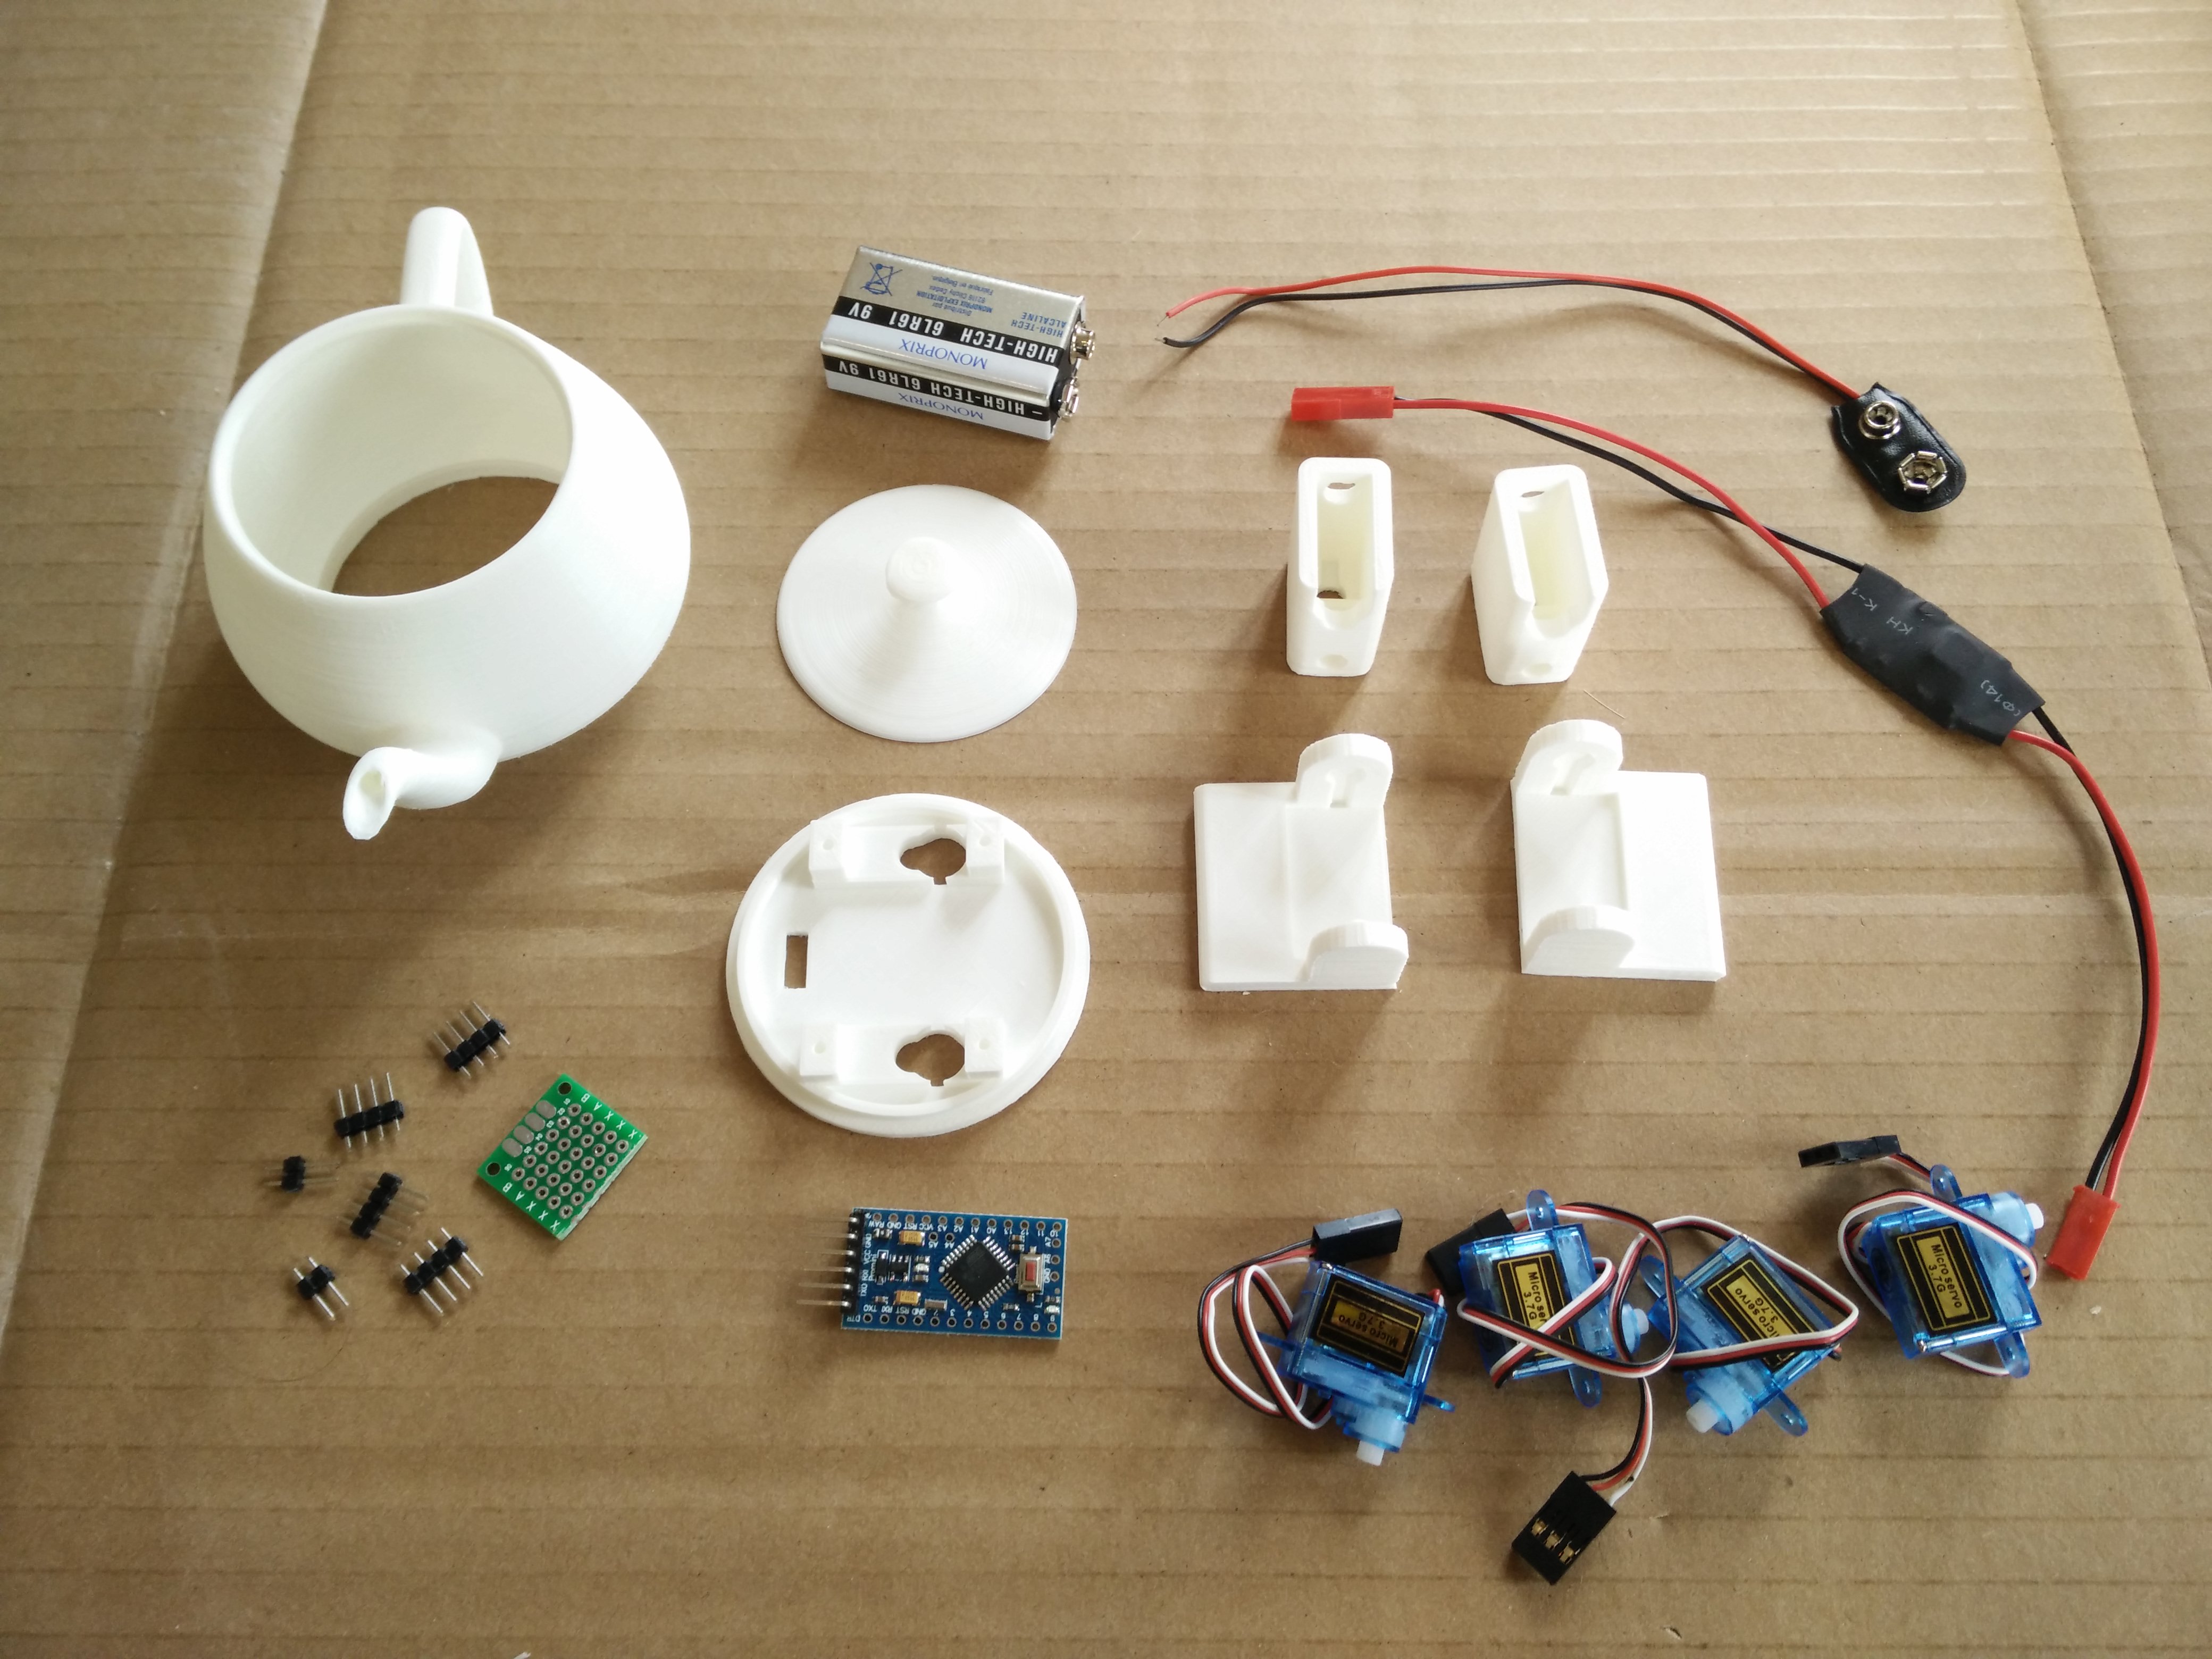
The components are ready to assemble
You might have recognized the shape of the famous Utah teapot! However, this is a subdivided and smoother model since the original is low-poly.
I'll use the following components:
- A 5-volt Arduino Pro Mini board (a compatible clone is fine)
- A 5-volt switching regulator, also called UBEC in the hobbyist world. Don't use a linear regulator, as it would be really inefficient here.
- Four 3.7g micro servos, H301 or compatible
- A 9-volt battery connector (with of course a 9-volt battery)
- A USB to UART bridge to program the robot
- Dupont wires, M2 screws, pins, prototype board, and glue
- Optional: A piezo sounder to play music
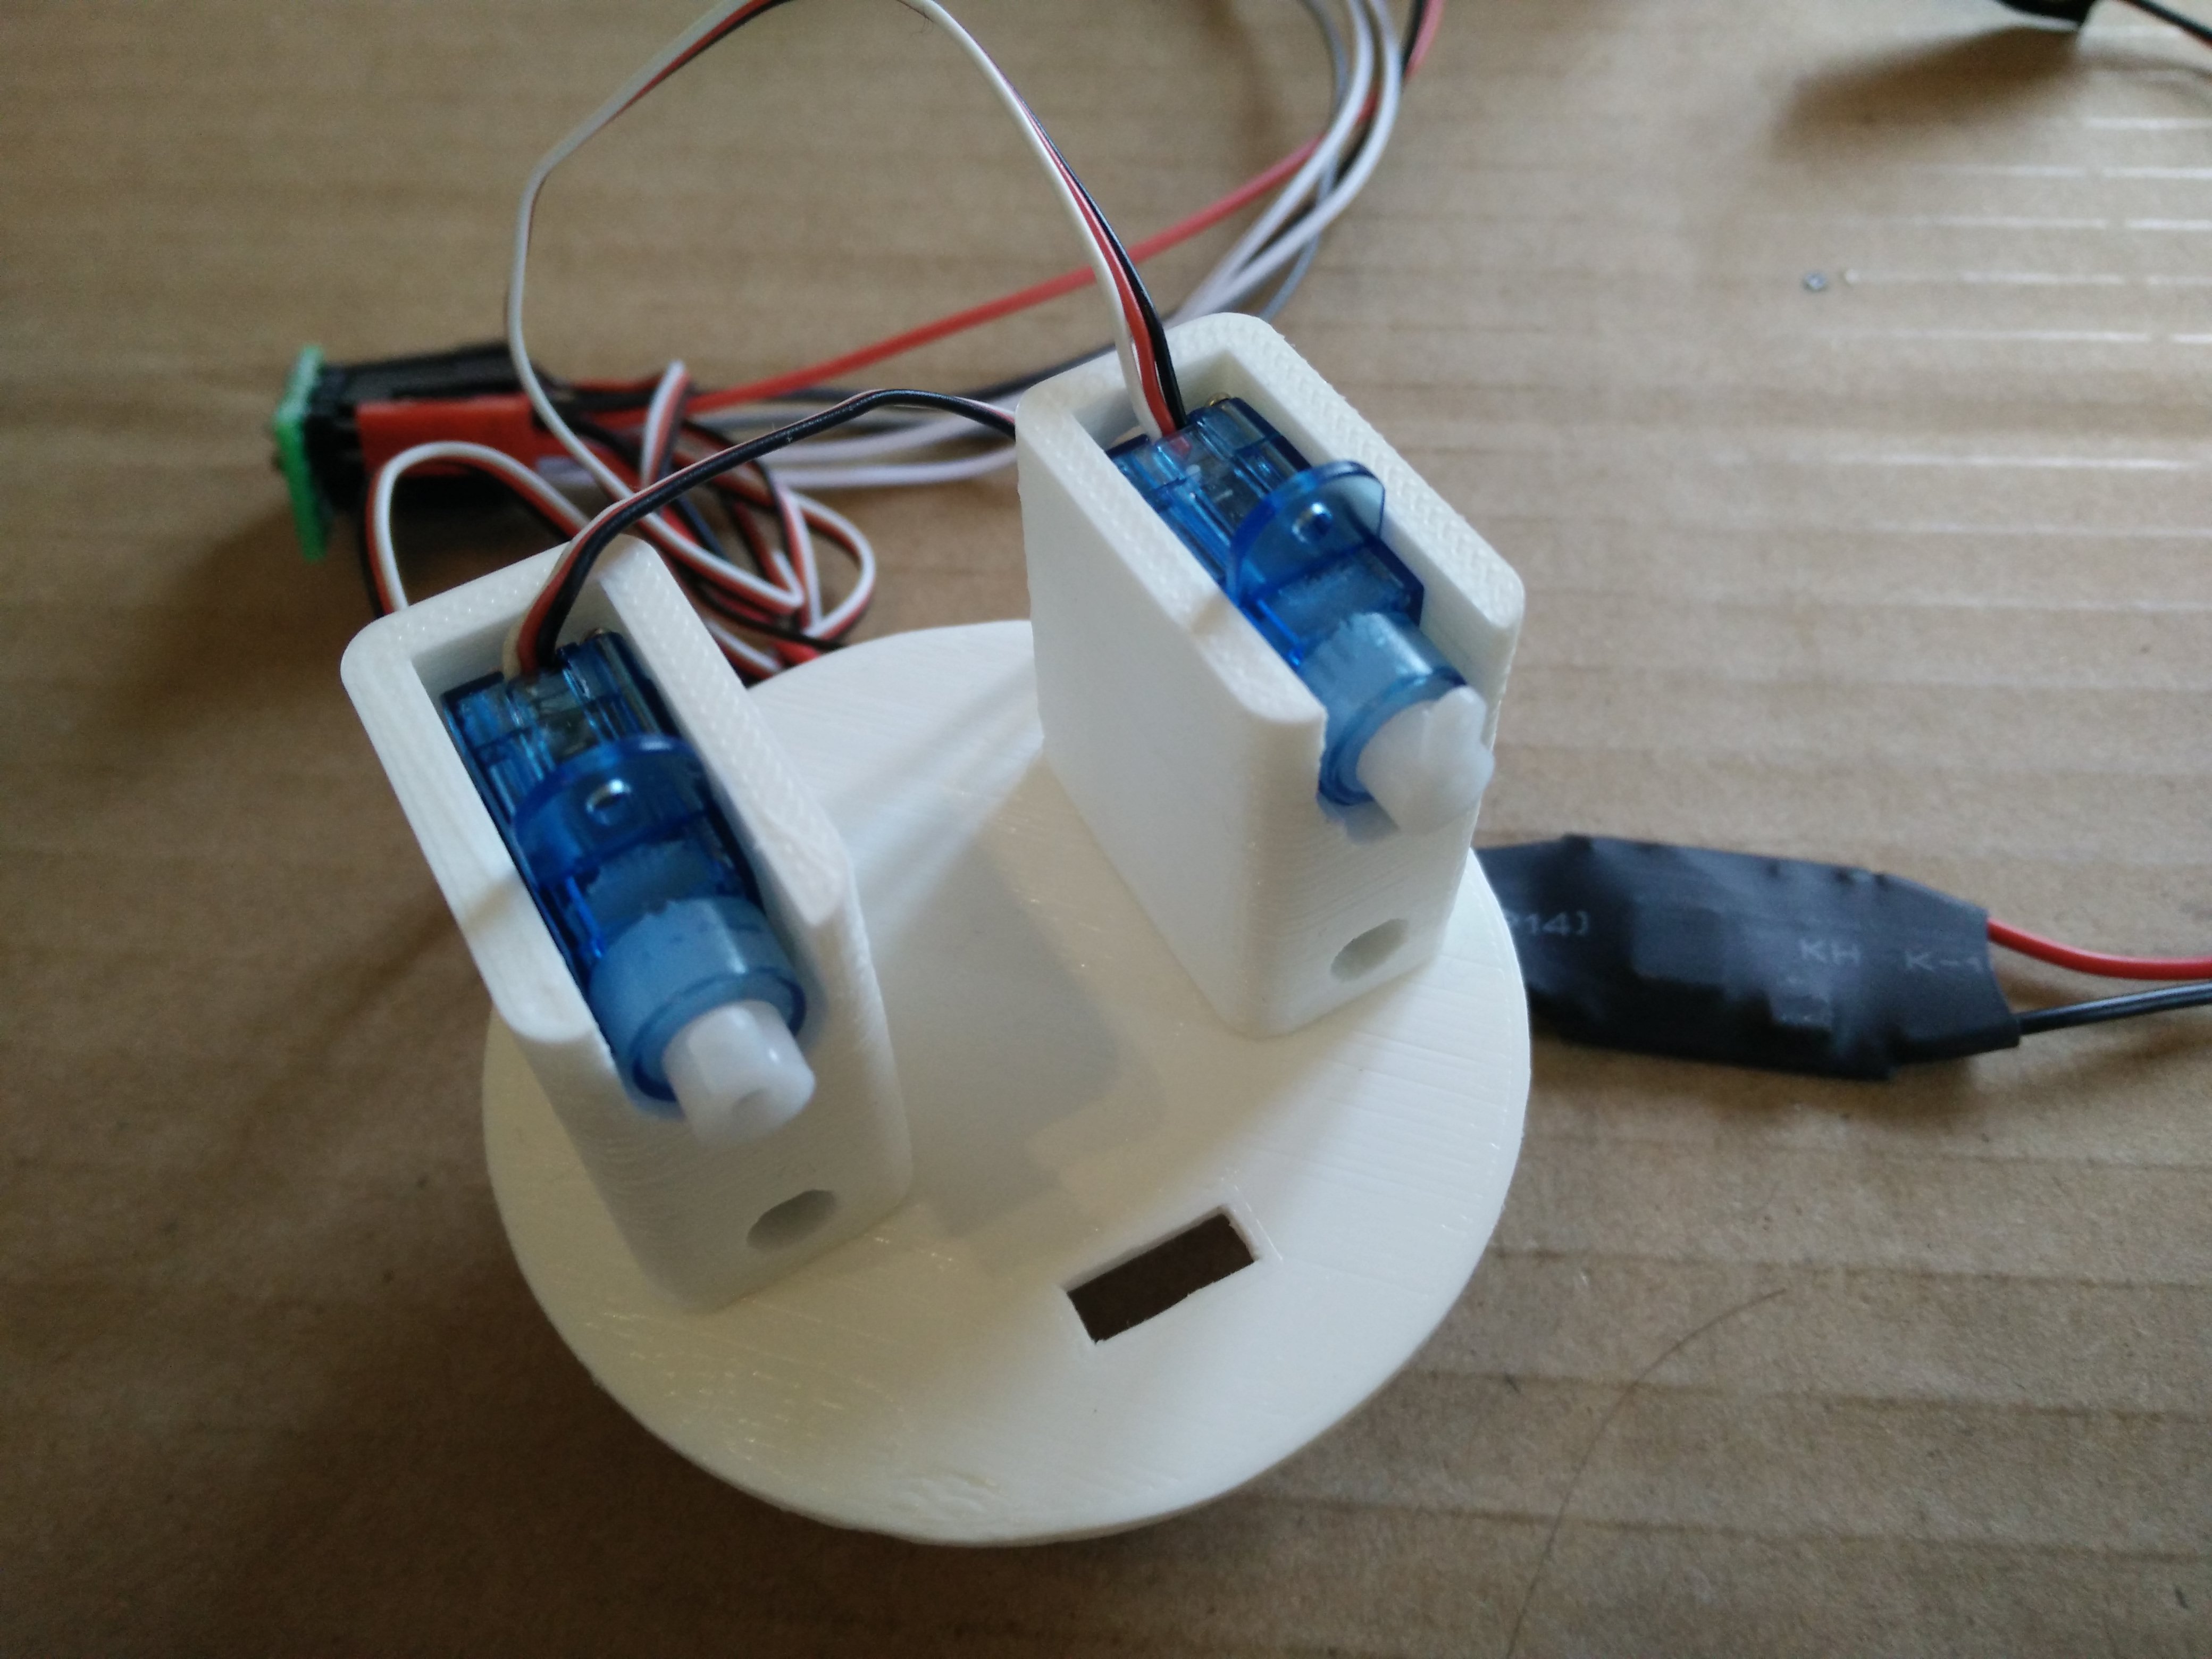
The first step is to screw the two hip servos on top of the platform.
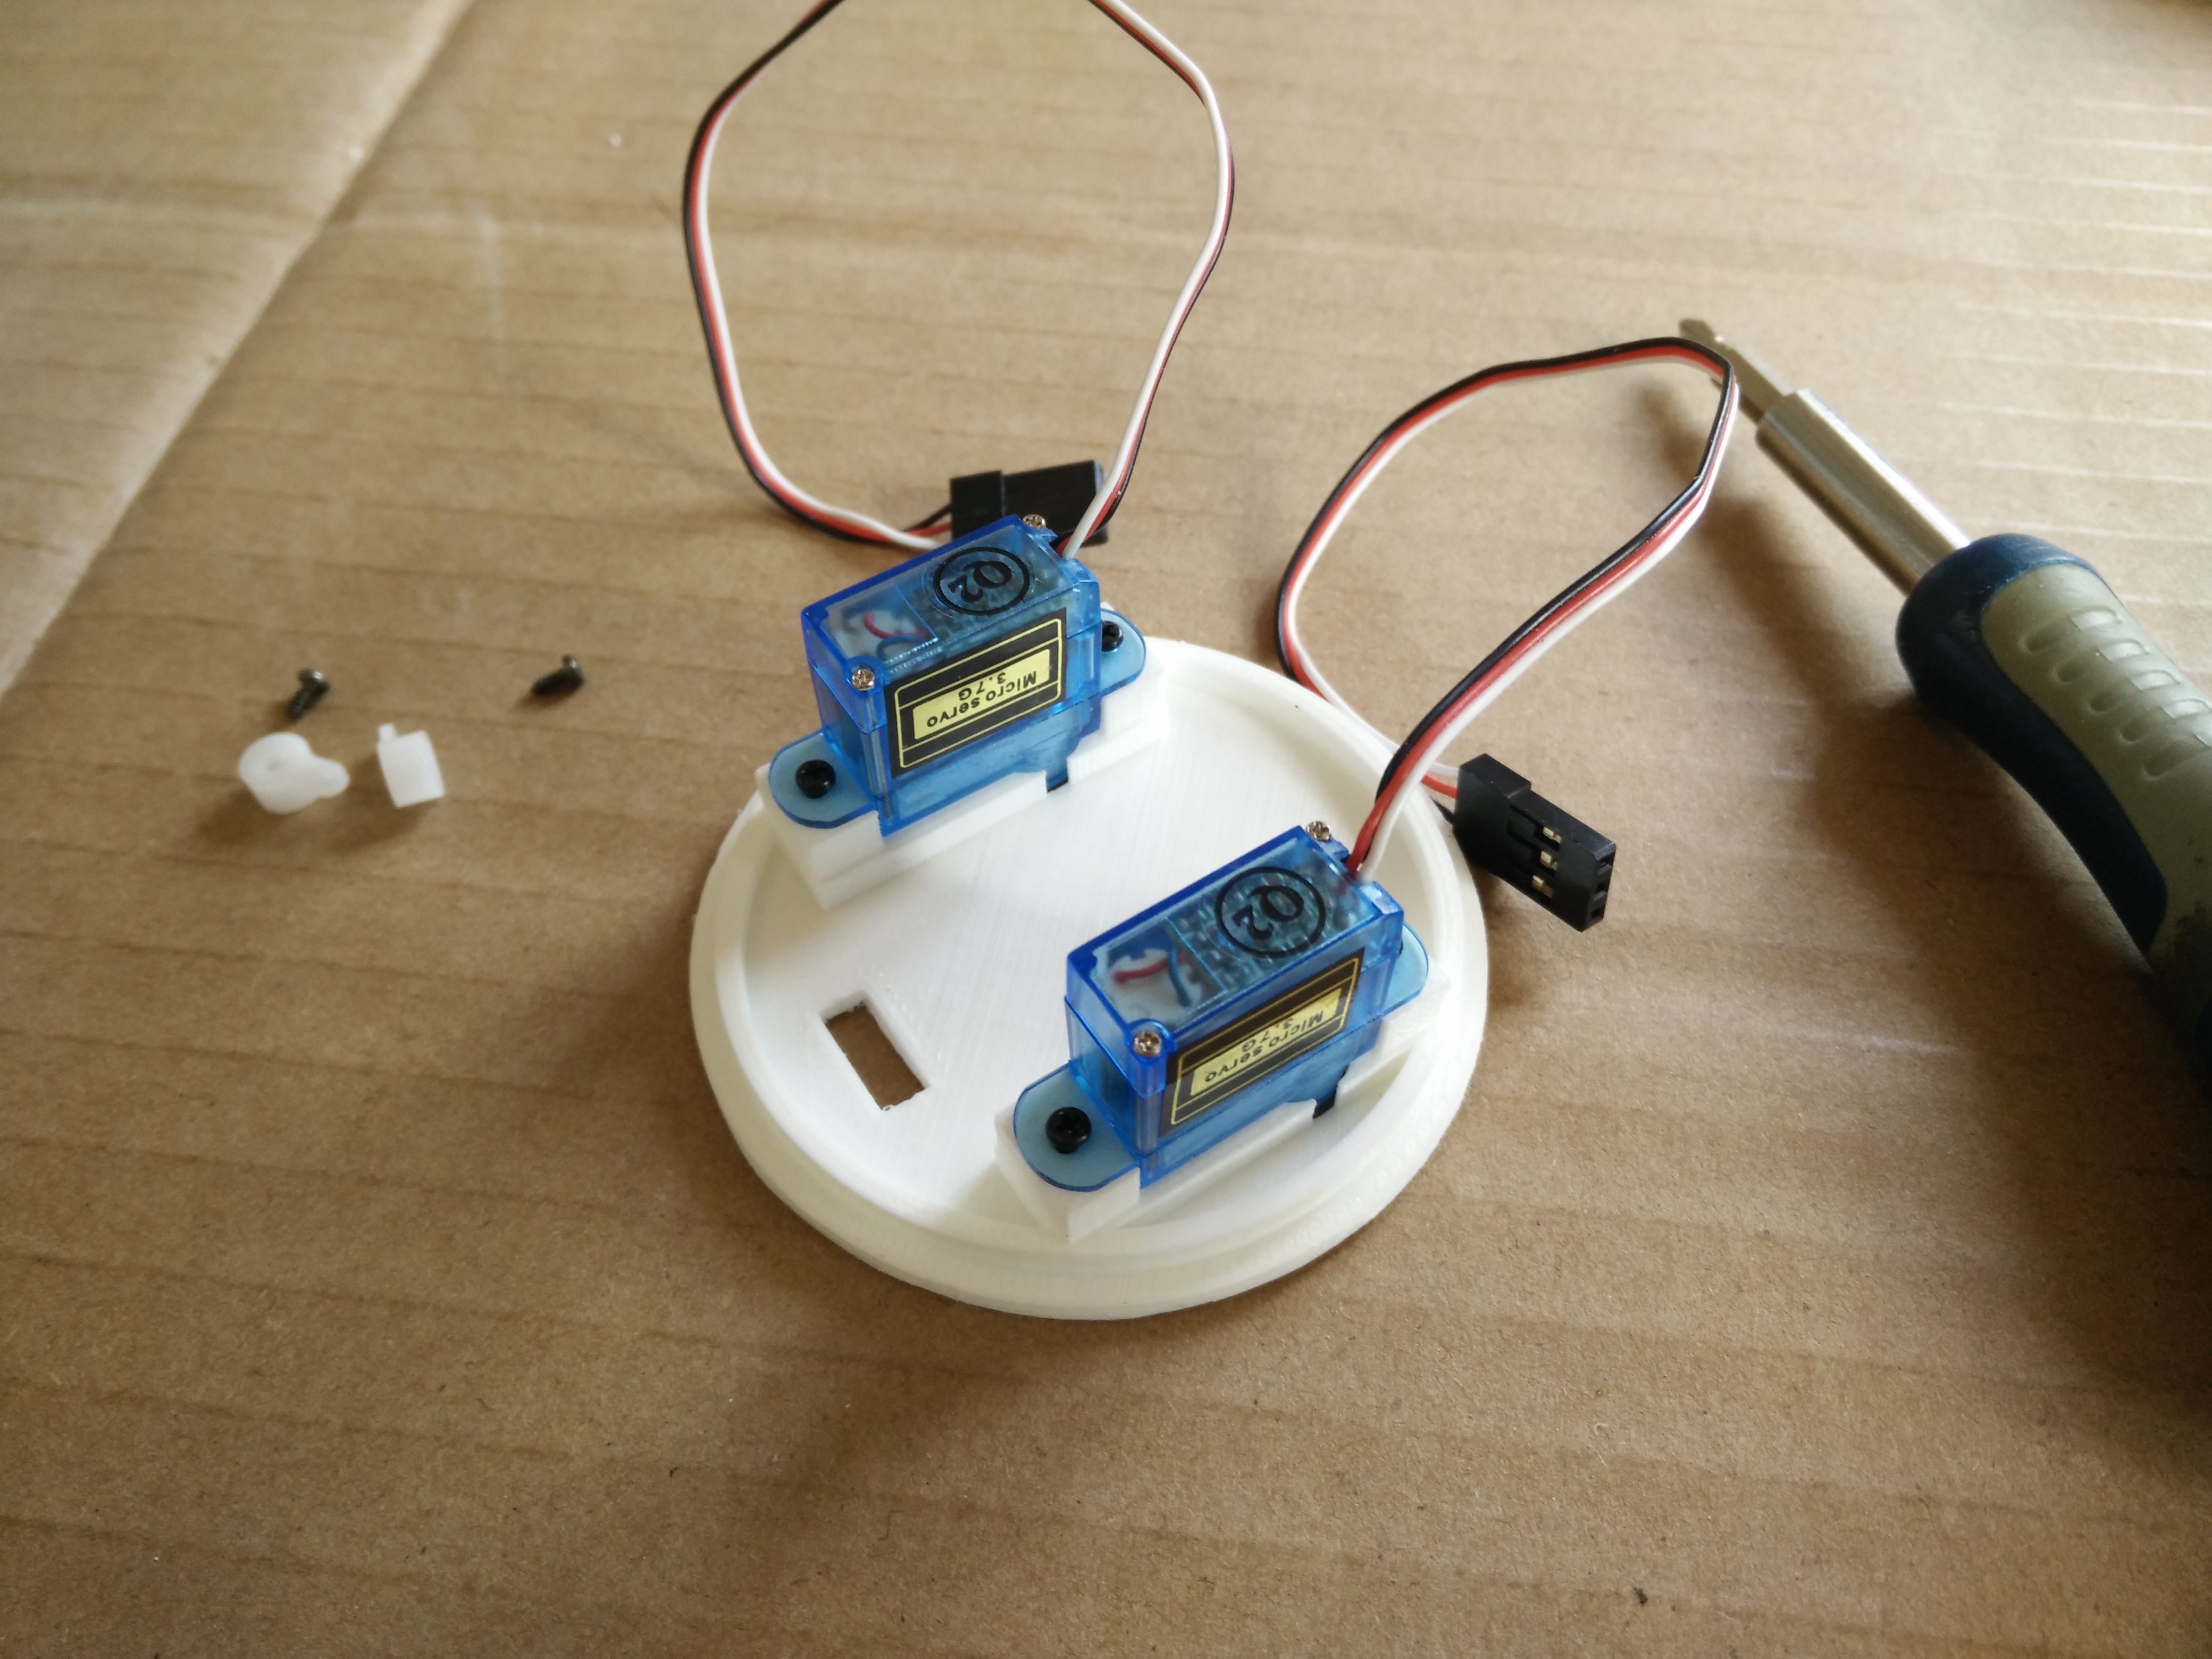
The hip joint servos attached to the platform
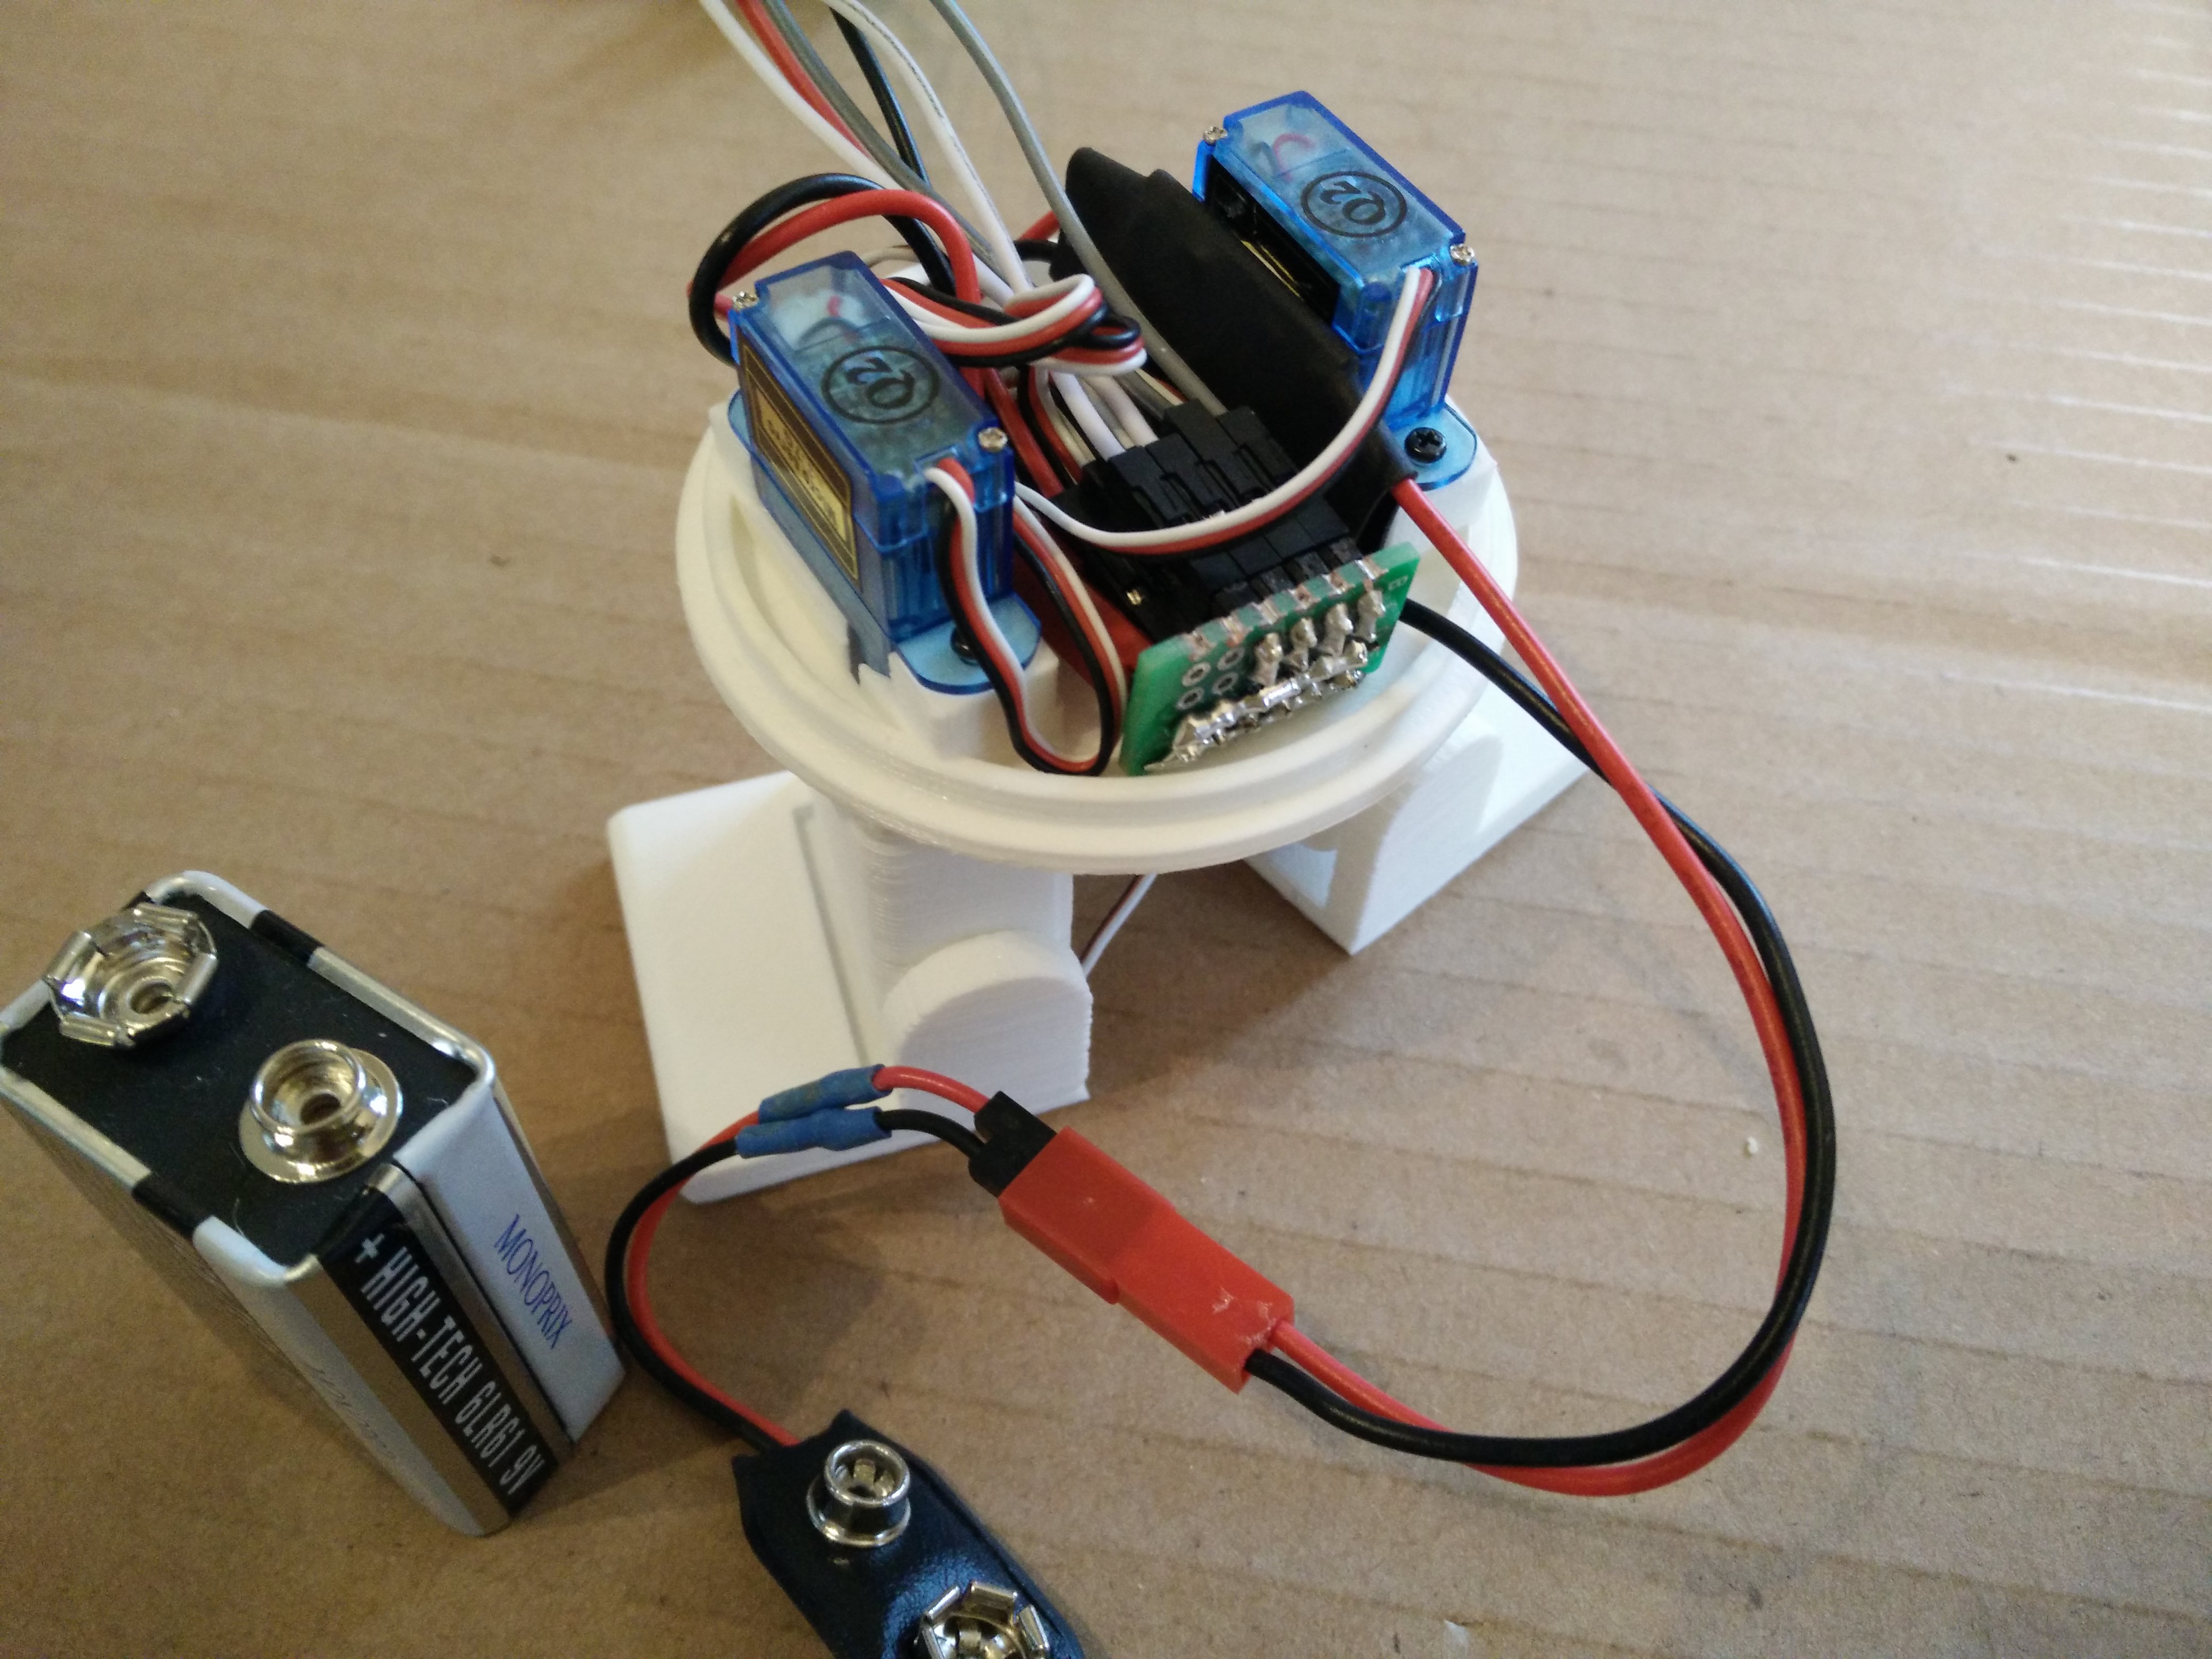
Then, I soldered a small power distribution board with a piece of prototype board and some pins. The servos are connected and powered with the voltage regulator. The signal pins of the servos will be connected to the Arduino pins 5, 6, 7, and 8. The Arduino board power is also connected to this board.

One of the servos connected to the power distribution board
Next, the two legs are attached to the hip servos. The servo arm is clipped inside each leg then screwed, maintaining the leg in position. A drop of oil helps the legs rotate smoothly against the body.

Legs connected to the body
Then, the ankle servos are placed in the legs and secured with M2 screws on the top part of the leg, and foots are simply clipped to the ankles!
Ankle servos placed in the legs

Foots clipped to the ankles
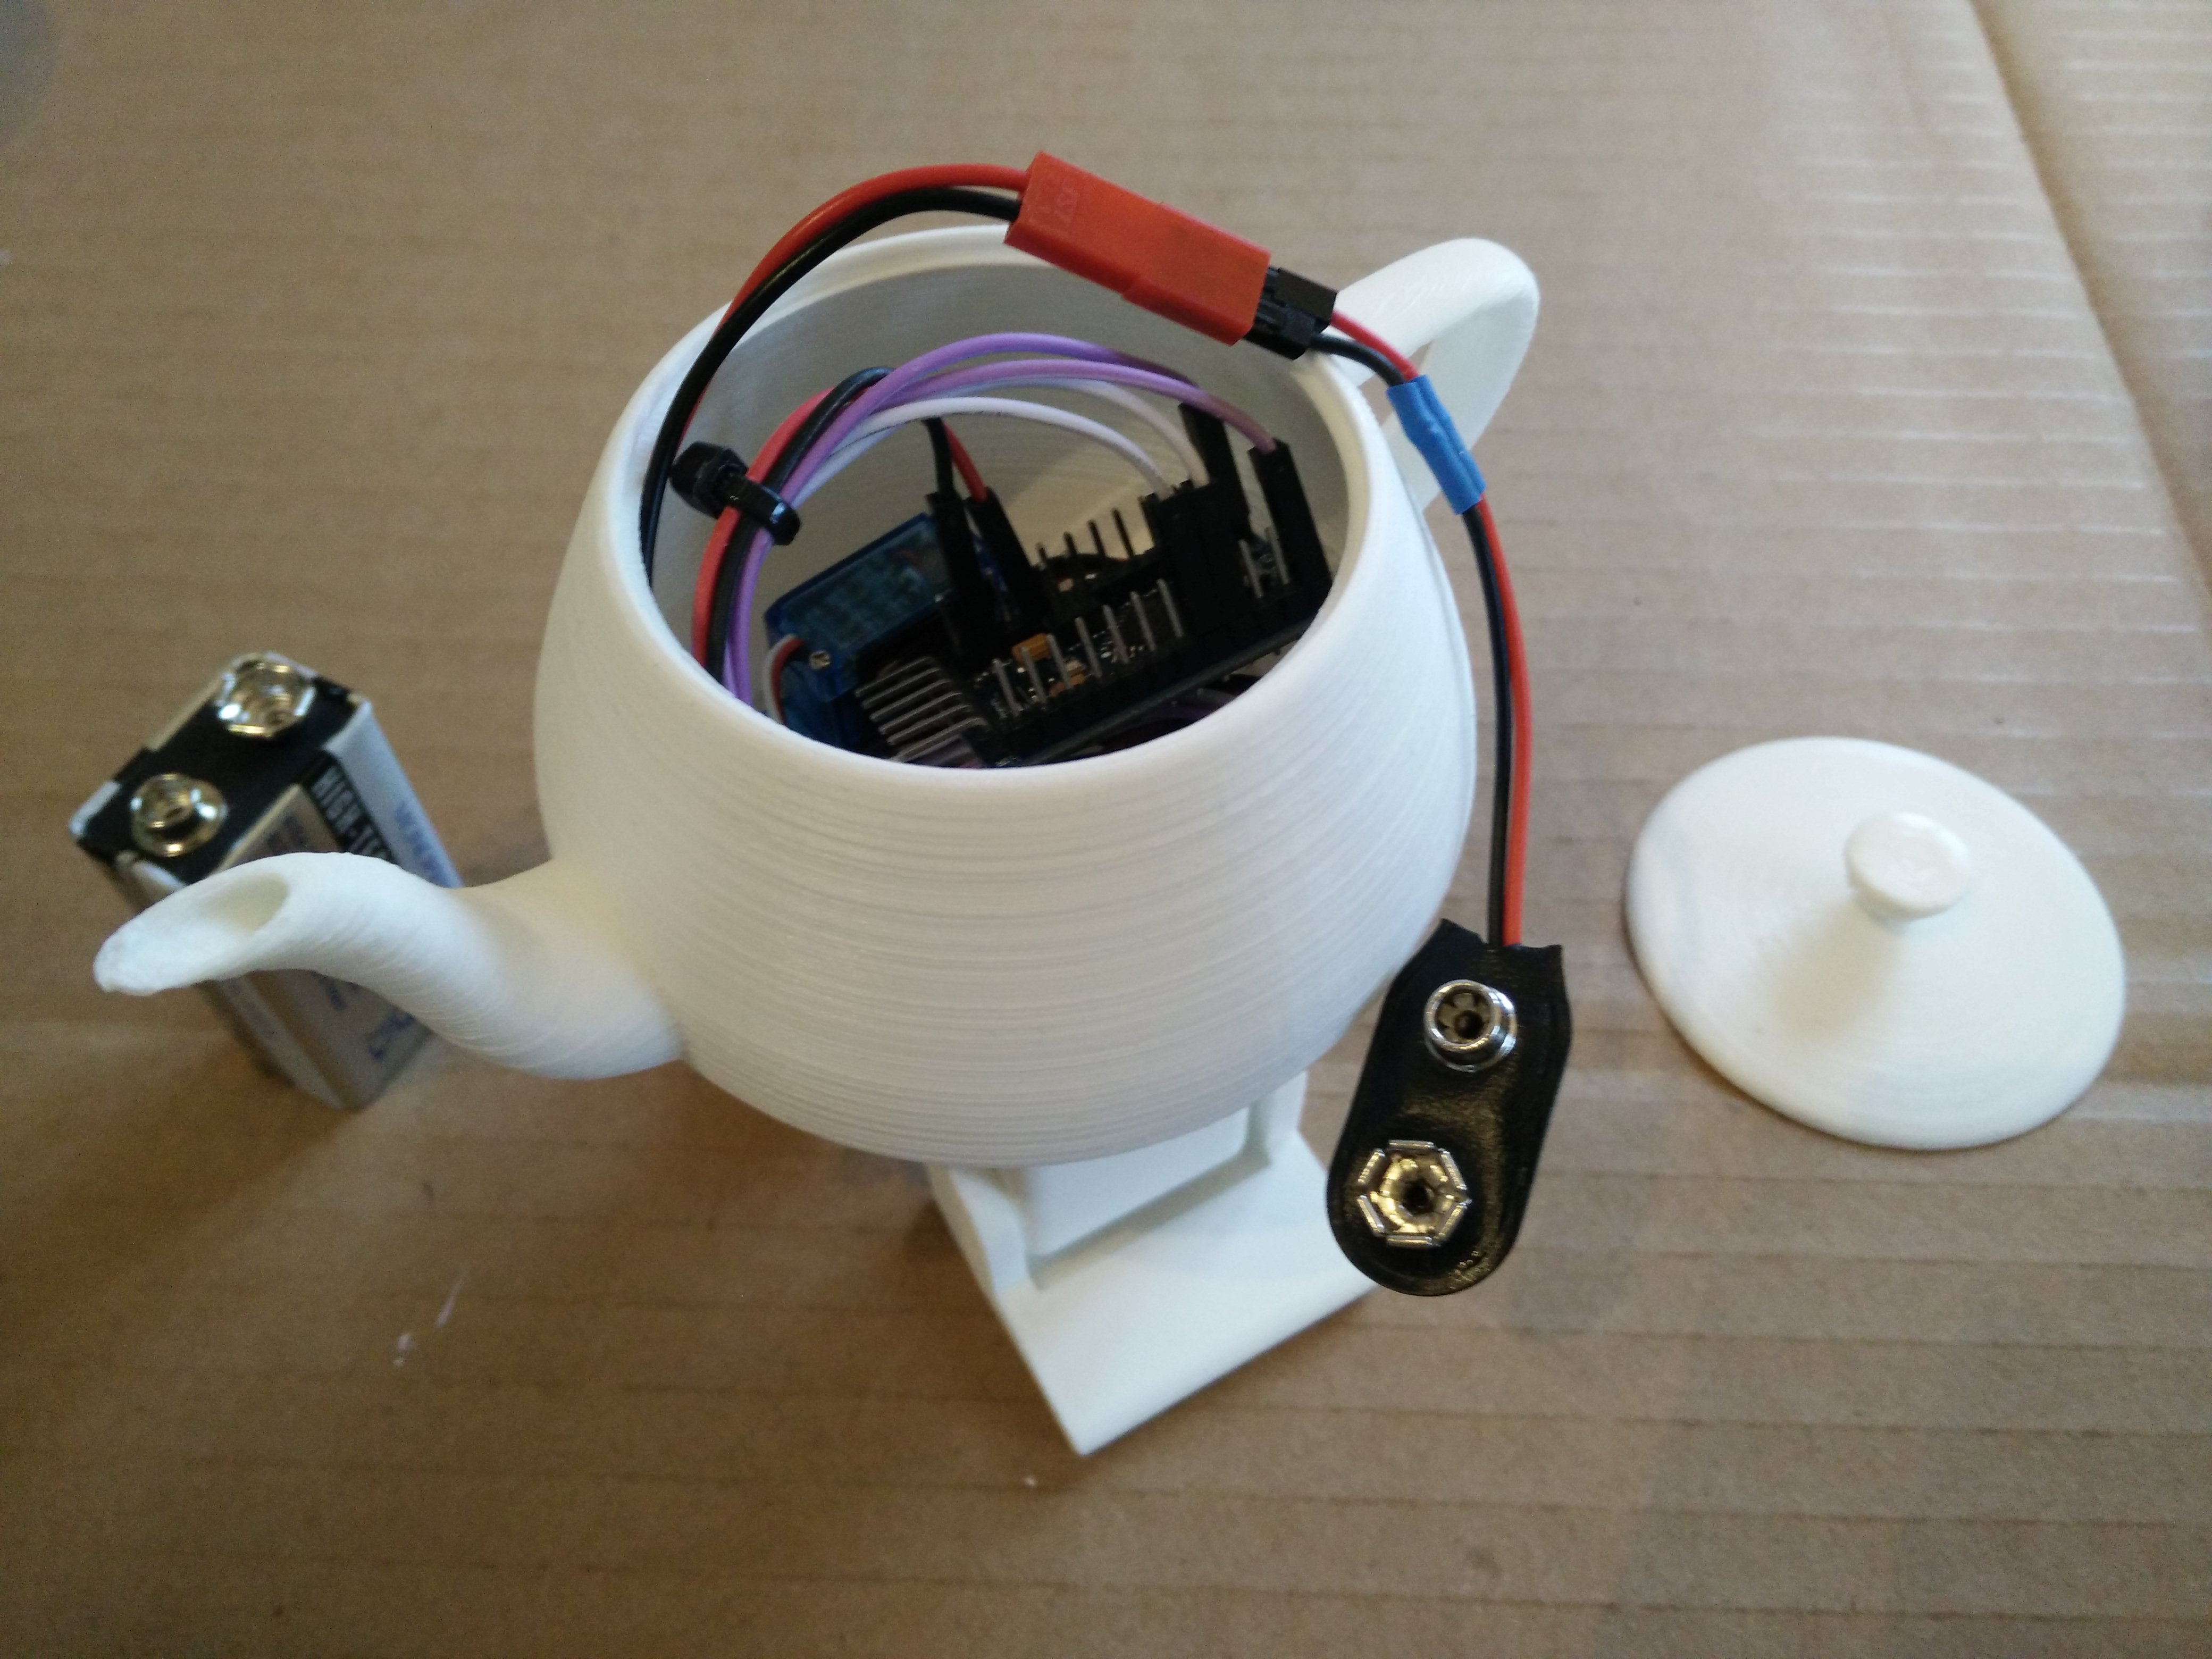
To prevent a complete cable mess, I tried to attach the electronics to the platform with sticky tack and clamping rings.
Electronics attached on the platform
The teapot-shaped top is put onto the platform and glued. Everything should fit nicely inside of it. The 9-volt battery connector, soldered to the voltage regulator, is ready to host the battery.
Arduino board connected and body glued on the platform
Finally, the last touch: the lid is clipped on top!
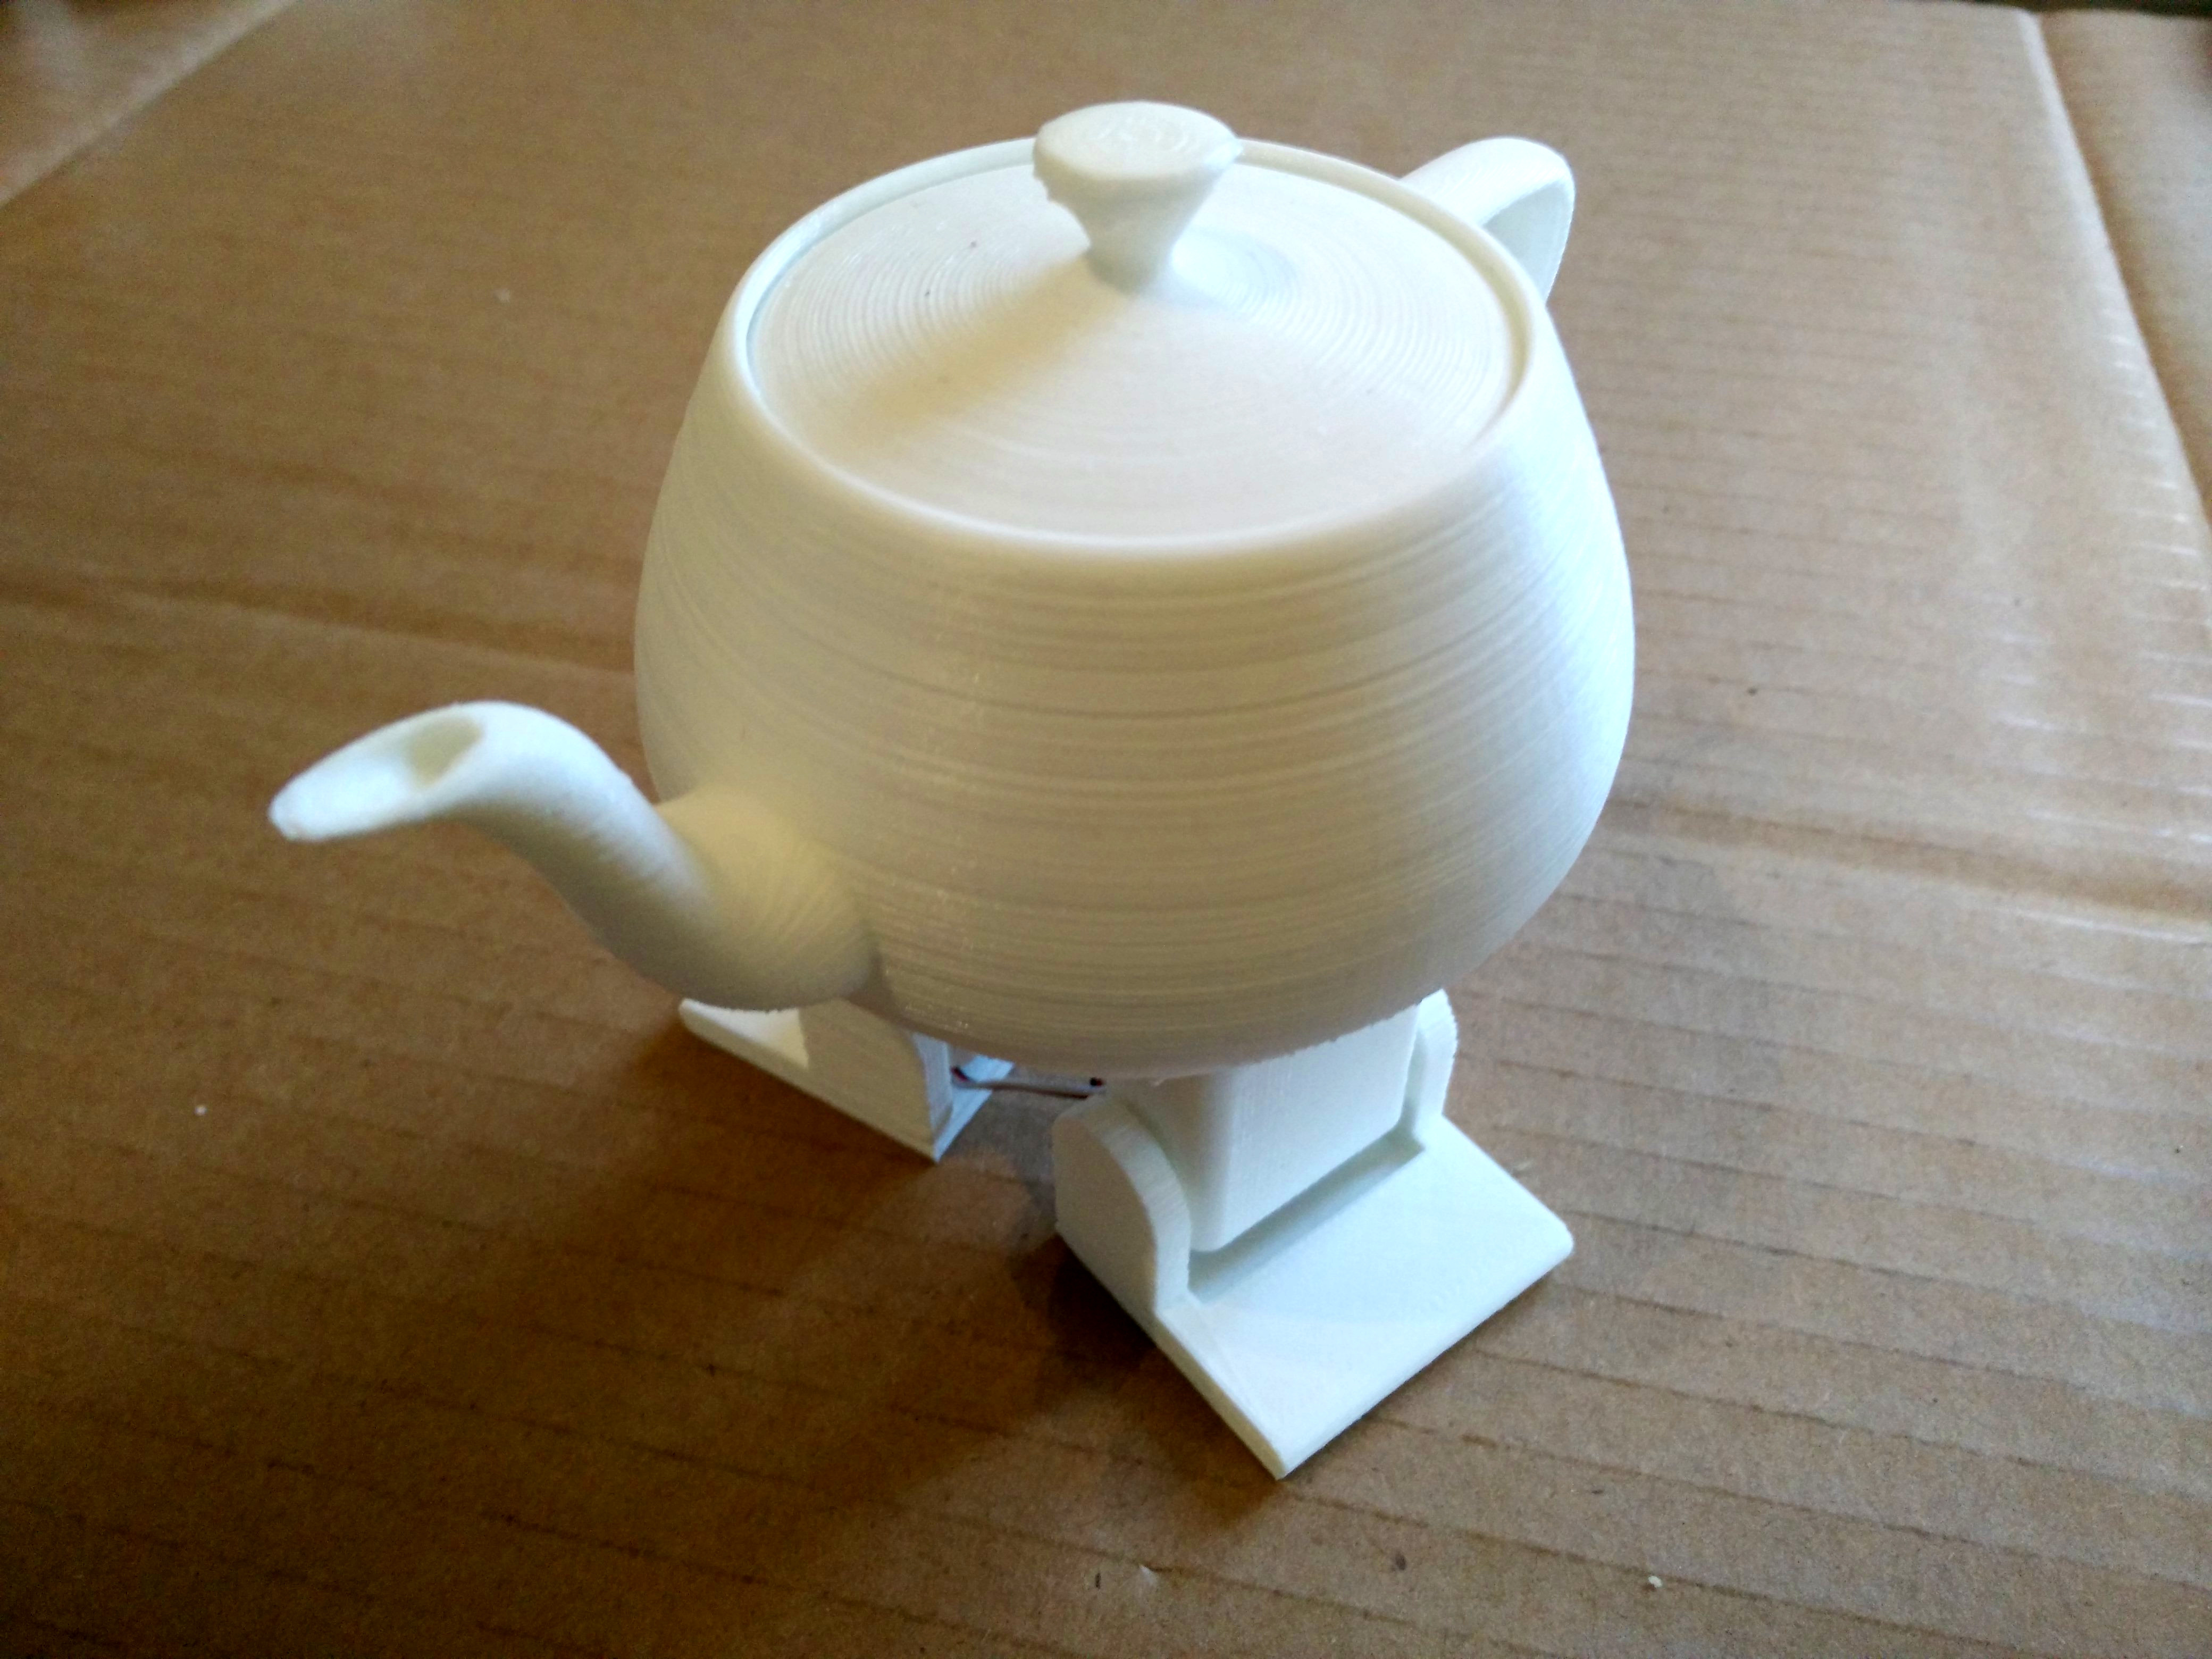
The robot is fully assembled and ready to be programmed!
Now that the robot is built, let's program it!
The structure is a classic Arduino program with setup() and loop() functions. Two functions left(int hip, int foot) and right(int hip, int foot) allow to move the legs by changing the angles of the corresponding servos. Offsets are added to the angles so the zero corresponds exactly to the right position.
#include <Servo.h>

// ---------- Pin setup ----------
const int servoPins[4] = {5, 6, 7, 8};

// -------- Servo offsets --------
const int leftHipOffset  = 5;
const int rightHipOffset = 5;
const int leftFootOffset  = 10;
const int rightFootOffset = 10;

// The four servos
Servo servos[4];

// Move left leg
void left(int hip, int foot)
{
  servos[0].write(90 + (hip + leftHipOffset));
  servos[2].write(90 + (foot + leftFootOffset));
}

// Move right leg
void right(int hip, int foot)
{
  servos[1].write(90 - (hip + rightHipOffset));
  servos[3].write(90 - (foot + rightFootOffset));
}

void setup()
{
  // Init serial
  Serial.begin(9600);

  // Init servos
  for(int i = 0; i<4; ++i)
    servos[i].attach(servoPins[i]);

  left(0, 0);
  right(0, 0);
  delay(4000);
}

void loop()
{
  [...]
}
I wrote a sync() function to synchronize action to the beat. Each time it is called, it waits for the next quarter of a beat to end. In musical terms, it corresponds to a sixteenth note, or semiquaver. The function nsync(unsigned int count) waits for count quarters of a beat. For instance rsync(4) waits for one beat, i.e., half a second if the BPM is 120.
This is better than simply using delay() because it takes into account the potential processing time between calls to sync(). Moreover, it could be used to do some processing on each quarter of a beat, like playing music.
long bpm = 120L;

void sync()
{
  // Given set BPM, delay until the next quarter of a beat
  static unsigned long lastMillis = 0;
  unsigned long duration = 60000L/(bpm*4);
  long leftMillis = lastMillis + duration - millis();
  if(leftMillis > 0) delay(leftMillis);
  lastMillis = millis();

  // We could play music notes here
}

void nsync(unsigned int count)
{
  // Call count times sync
  while(count--)
    sync();
}
Now the synchronization functions are available, we can write some choregraphy.
void hello_left(int cycles)
{
  const int a = 15;
  const int b = 60;
  const int c = 20;

  // Lean over
  left(0, -b);
  right(0, a);
  nsync(8);      // 2 beats
  left(0, 0);
  right(0, a+5);
  nsync(4);      // 1 beat

  // Move foot in rythm
  while(cycles--)
  {
    left(-c, 0);
    right(-c/4, a+10);
    nsync(4);    // 1 beat
    left(c, 0);
    right(c/4, a+10);
    nsync(4);    // 1 beat
  }

  // Back to standing position
  left(0, 0);
  right(0, a);
  nsync(2);    // 1/2 beat
  left(0, 0);
  right(0, 0);
  nsync(2);    // 1/2 beat
}
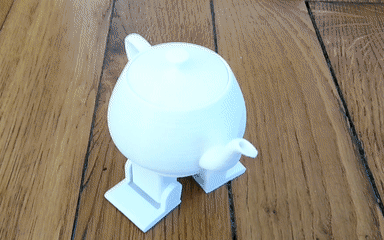
Eventually, the teapot dances in rythm!
The complete source for the project is available on my repository on GitHub.
In the next article, I'm adding music playing support to the robot by connecting a piezo sounder!
You can also read this article about the enhanced teapot lid featuring a battery switch.

