I got numerous comments about my 3D printed NAS. An issue encountered by multiple people is that it is now virtually impossible to come around a similar USB hub. Indeed, I used a store brand one and the product has been discontinued for some time...
Let's build an enhanced version solving that issue!
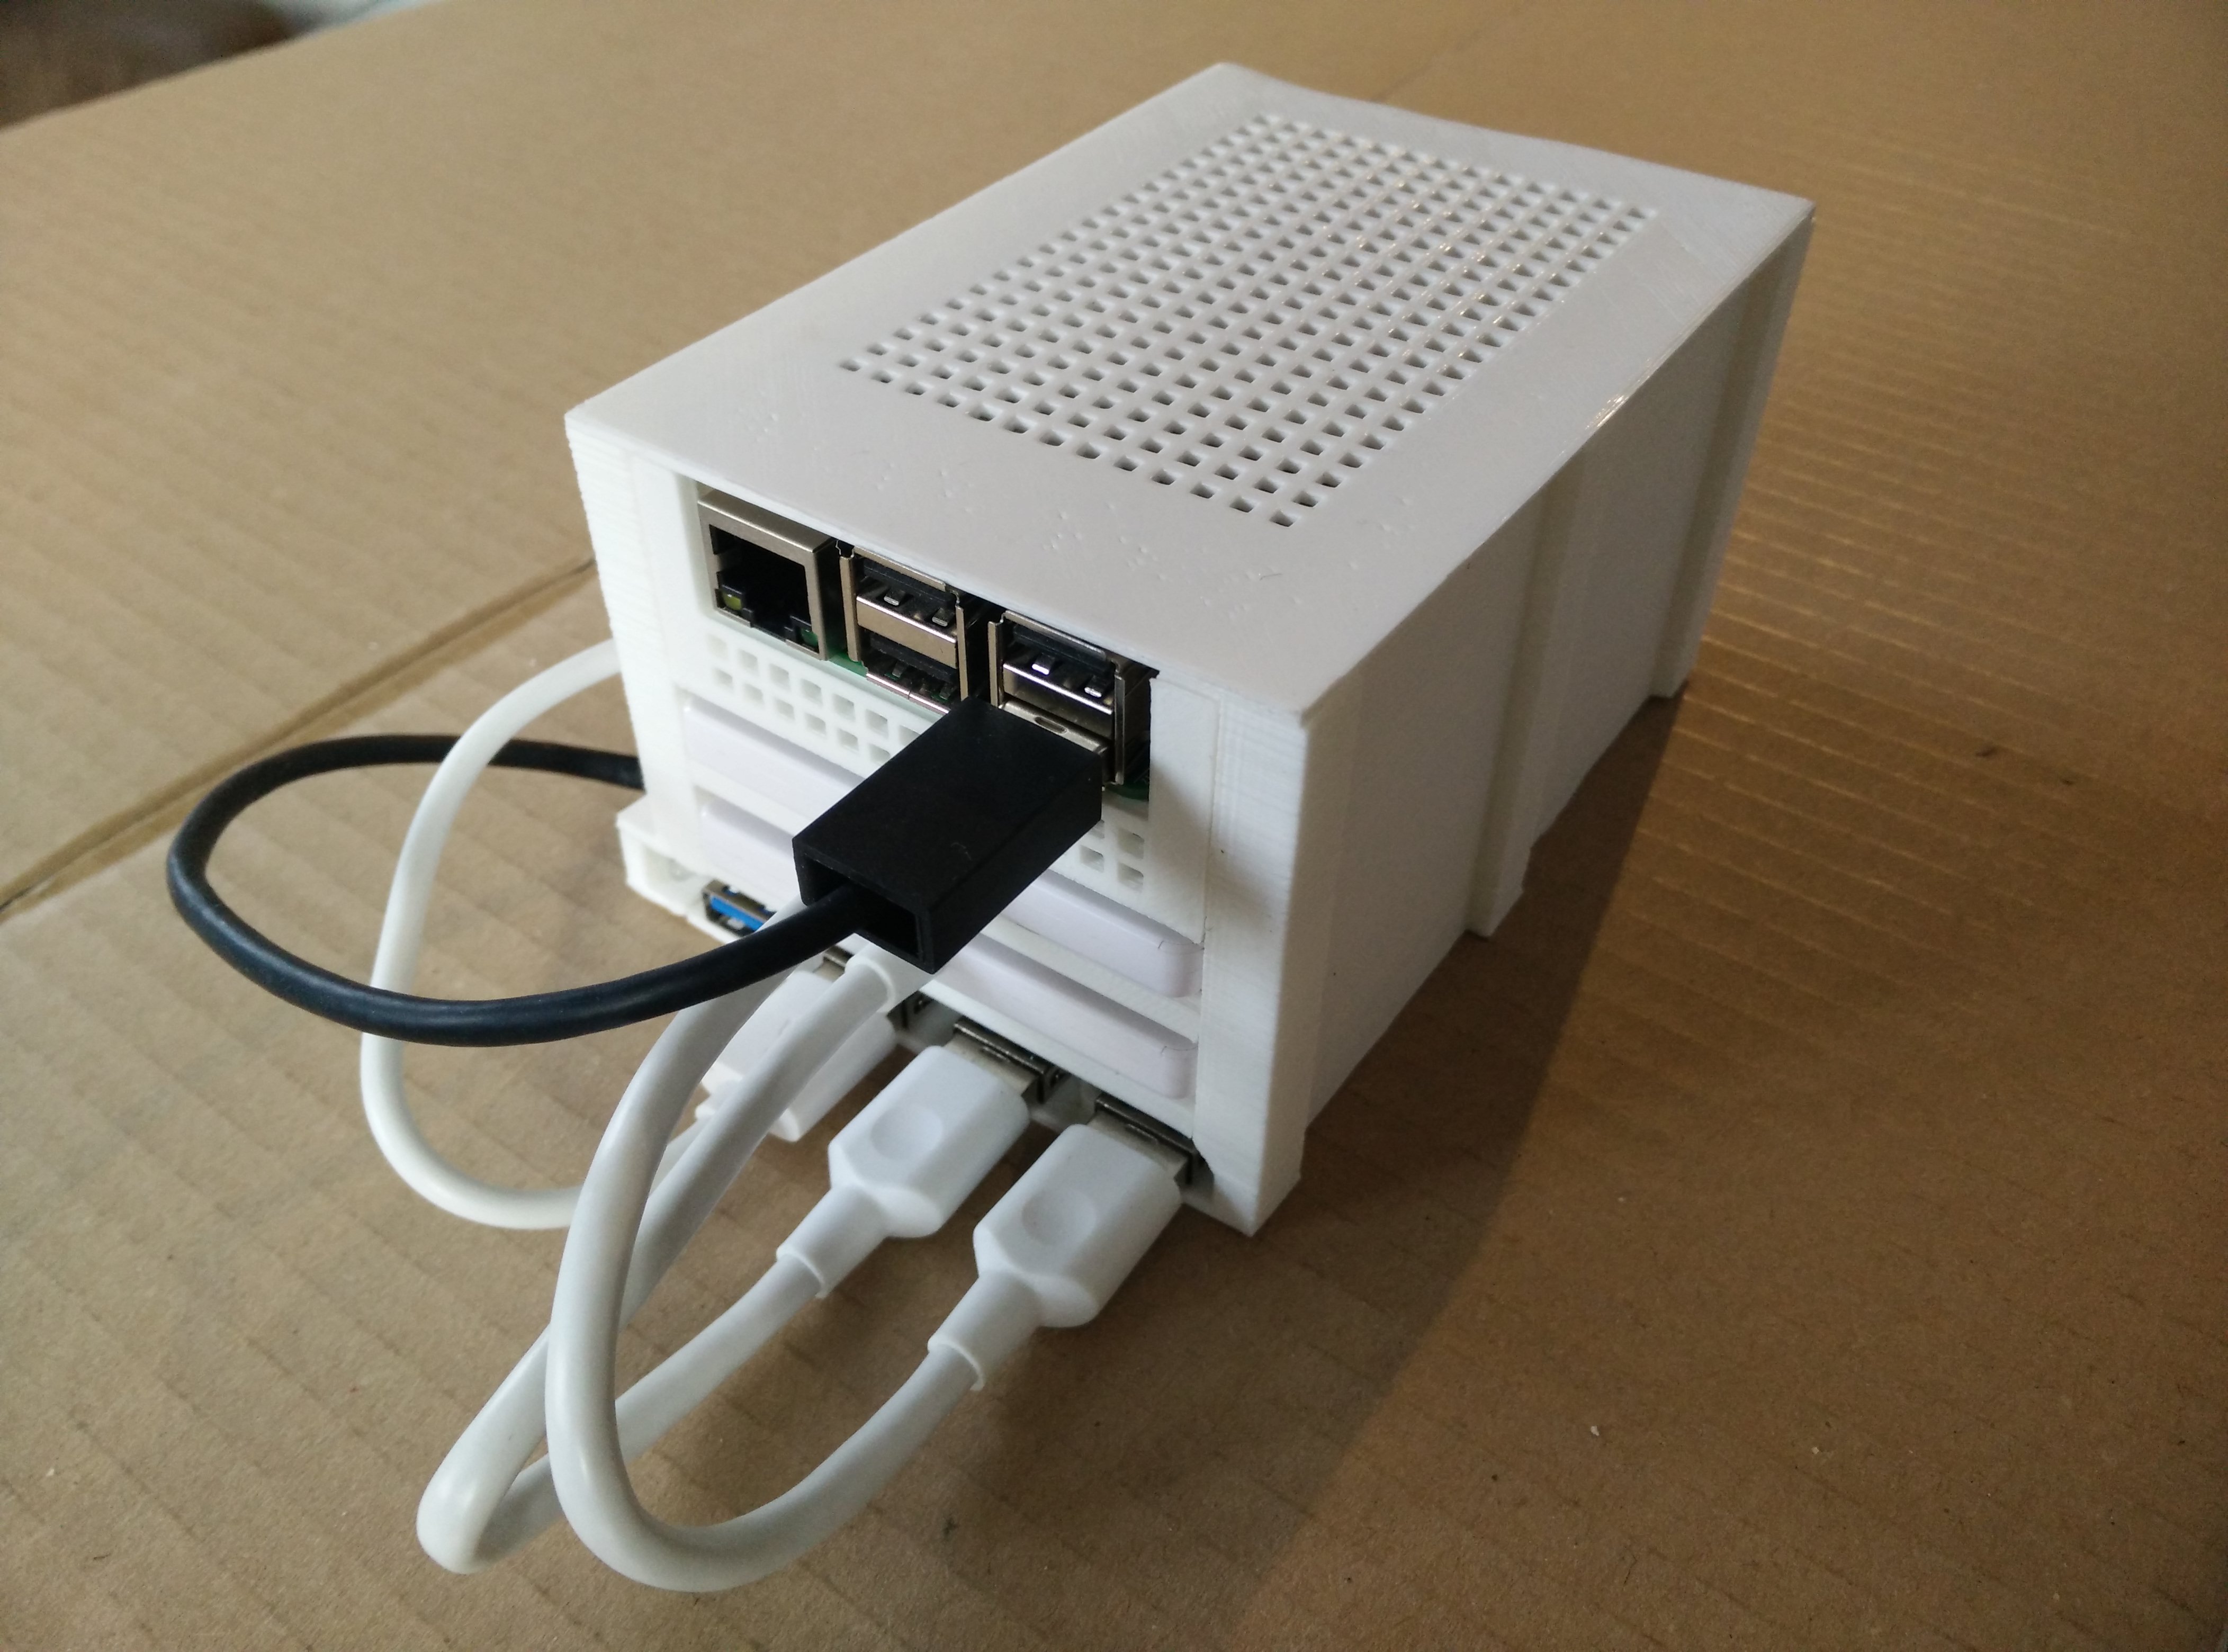
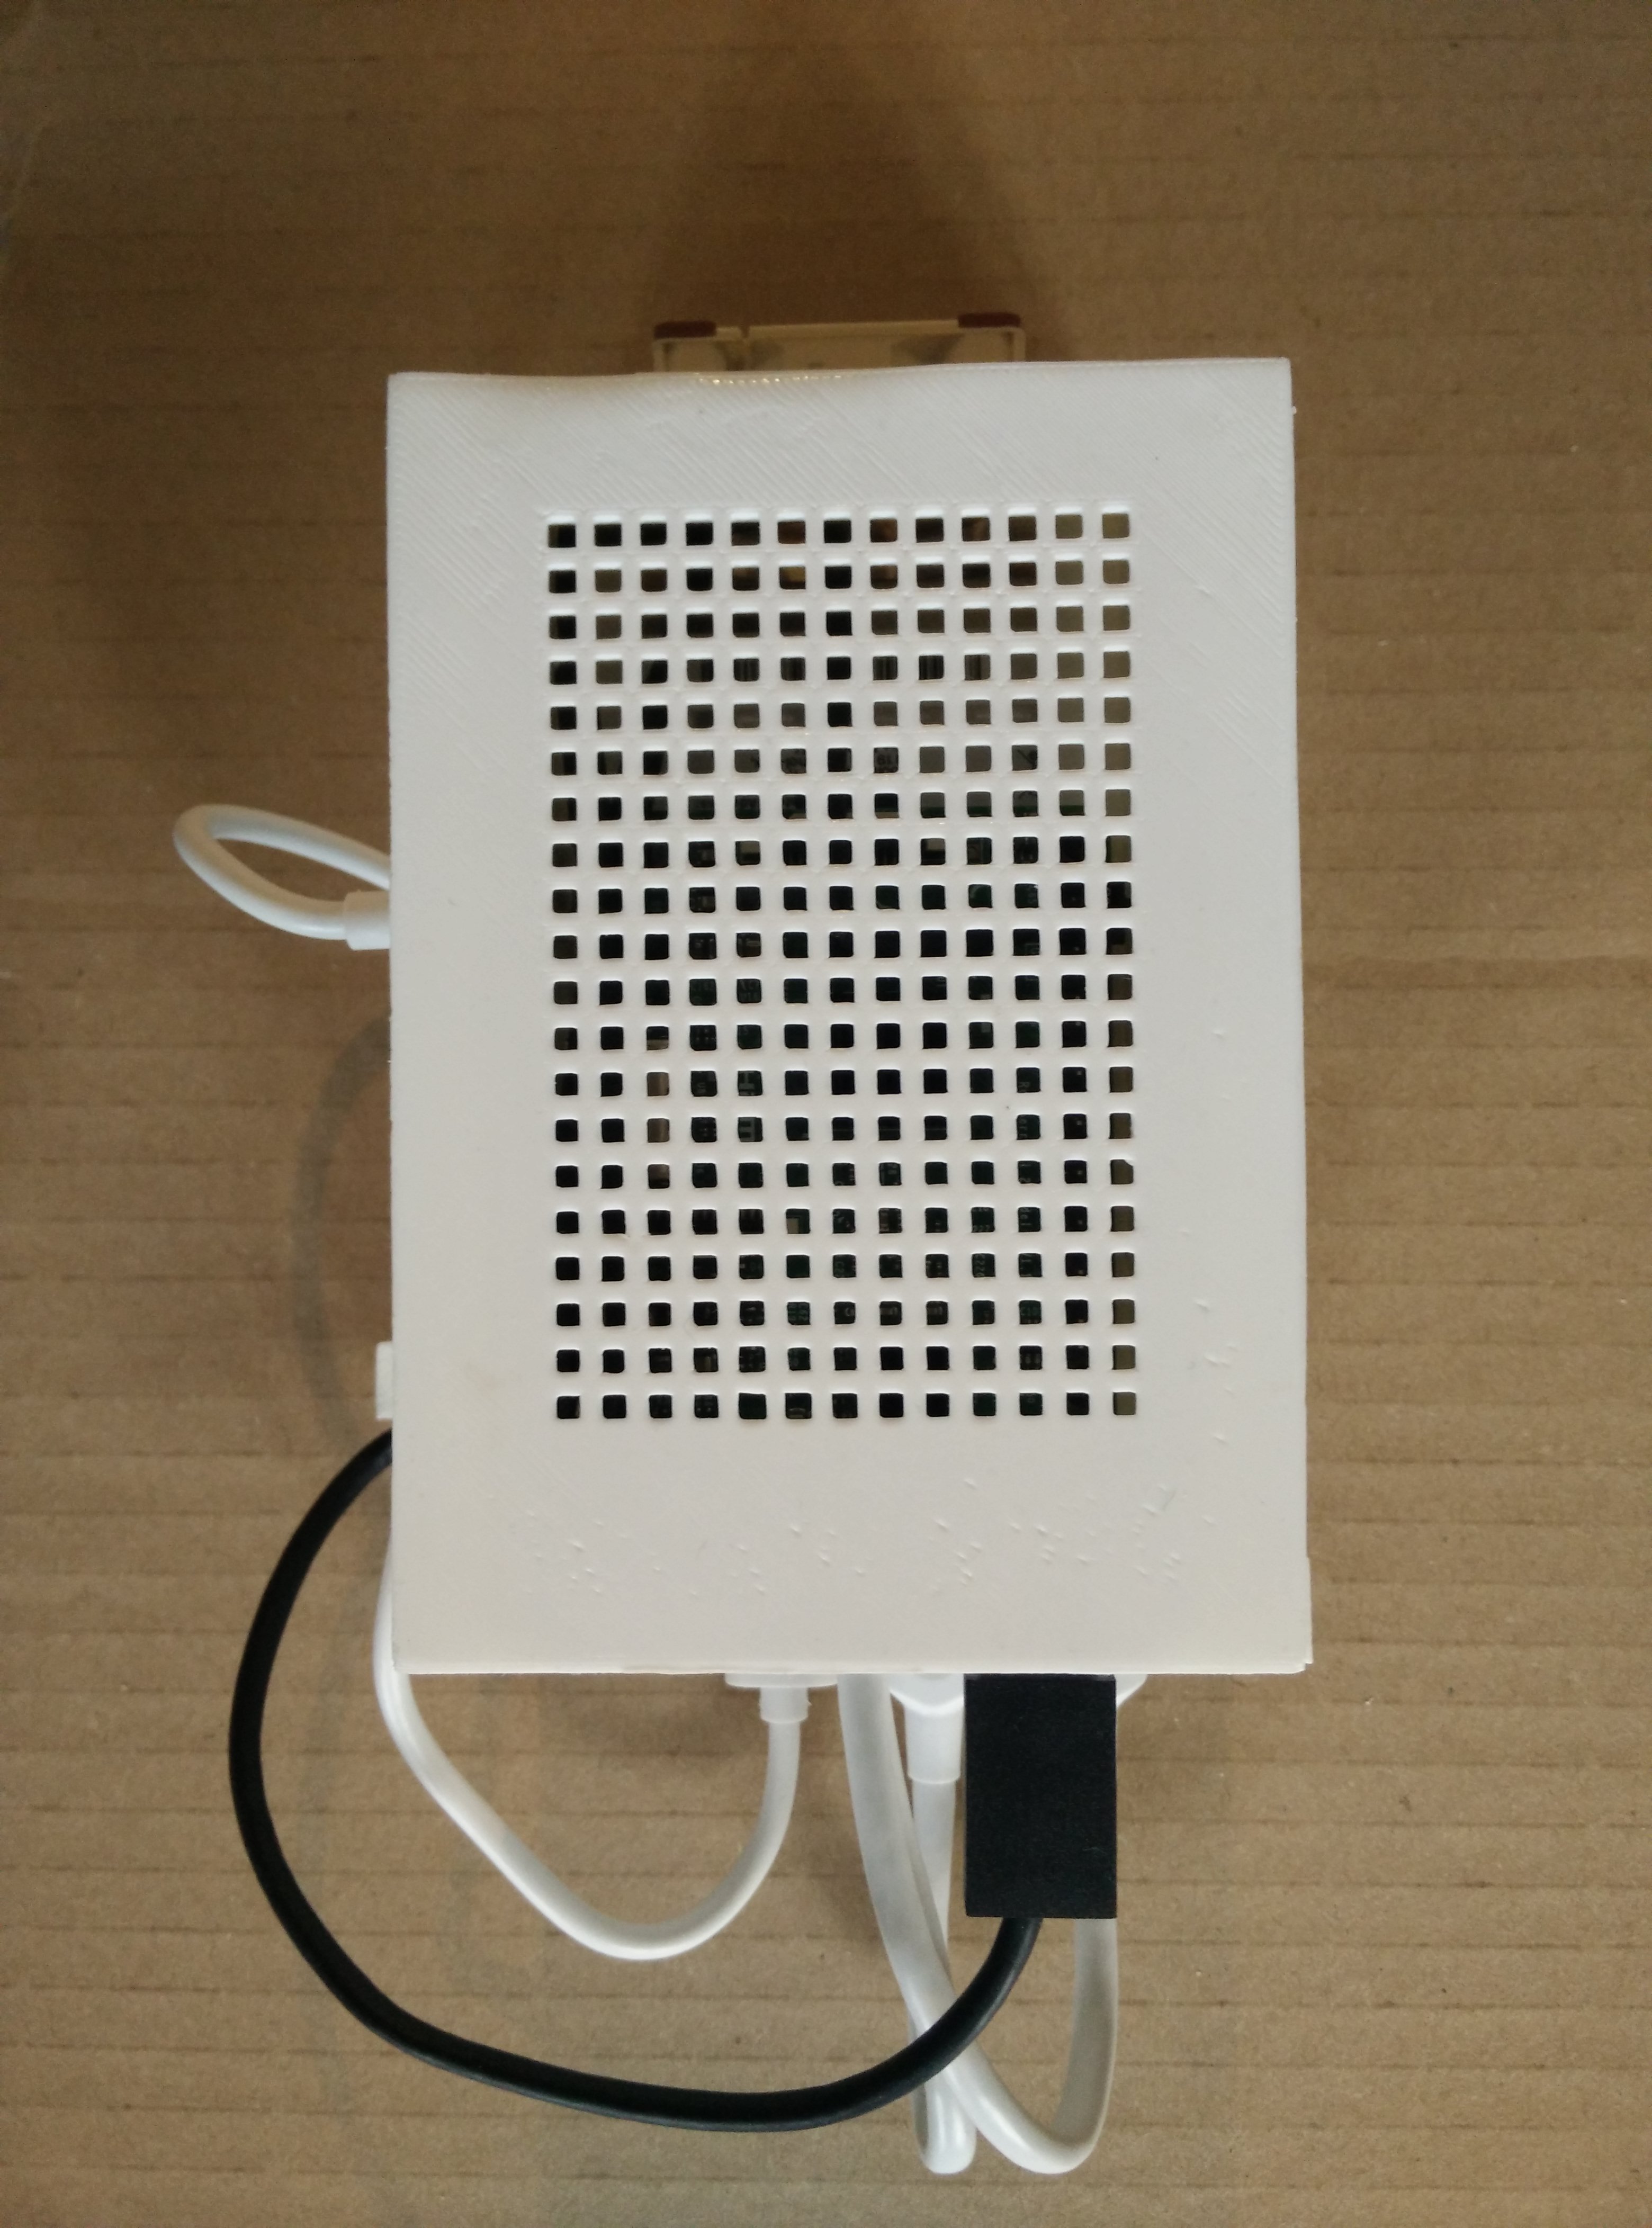
The finished NAS
The first version of the case was designed with OpenSCAD and 3D-printed. I modified it to accomodate a new wider 4-port USB hub and a more efficient 40mm fan at the rear instead of the small one on the lid. You can download the new SCAD source files and STL files here (licensed under GPLv3).
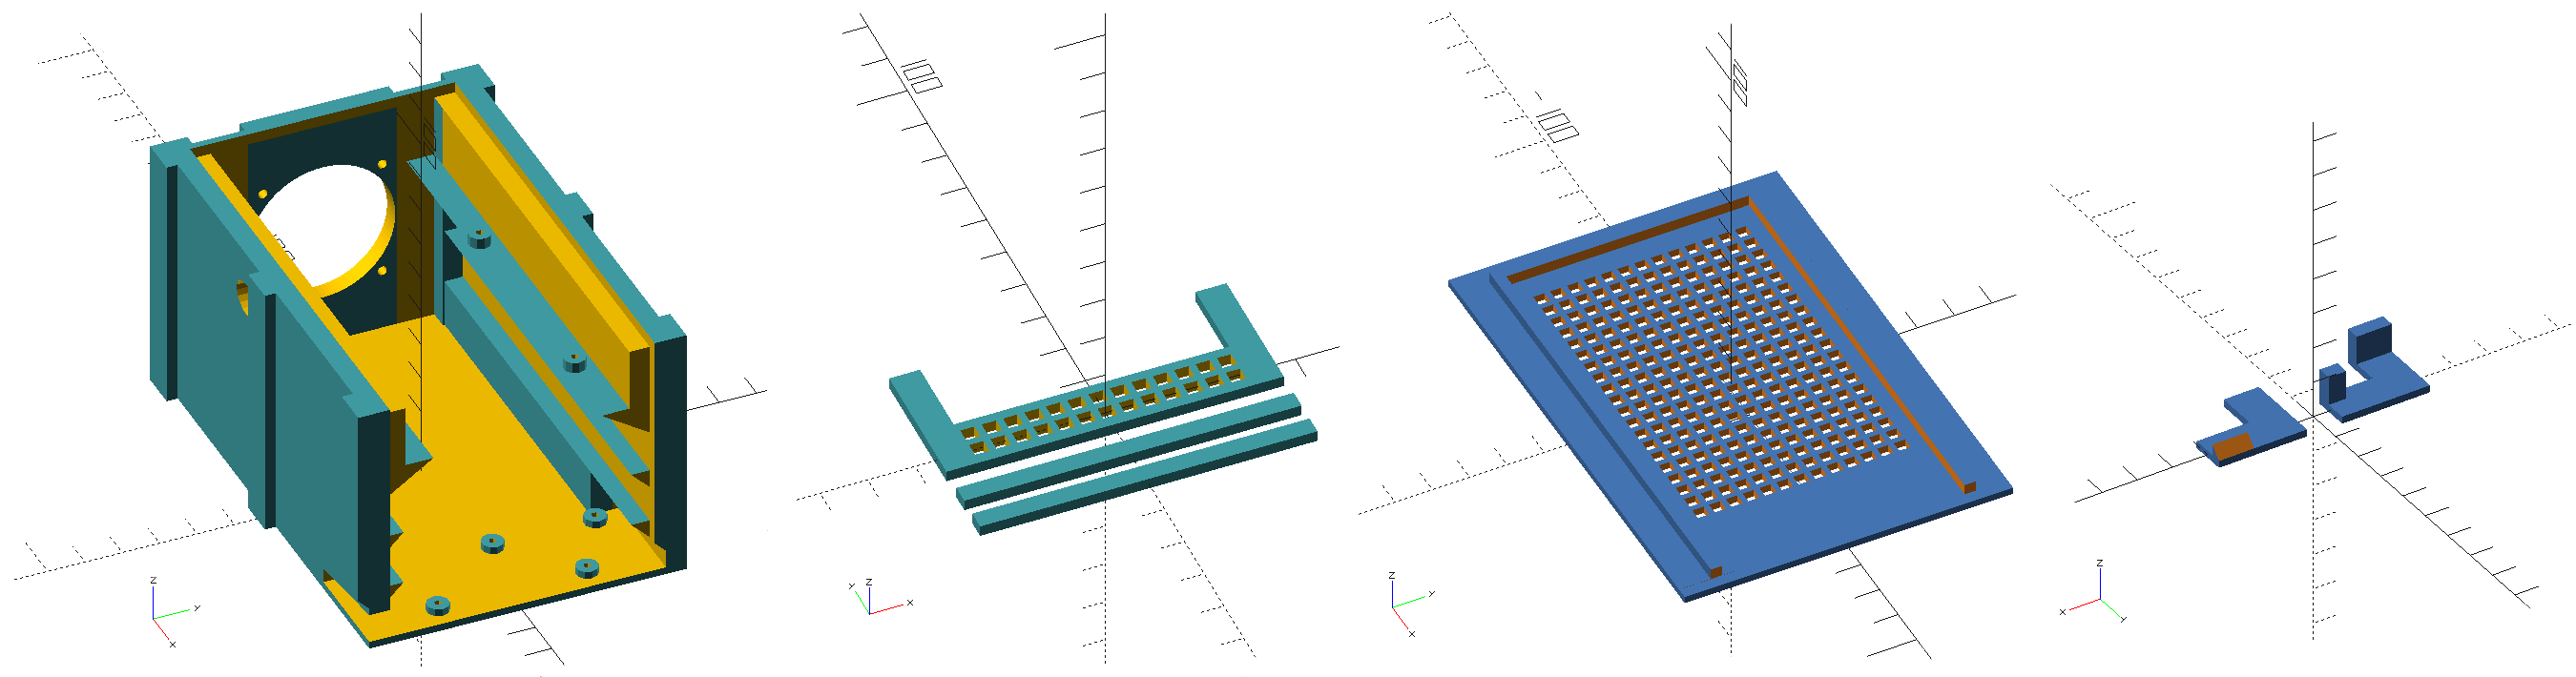
3D models of the enhanced case
In addition, we'll use the following elements:
- A Raspberry Pi Model B (2, 3, 3+ or 4), obviously
- A 4-Port Ultra Slim USB 3.0 Hub with USB charger from Anker (warning, there is also a version without the micro-USB charger port, you need model A7518111 or A7518311 to power the NAS through the hub)
- Two 2.5" SATA to USB adapter cable IB-AC6033-U3 from Icy Box
- Two 2.5" SATA hard disks (or SSD)
- A 40x10mm 5V cooling fan (not a PWM one)
- A few short M2 screws, and a couple of bolts and nuts for the fan
- Some glue
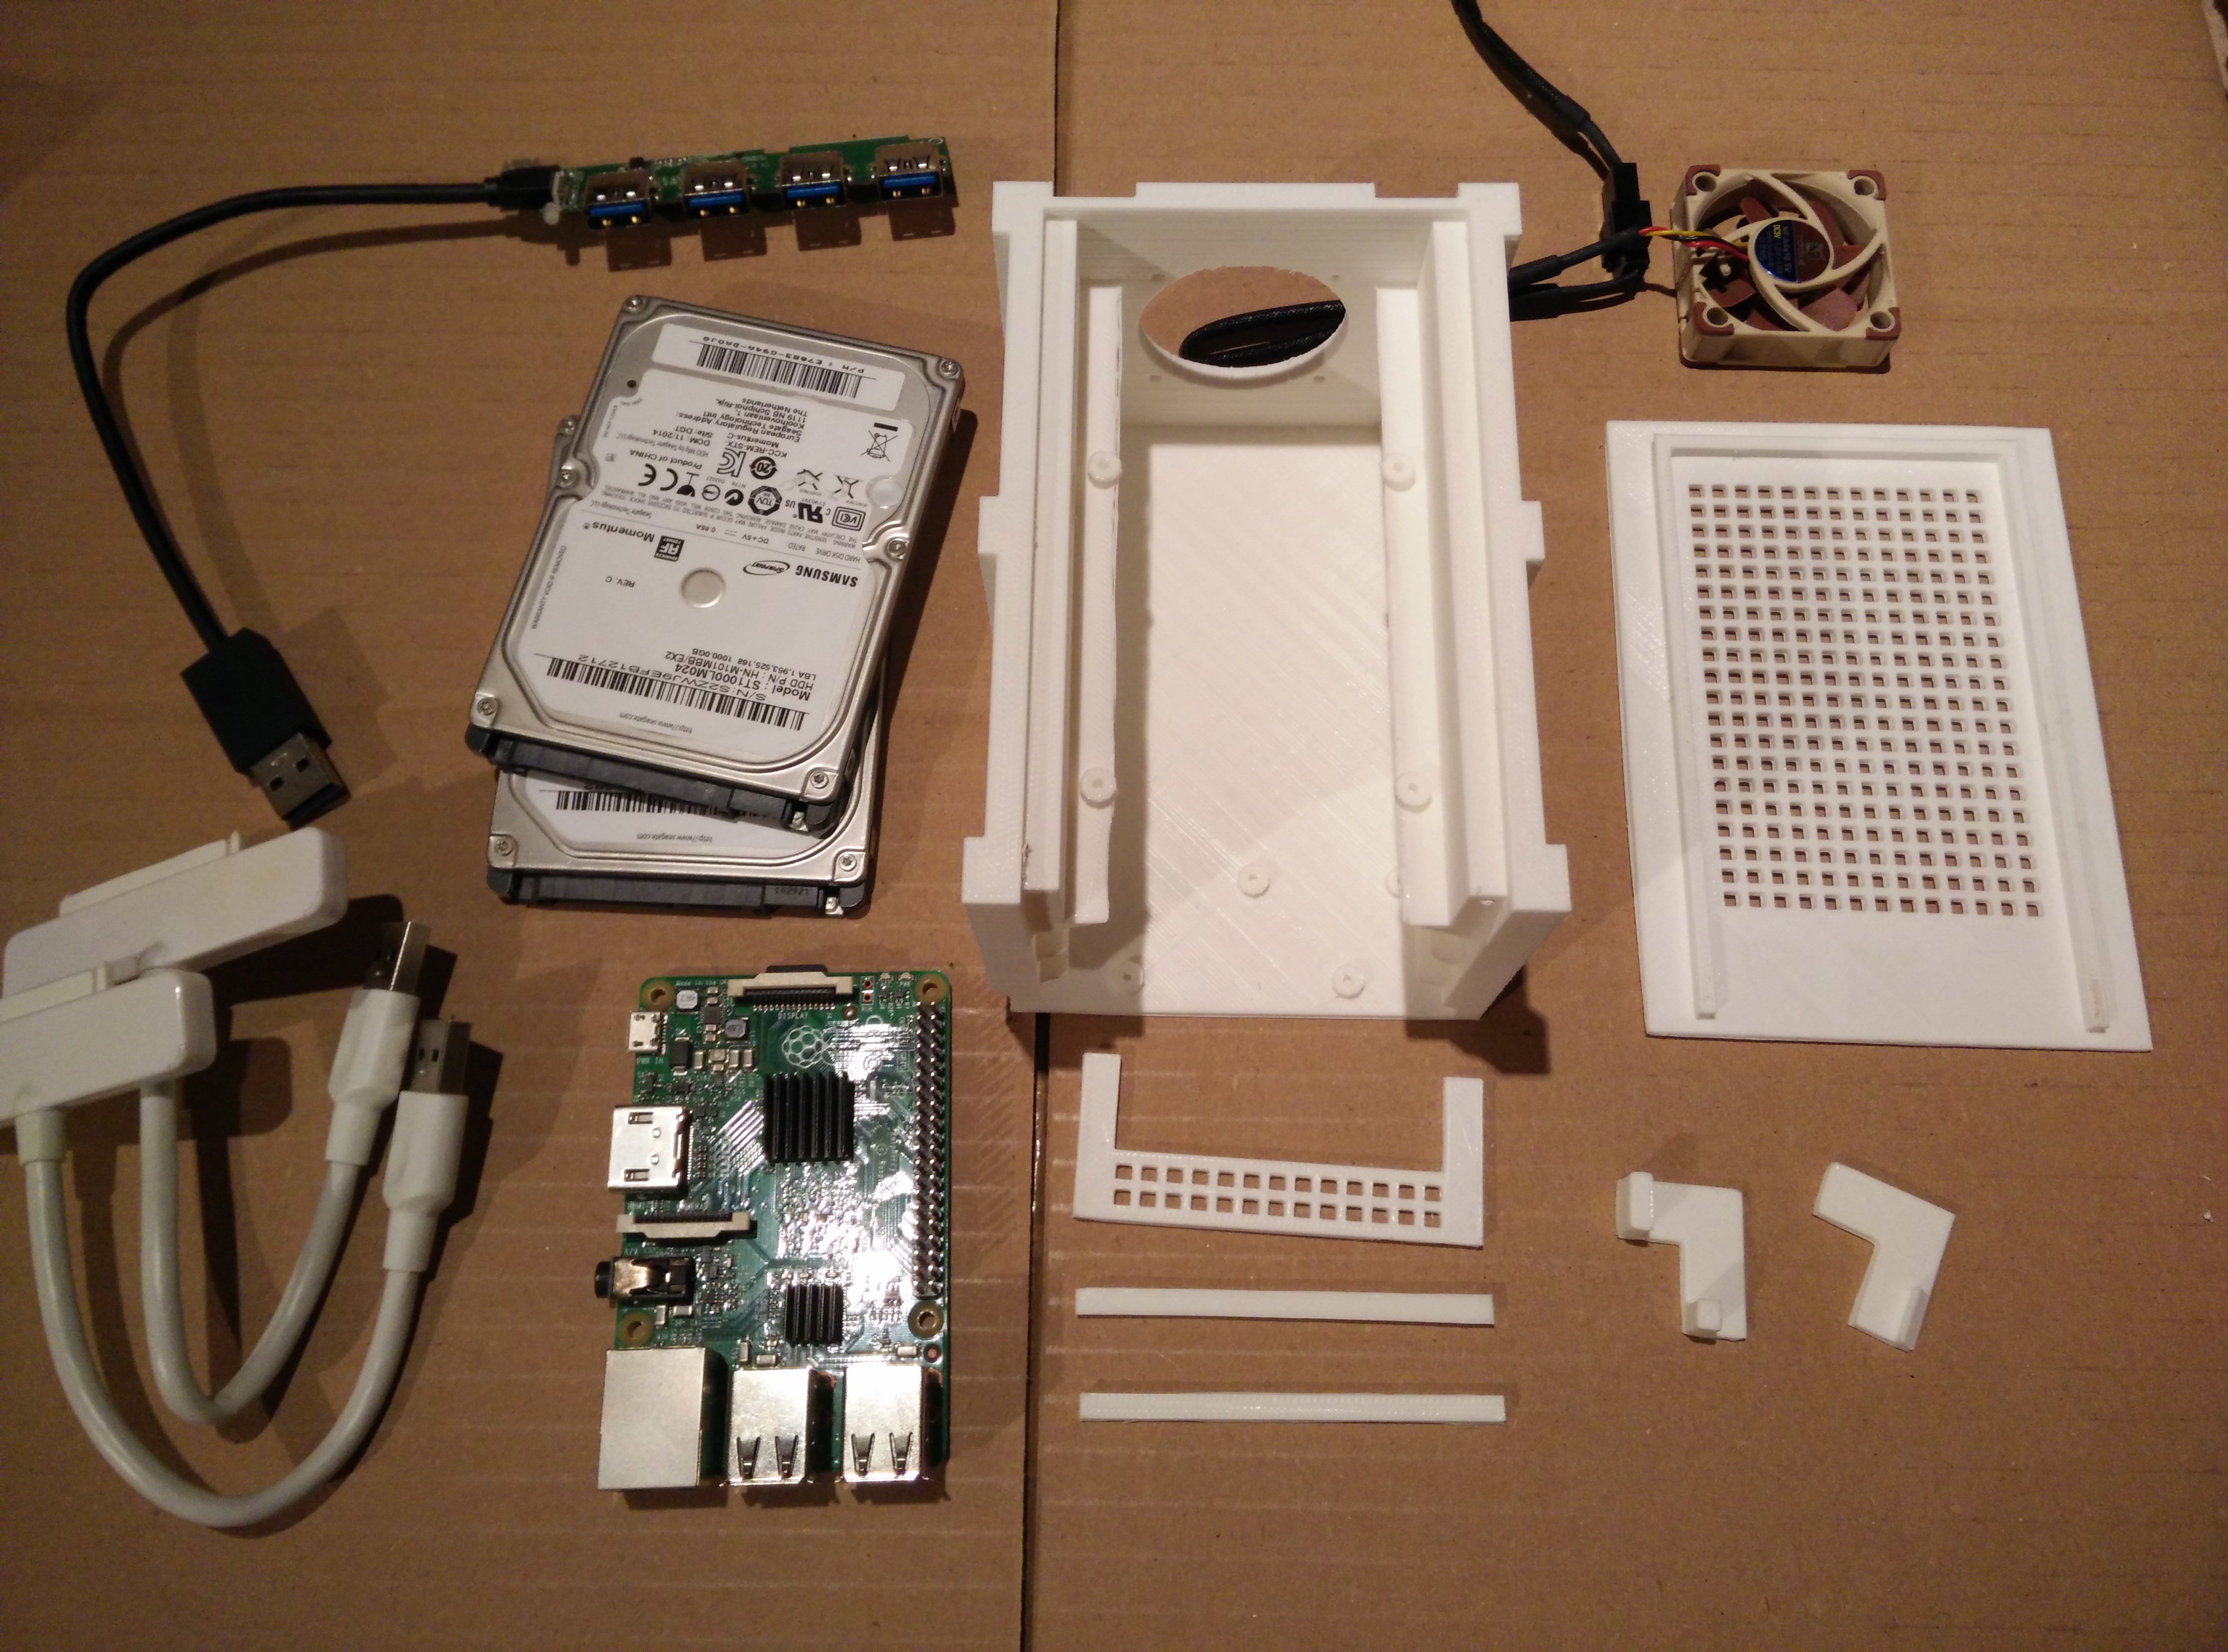
Overview of the used parts
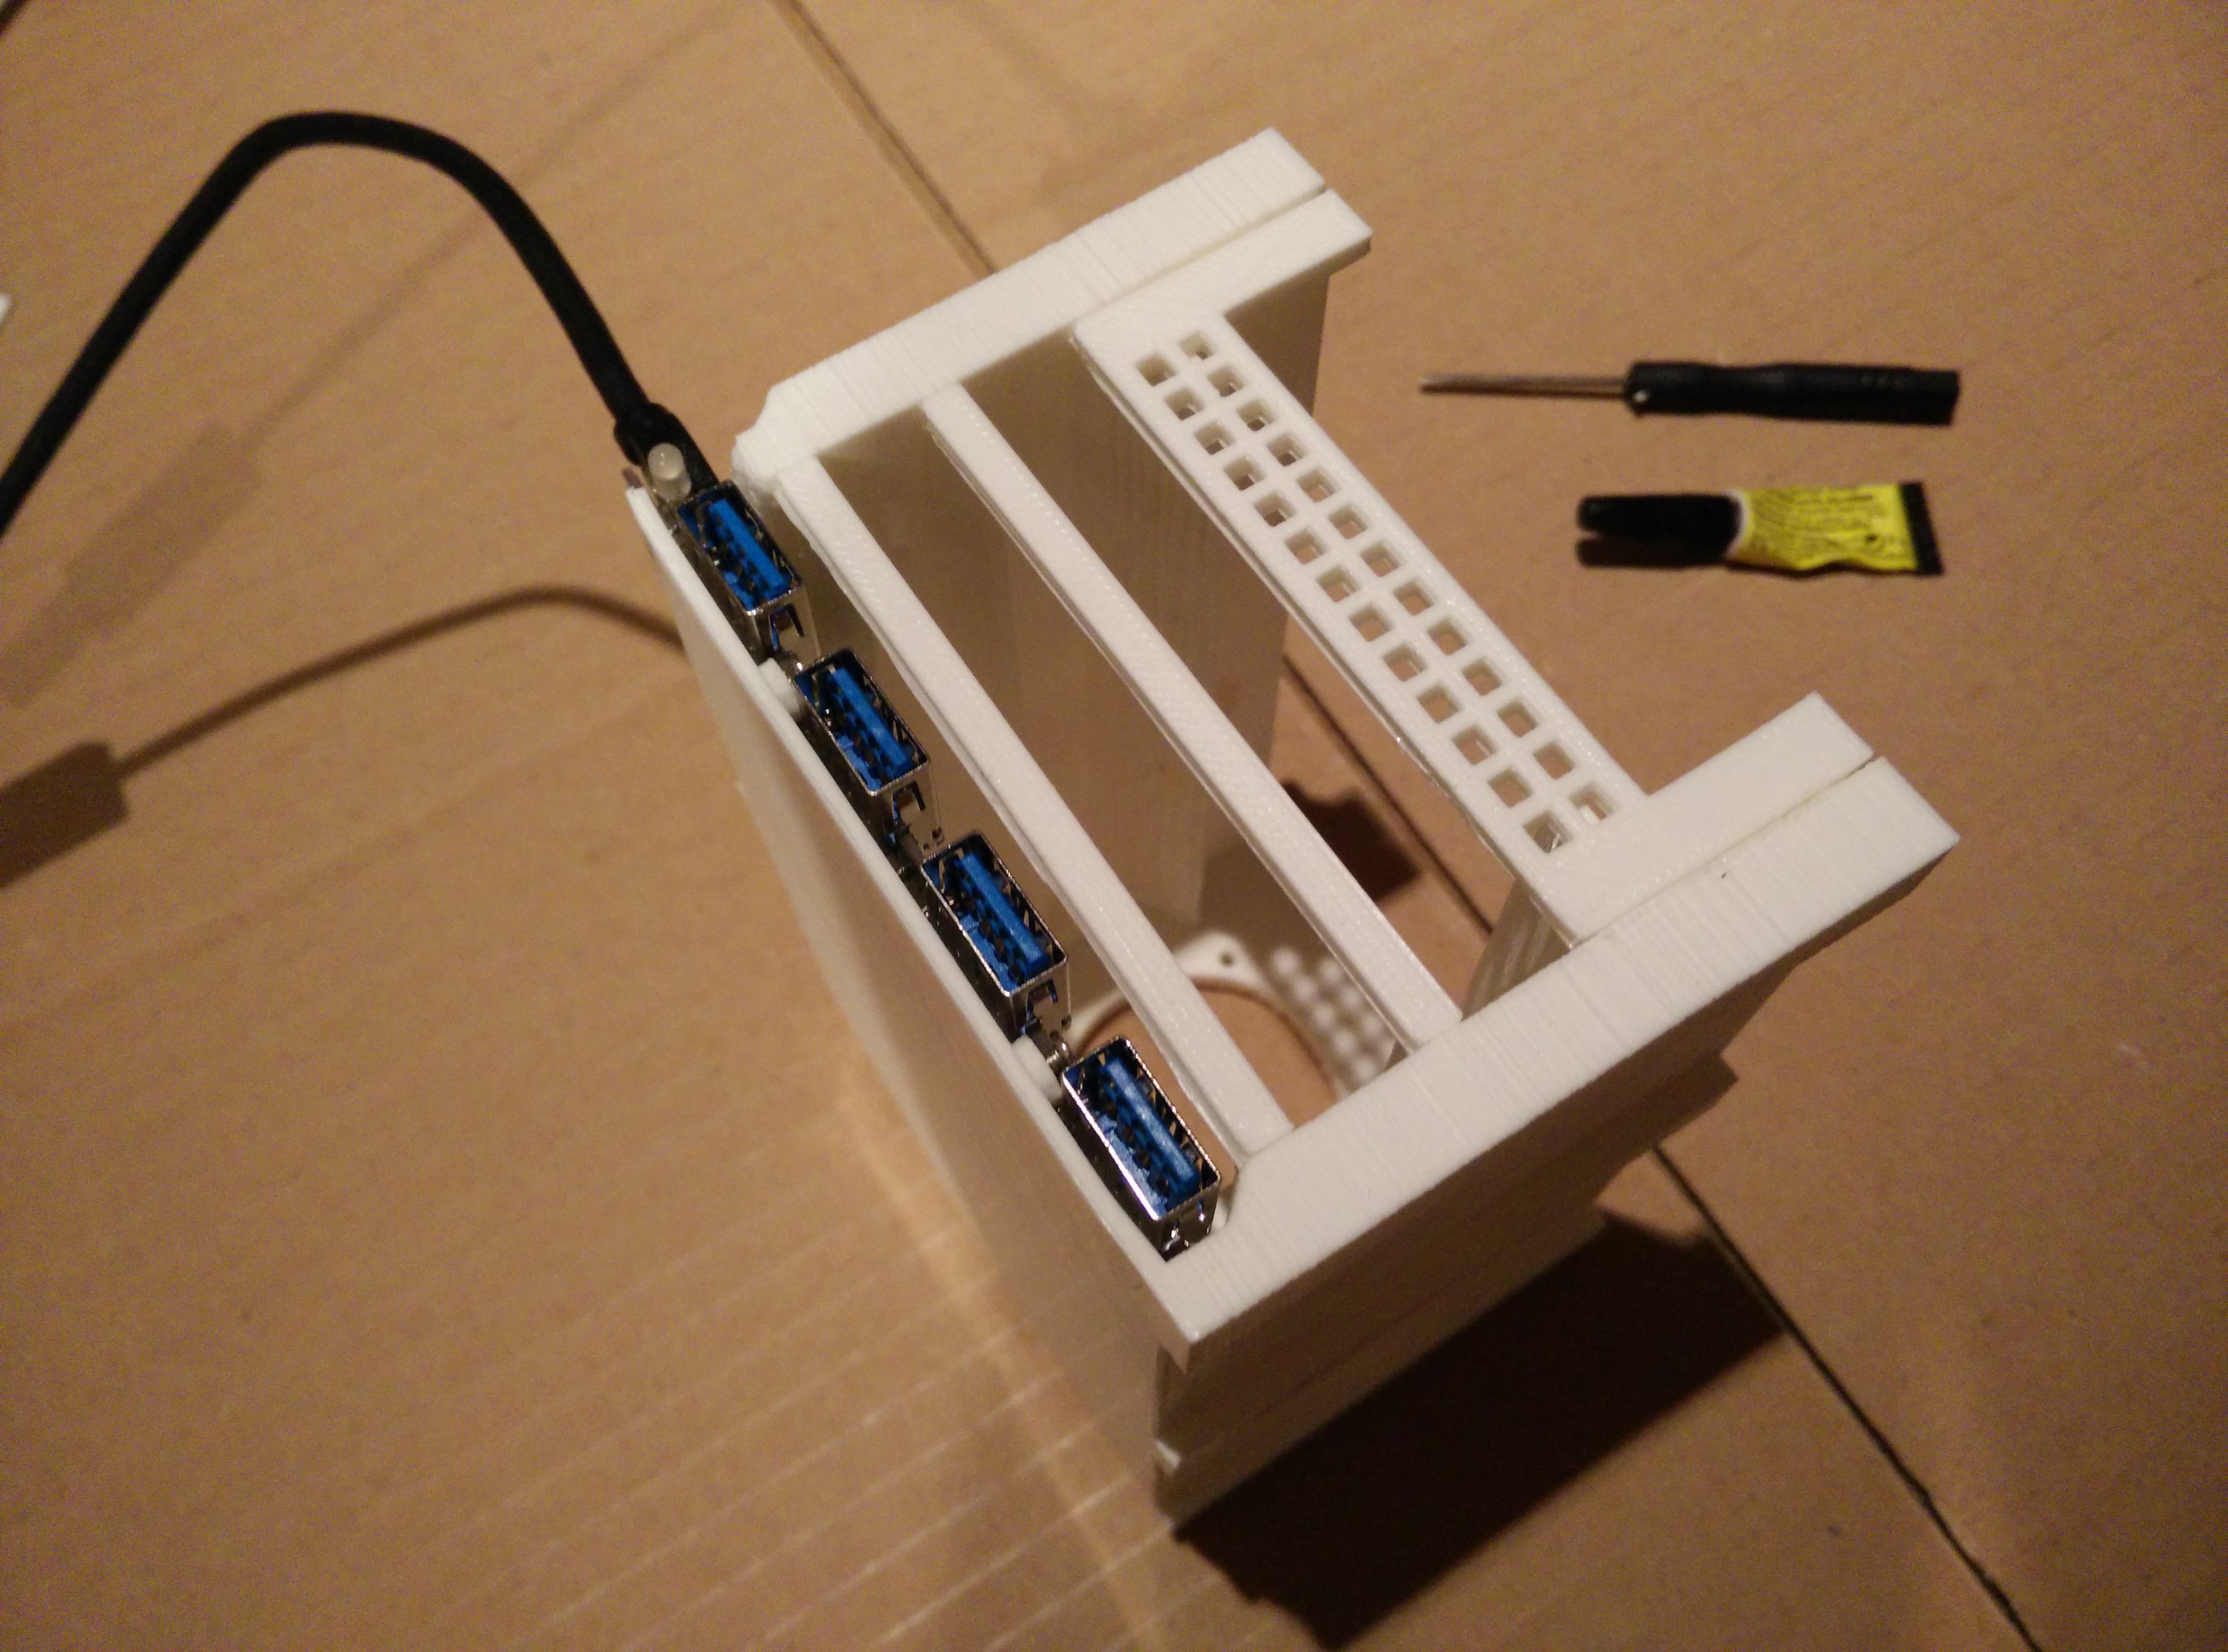
The first step is disassembling the USB hub. The cover is just clipped and can be removed easily. Then, the USB hub is installed at the bottom of the case, and screwed on it. The screw holes on the updated case match this particular model.
Due to the longer width of the hub, it's expected that the side with connectors stands out of the case. The USB connectors themselves should still be centered.
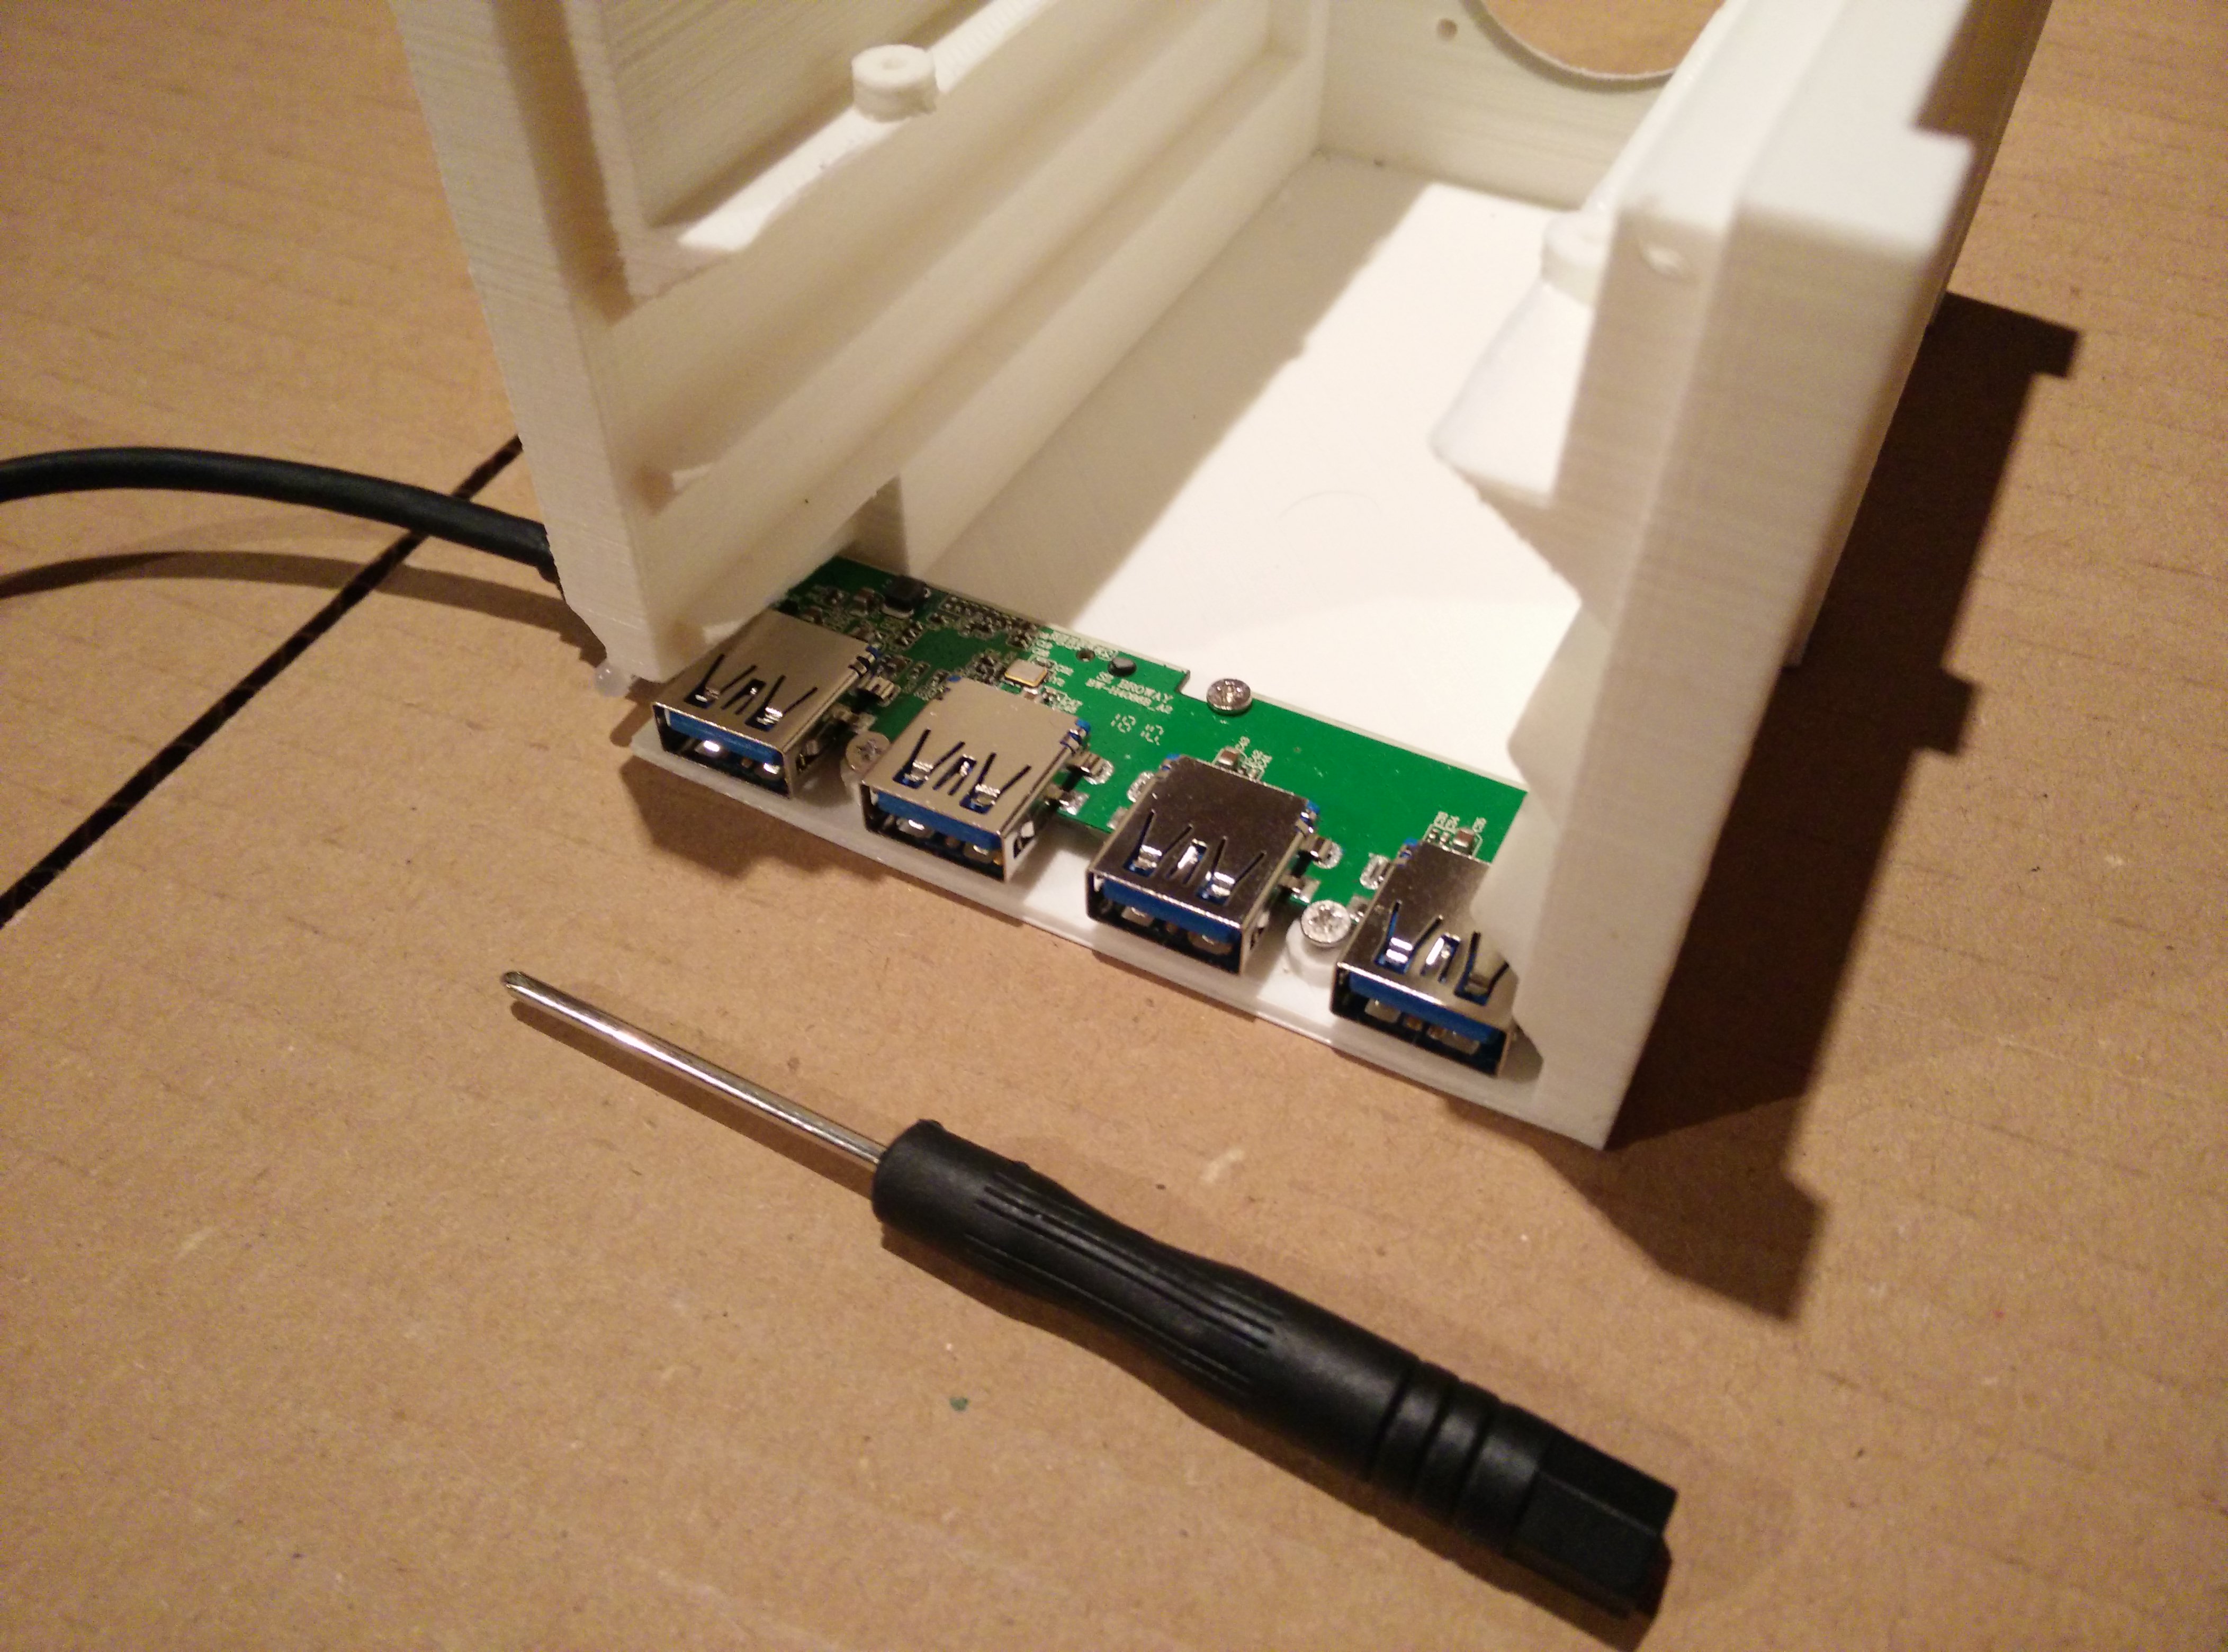
The USB hub installed at the bottom of the case
Now the front panel can be glued to the case. The grid just below the Raspberry Pi helps for the airflow.
The front panel glued to the case
The main difference with the previous version of the NAS is the location of the fan. In this version, the fan has been upgraded to a bigger 40mm one on the rear of the case. It creates a way better airflow alongside the Raspberry Pi and disks.
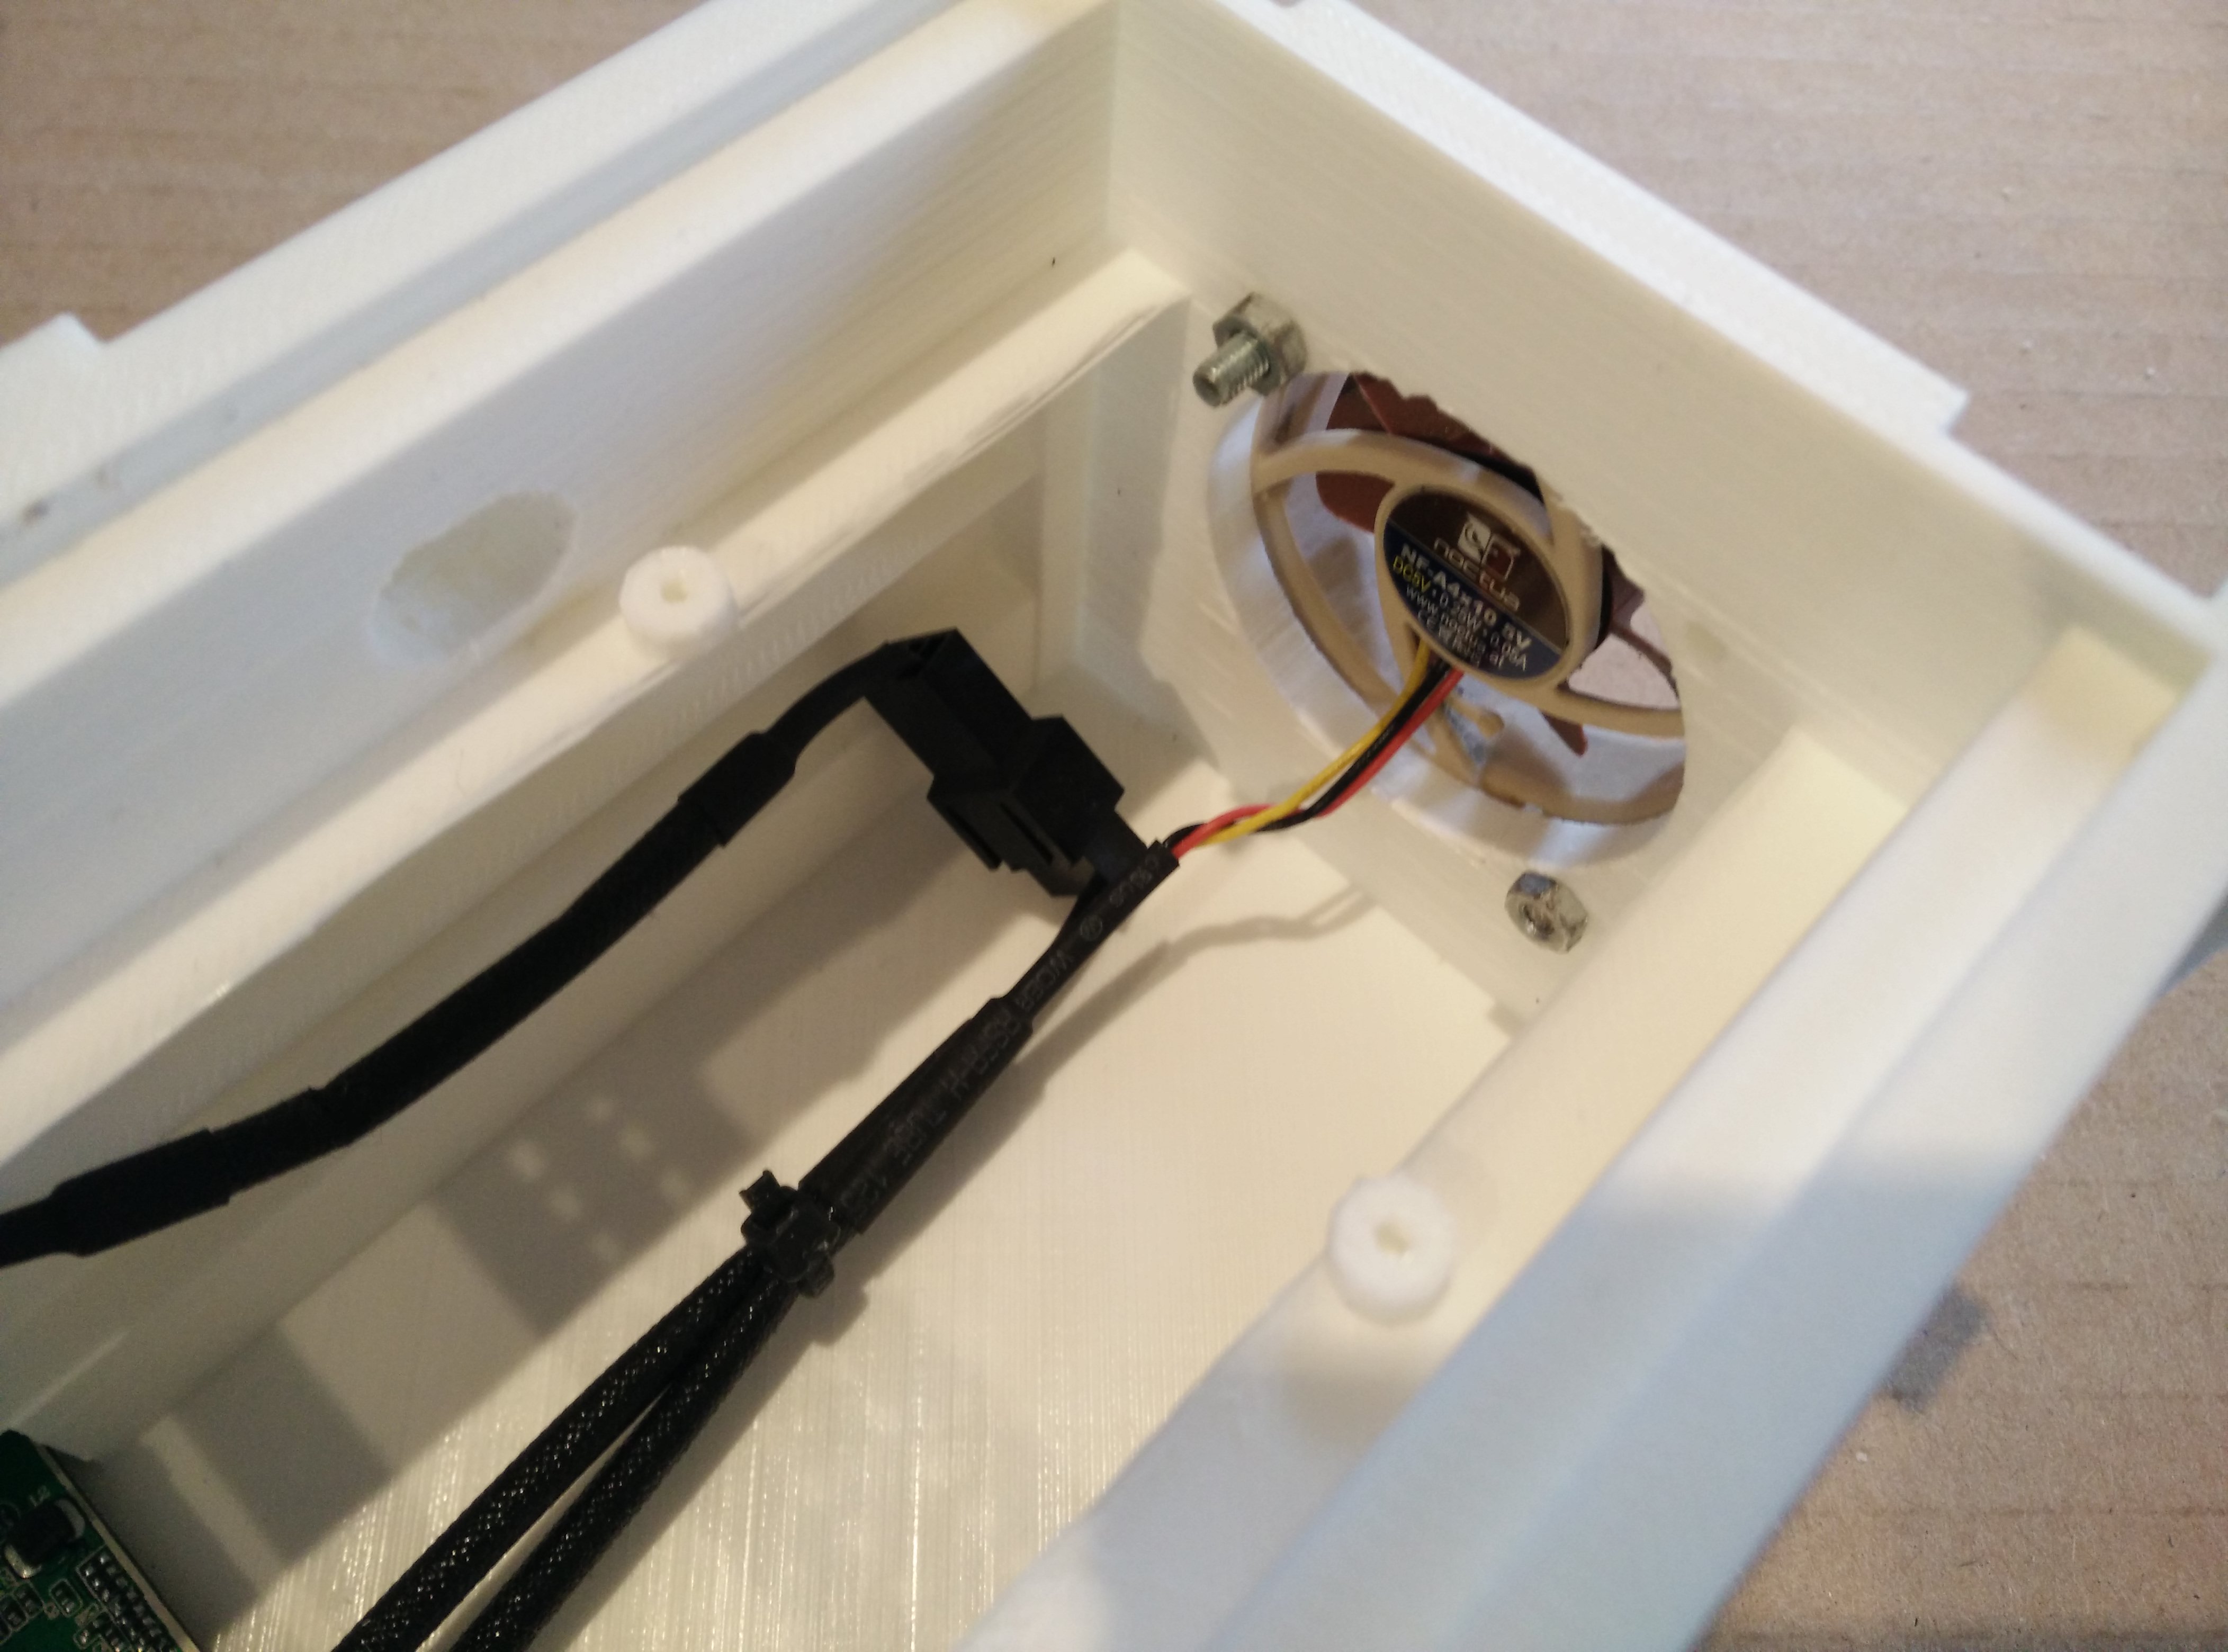
The fan attached at the rear of the case

Outside view of the fan at the rear
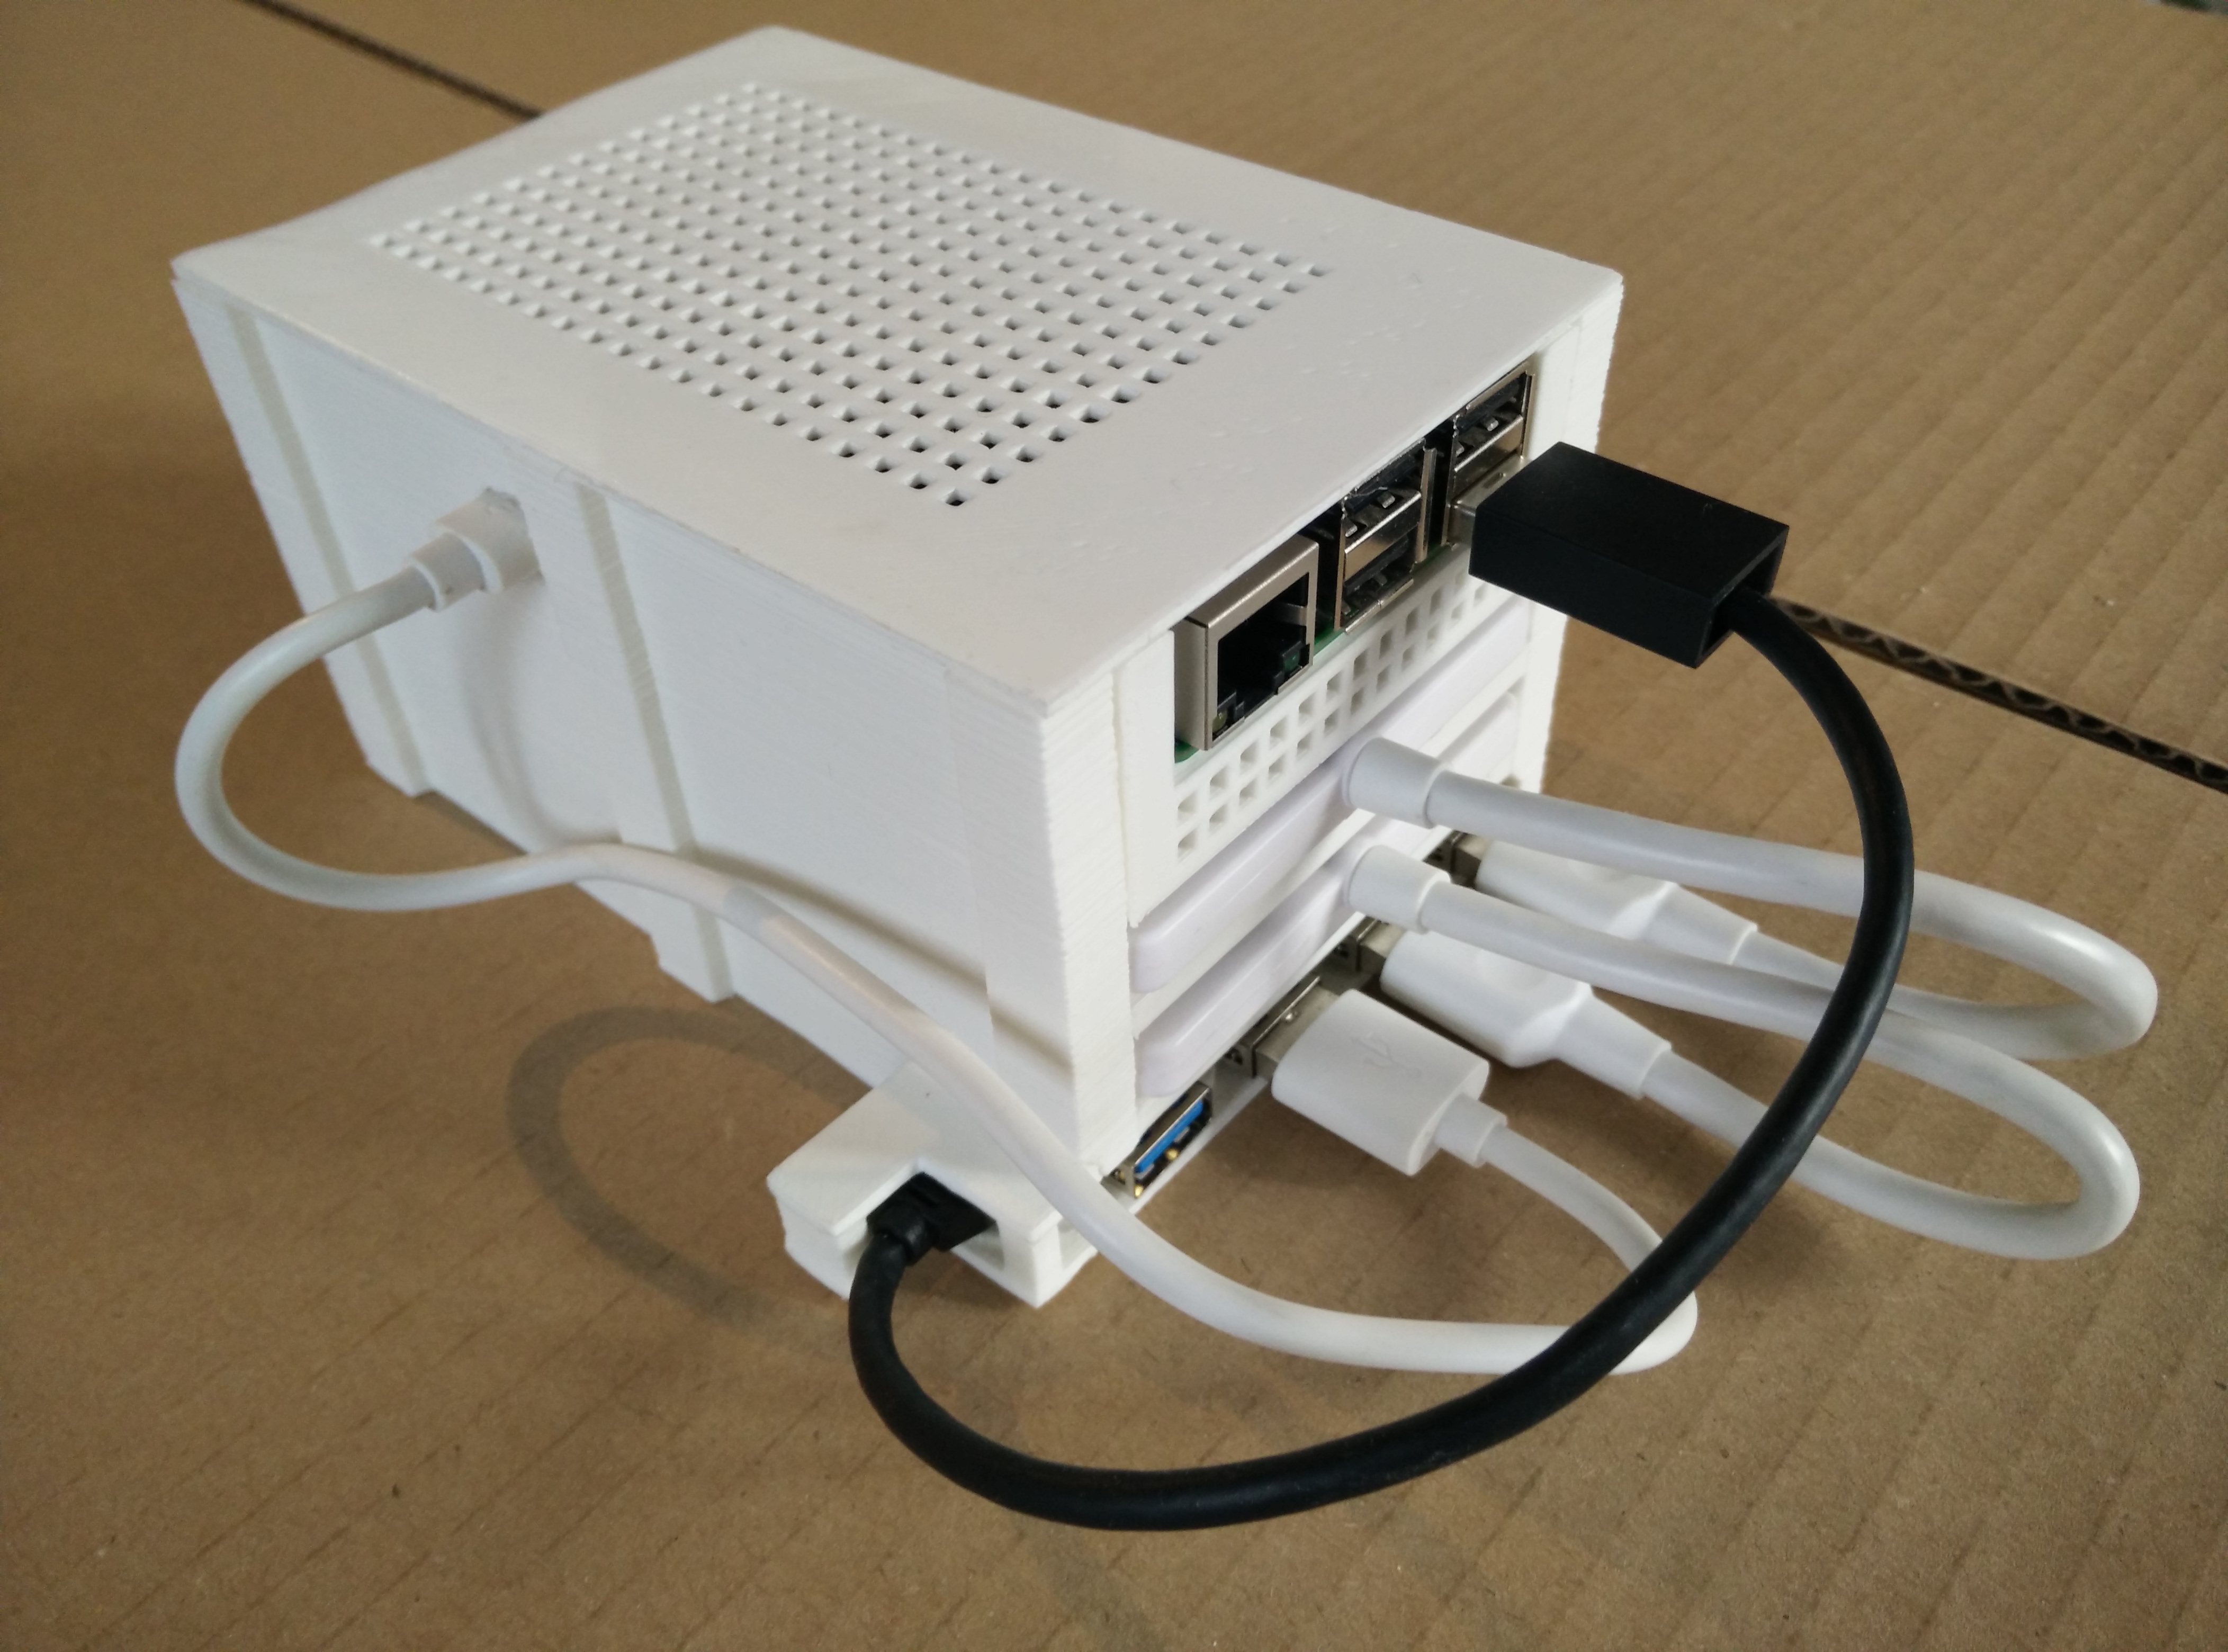
I'm using a Raspberry Pi 2 here just because I had one available. You should definitely use a Pi 3 B+ to increase transfer speeds, or better, a Pi 4, so the disks are connected over USB 3!
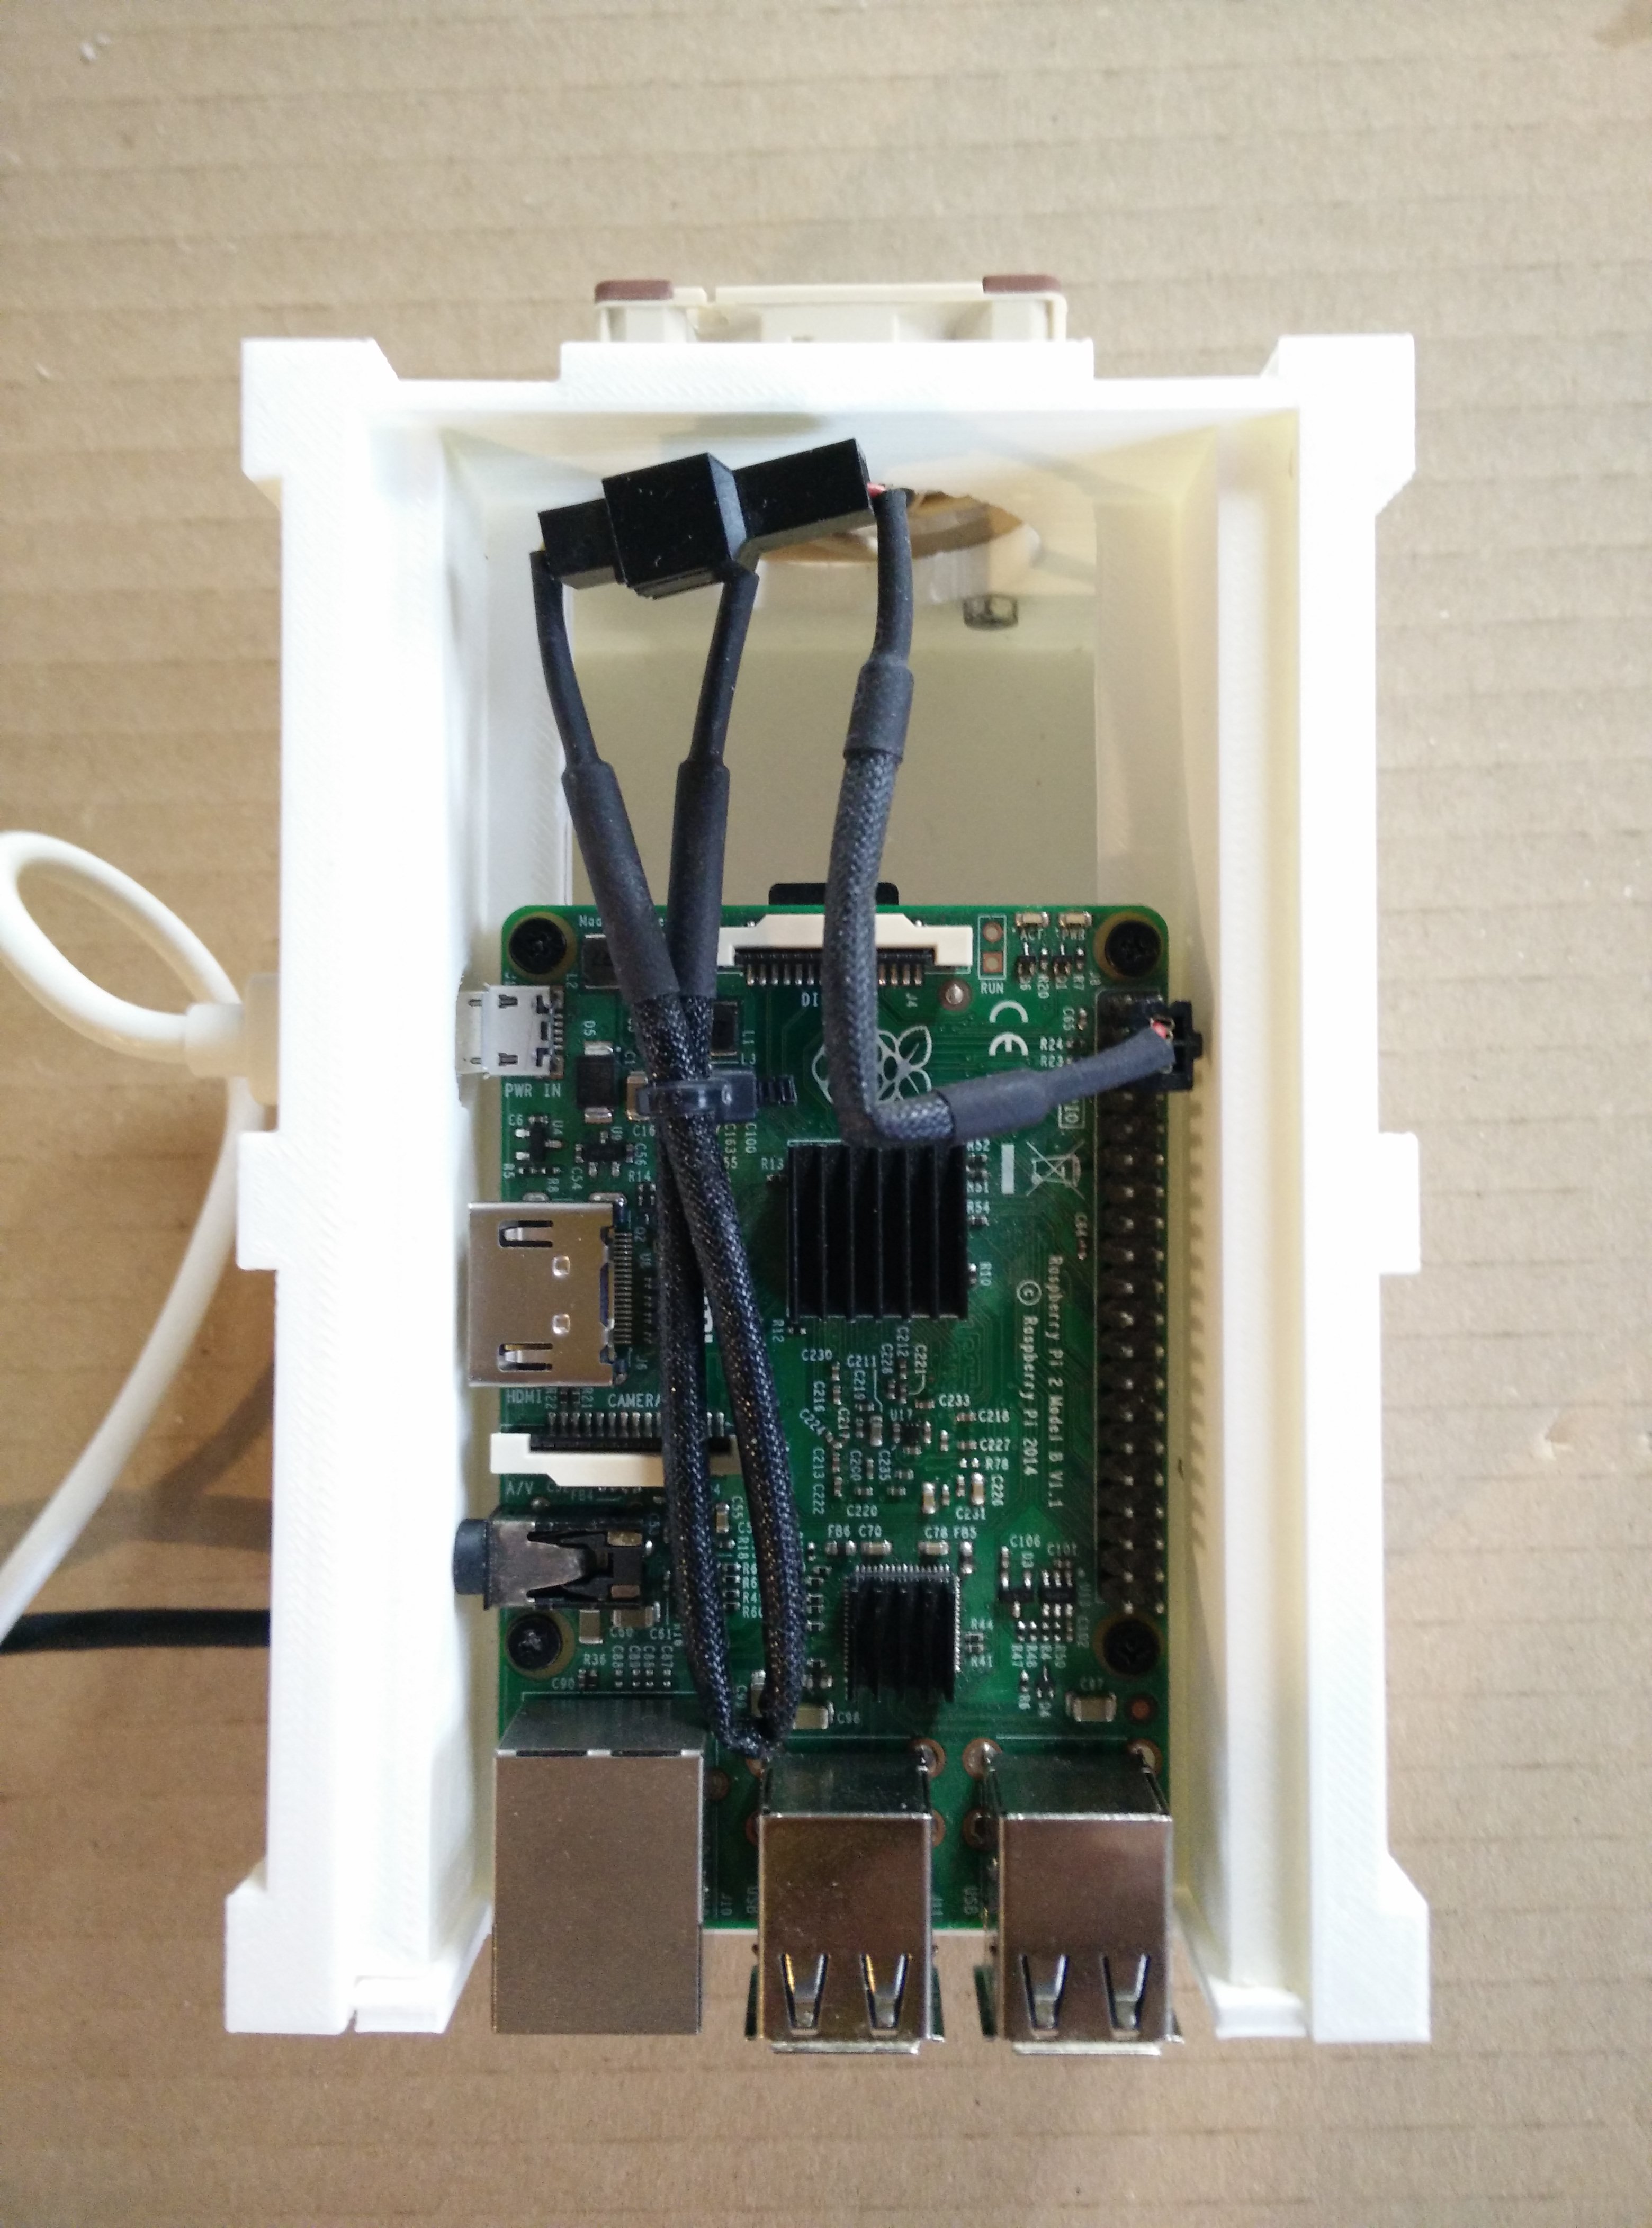
The Raspberry Pi in place on top of the the case

The disks inserted and connected to the USB hub
The last touch consists in gluing the USB hub cover on the side. On this version, the USB hub being wider, it sticks out on the side, therefore I added a cover so the front still looks nicely integrated.
The USB hub cover glued to the side of the case
We can now clip the cover. Of course the cover doesn't feature a fan anymore, it would be redundant. And it's finished!
Top view of the case with the cover clipped on
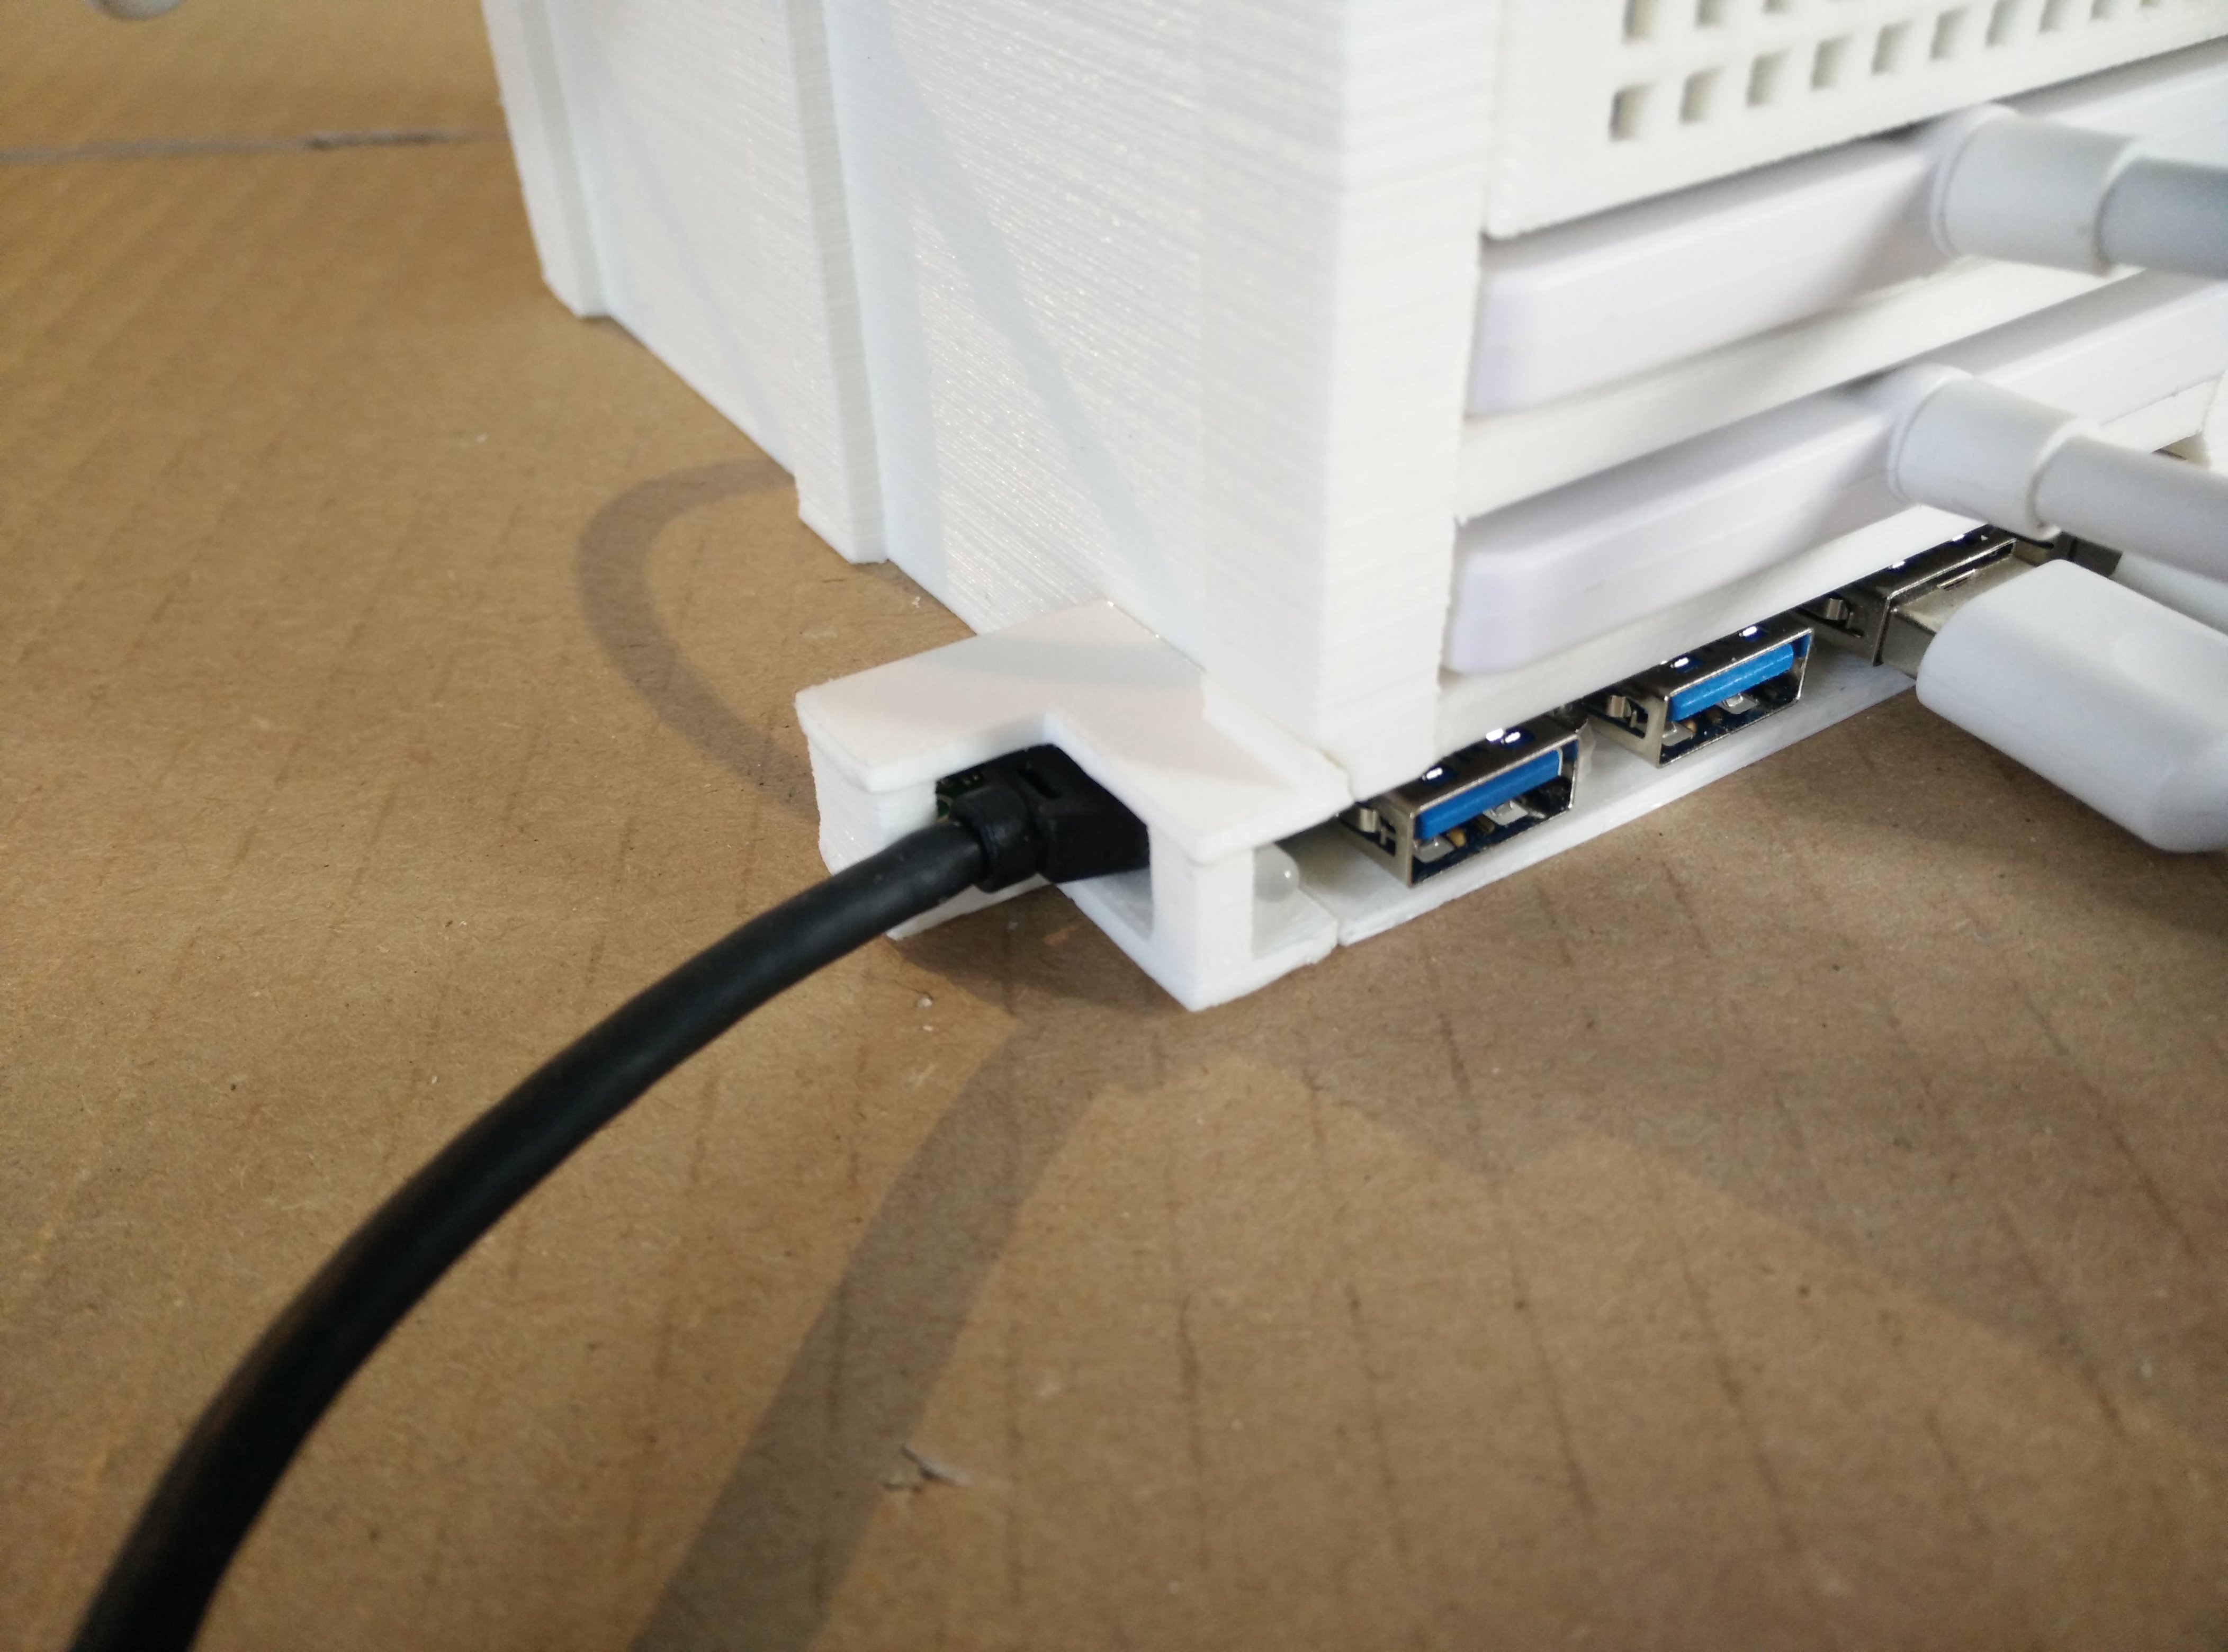
In my case, the power adapter must be connected to the USB hub on the side. With a more recent Raspberry Pi model, powering everything through the Raspberry Pi might work. Pay attention to use a genuine power adapter that will be able to deliver enough power to the Raspberry Pi and the disks for an extended period of time. I chose one rated 3A to have a bit of room in terms of power supply.
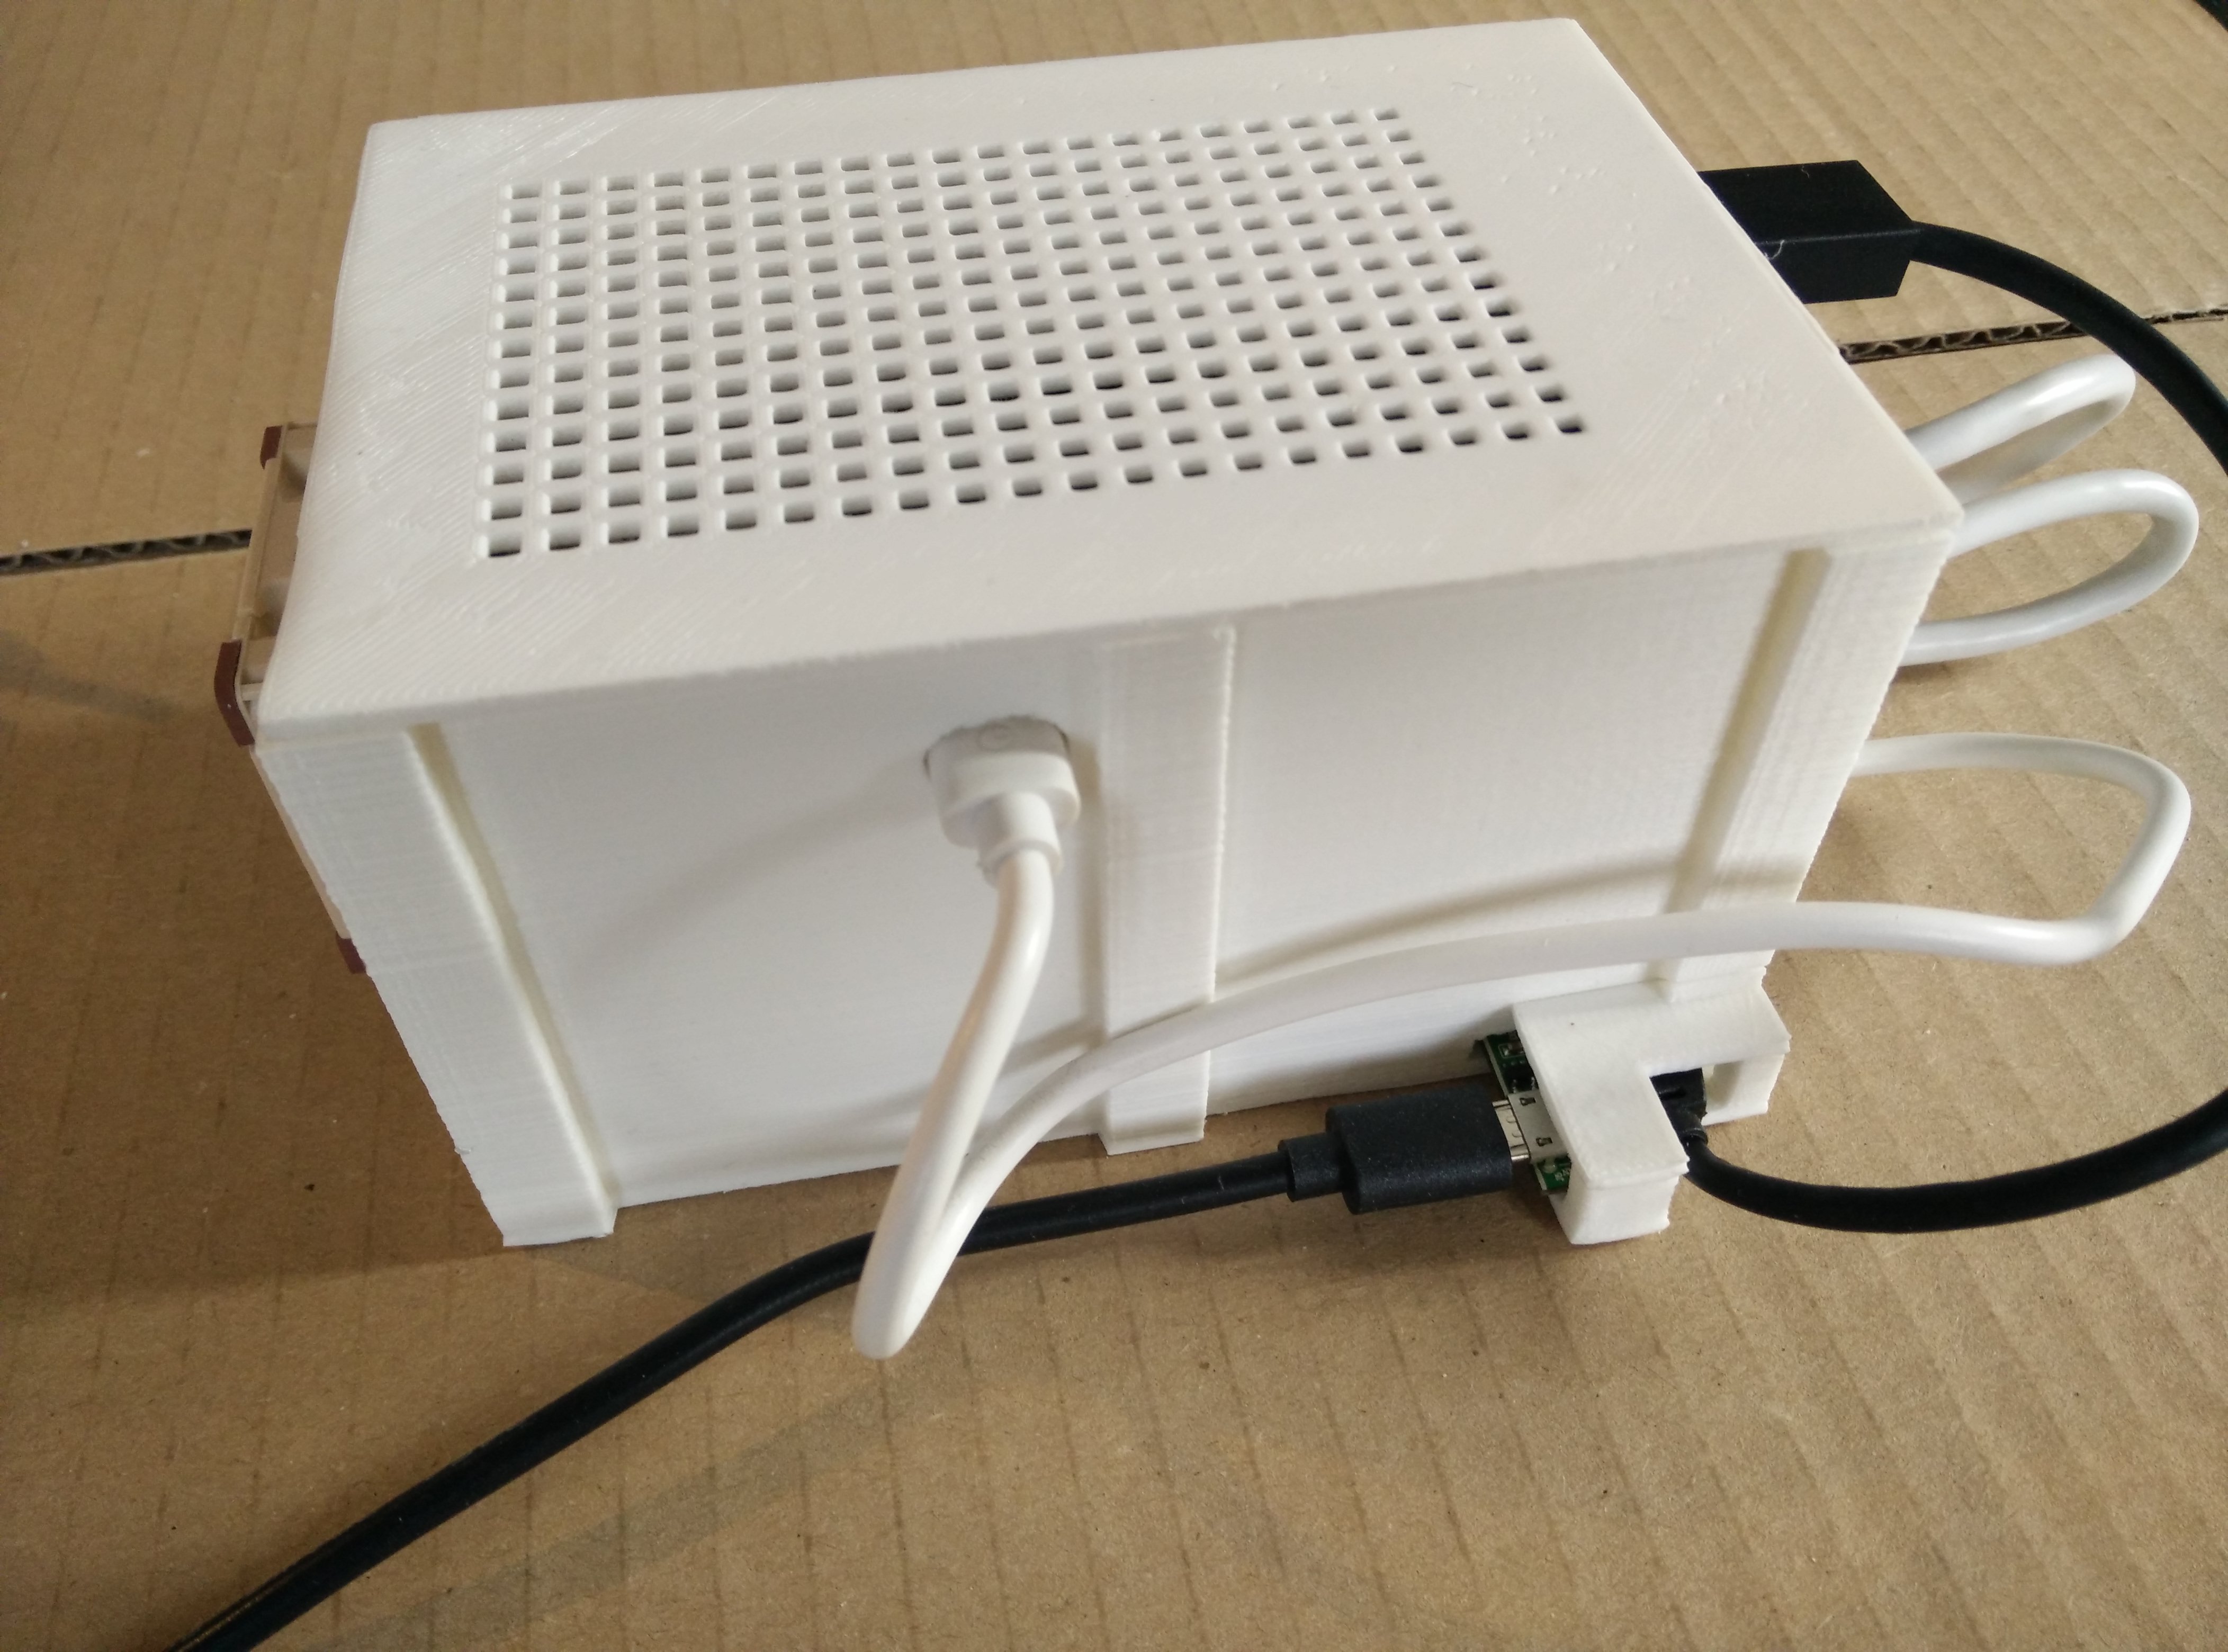
The power adapter connects on the side
The finished NAS
The new NAS is now ready to run!

